
Building your own recumbent bike can change how you ride. You will feel much more comfortable with a well-thought-out recumbent bike frame design. You can also make your bike fit your needs. Whether you want a relaxing ride or a fast one, there are many choices!
You can find many plans online. This makes it easy for beginners to start. For example, Tom Porter’s Recumbent Bike Plans and DIY No-weld Recumbent Trikes give clear steps for home builders. This helps you create a recumbent bike frame design that matches your style and preferences.
Key Takeaways
Making your own recumbent bike is comfy and fun. You can create a bike that matches your riding style and needs.
Collect important materials like steel or aluminum tubes, a comfy seat, and regular bike wheels before you start.
Follow simple steps to put your bike frame together. This means designing, cutting, and securing all parts correctly.
Think about different designs like adjustable, folding, or electric recumbent bikes to make your ride better.
Feel proud of making a special bike. Building your own bike saves money and gives you a great feeling of success.
Basic Recumbent Frame

Building a basic recumbent bike frame is a fantastic way to start your DIY journey. This design offers comfort and stability, making your rides more enjoyable. Plus, you can customize it to fit your style. Let’s dive into what you need and how to create your own recumbent bike frame design.
Materials Needed
To get started, gather the following materials:
Steel or Aluminum Tubing: Choose lightweight materials for better performance.
Welding Equipment: If you’re using metal, you’ll need a welder. If not, consider using bolts and brackets.
Seat: A comfortable seat is crucial for long rides.
Wheels: Standard bike wheels work well.
Handlebars: You can use regular bike handlebars or create your own.
Brakes: Ensure you have a reliable braking system.
Chain and Gears: These are essential for smooth pedaling.
Step-by-Step Instructions
Design Your Frame: Start by sketching your frame design. Consider the length and height that will suit you best. A longer frame can provide more stability.
Cut the Tubing: Measure and cut your tubing according to your design. Make sure to wear safety gear while cutting.
Assemble the Frame: Lay out the pieces on a flat surface. Use clamps to hold them in place. If you’re welding, ensure you have a solid connection at each joint.
Attach the Seat: Position your seat at a comfortable angle. Secure it to the frame using bolts or welds.
Install the Wheels: Attach the wheels to the frame. Make sure they spin freely and are aligned properly.
Add Handlebars: Position the handlebars at a comfortable height. Secure them firmly.
Set Up the Brakes: Install the brakes and ensure they function correctly. Test them before taking your bike out for a ride.
Add the Chain and Gears: Finally, attach the chain and gears. Adjust them for smooth shifting.
Once you complete these steps, you’ll have a basic recumbent bike frame ready for your next adventure! Enjoy the comfort and unique experience that comes with your custom design.
Adjustable Recumbent Bike Design
Making an adjustable recumbent bike frame design helps you fit your ride to your needs. This can really improve your comfort and how well you ride. Let’s look at what materials you need and how to build your adjustable bike.
Materials Needed
Gather these materials to start:
Steel or Aluminum Tubing: Lightweight materials are best for easy handling.
Adjustable Seat Mechanism: Find a mechanism that lets you change the seat position easily.
Comfortable, Supportive Seat: A soft seat makes long rides fun.
Wheels: Standard bike wheels will work great.
Handlebars: Pick adjustable handlebars for better comfort.
Brakes: A good braking system is important for safety.
Chain and Gears: These parts help with smooth pedaling.
Step-by-Step Instructions
Design Your Frame: Draw a design that has adjustable features. Think about how you want to change the seat and handlebars.
Cut the Tubing: Measure and cut your tubing based on your design. Always wear safety gear!
Assemble the Frame: Lay out the pieces on a flat surface. Use clamps to hold them steady. If welding, make sure connections are strong.
Install the Adjustable Seat: Attach the seat mechanism to the frame. Make sure it can slide or tilt easily.
Attach the Wheels: Secure the wheels to the frame. Check that they spin freely.
Add Handlebars: Position the handlebars at a comfortable height. Ensure they can be adjusted as needed.
Set Up the Brakes: Install the brakes and test them to make sure they work.
Add the Chain and Gears: Finally, attach the chain and gears. Adjust them for smooth shifting.
By focusing on customization, you can create a bike that fits you just right. Here are some popular customization options to think about:
Description | |
|---|---|
Comfortable, supportive seat | Gives comfort for long rides without pain. |
Full back support | Helps keep good posture and support for your back. |
Natural wrist position | Lets your wrists stay relaxed while riding. |
Natural neck position | Keeps your neck comfortable while you ride. |
Adaptive modifications | Options like foot and leg support, different steering, and braking systems. |
Electric assist systems | Can be added for extra help on longer rides. |
Suspension systems | Makes rides smoother on bumpy roads, reducing bumps. |
Higher seat position | Good for mobility or rehab, making it easier to get on and off the bike. |
Handholds | Helps you get on and off the bike. |
Linking ability | Some models can connect together for shared rides. |
With these steps and options, you can build an adjustable recumbent bike that meets your unique needs. Enjoy the ride!
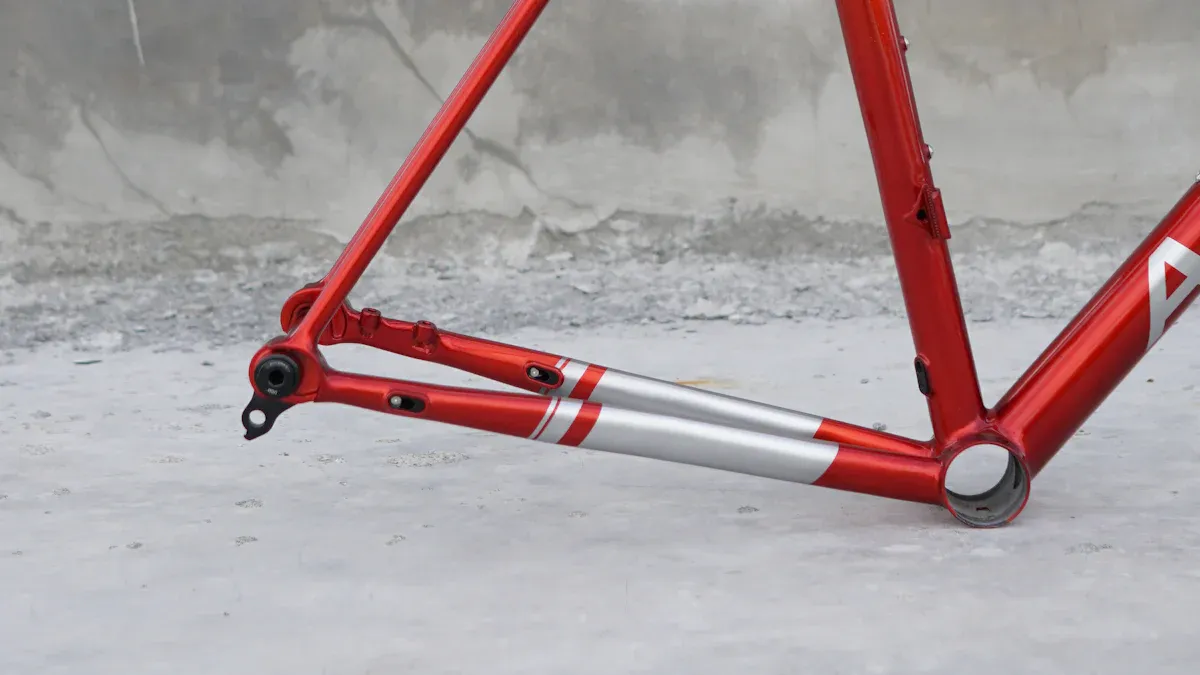
Lightweight Aluminum Frame
Making a lightweight aluminum frame for your recumbent bike can really improve how you ride. Aluminum has many benefits compared to steel or wood. First, aluminum frames are light, so they are easier to lift and ride. You will feel the difference when you carry your bike or go up hills. Second, aluminum does not rust, so your bike will last longer. Lastly, it is easy to take care of; just clean it sometimes and check for scratches.
Materials Needed
To start building your aluminum frame, gather these materials:
Aluminum Tubing: It is light and strong, great for your frame.
Welding Equipment: Make sure you have the right tools if you are welding.
Comfortable Seat: Pick a seat that supports your back on long rides.
Wheels: Standard bike wheels will work well.
Adjustable Handlebars: These help you find a comfy riding position.
Brakes: A good braking system is important for safety.
Chain and Gears: These parts help with smooth pedaling.
Step-by-Step Instructions
Design Your Frame: Start by drawing your frame design. Think about how long and wide it should be for comfort.
Cut the Tubing: Measure and cut your aluminum tubing based on your design. Always wear safety gear when cutting.
Assemble the Frame: Lay out the pieces on a flat surface. Use clamps to keep them steady. If welding, make sure each joint is strong.
Attach the Seat: Place your seat at a comfy angle. Secure it to the frame with bolts or welds.
Install the Wheels: Attach the wheels to the frame. Check that they spin freely and are lined up correctly.
Add Handlebars: Set the handlebars at a comfortable height. Make sure they can be adjusted easily.
Set Up the Brakes: Install the brakes and test them to make sure they work well.
Add the Chain and Gears: Finally, attach the chain and gears. Adjust them for smooth shifting.
By following these steps, you will make a lightweight aluminum frame that improves your recumbent bike frame design. Enjoy riding and the perks of your custom creation!
Wooden Recumbent Bike
Building a wooden recumbent bike can be a rewarding project. Not only does wood offer a unique aesthetic, but it also provides a comfortable ride. The natural feel of wood can make your bike stand out. Plus, you can customize it to fit your style and preferences. Let’s explore what you need and how to create your own wooden recumbent bike frame design.
Materials Needed
Gather these materials to get started:
Plywood or Hardwood: Choose a strong wood that can handle weight and stress.
Wood Glue: This will help bond the pieces together securely.
Wood Screws: Use screws for added strength in your joints.
Comfortable Seat: A supportive seat is essential for long rides.
Wheels: Standard bike wheels will work well.
Handlebars: You can use traditional handlebars or create your own from wood.
Brakes: A reliable braking system is crucial for safety.
Chain and Gears: These components ensure smooth pedaling.
Step-by-Step Instructions
Design Your Frame: Start by sketching your frame design. Think about how long and wide you want it to be for comfort.
Cut the Wood: Measure and cut your wood pieces according to your design. Always wear safety gear when cutting.
Assemble the Frame: Lay out the pieces on a flat surface. Use wood glue and screws to secure the joints. Make sure everything is aligned properly.
Attach the Seat: Position your seat at a comfortable angle. Secure it to the frame using screws.
Install the Wheels: Attach the wheels to the frame. Check that they spin freely and are aligned correctly.
Add Handlebars: Set the handlebars at a comfortable height. Ensure they are securely attached.
Set Up the Brakes: Install the brakes and test them to make sure they work well.
Add the Chain and Gears: Finally, attach the chain and gears. Adjust them for smooth shifting.
By following these steps, you’ll create a beautiful wooden recumbent bike that combines comfort and style. Enjoy the ride and the satisfaction of your custom creation!
Folding Recumbent Bike
Making a folding recumbent bike is a smart idea if you want something easy to carry. This design helps you store and move your bike easily. It’s great for people who like to ride in different places. Whether you go to a park or travel, a folding bike fits in small spaces and makes life simpler. Let’s see what you need and how to build your own folding recumbent bike frame.
Materials Needed
To start, gather these materials:
Aluminum or Steel Tubing: Light materials make the bike easy to carry.
Folding Mechanism: Find a strong folding system that locks well.
Comfortable Seat: A good seat is important for long rides.
Wheels: Standard bike wheels will work fine.
Adjustable Handlebars: These help you find a comfy riding position.
Brakes: A good braking system is very important for safety.
Chain and Gears: These parts help with smooth pedaling.
Step-by-Step Instructions
Design Your Frame: Start by drawing your frame design. Be sure to add the folding mechanism in your plan.
Cut the Tubing: Measure and cut your tubing based on your design. Always wear safety gear when cutting.
Assemble the Frame: Lay out the pieces on a flat surface. Use clamps to keep them steady. If welding, make sure each joint is strong.
Install the Folding Mechanism: Attach the folding mechanism to the frame. Test it to make sure it locks well when in use.
Attach the Seat: Place your seat at a comfy angle. Secure it to the frame with bolts or welds.
Install the Wheels: Attach the wheels to the frame. Check that they spin freely and are lined up correctly.
Add Handlebars: Set the handlebars at a comfortable height. Make sure they can be adjusted easily.
Set Up the Brakes: Install the brakes and test them to ensure they work well.
Add the Chain and Gears: Finally, attach the chain and gears. Adjust them for smooth shifting.
When you compare folding bikes to regular bikes, you’ll see some big differences:
Feature | Folding Bikes | Non-Folding Bikes |
|---|---|---|
Frame Design | Folds for easier storage/transport | Standard rigid frame |
Weight | Usually lighter because of design | Typically heavier due to rigidity |
Folded Size | More compact when folded | Fixed size, needs more space |
With these steps, you can build a folding recumbent bike that fits your needs for easy carrying. Enjoy the freedom of taking your bike anywhere!
Recumbent Trike Conversion
Converting a standard bike into a recumbent trike can be an exciting project. This conversion allows you to enjoy the comfort of a recumbent position while riding. Plus, it can be a fun way to repurpose old bikes. Let’s go through the materials you’ll need and the steps to make this conversion happen.
Materials Needed
To get started, gather these materials:
Two Old Bicycles: You’ll use parts from these bikes.
Steel Sticks: These will help create the frame.
Wood or Fabric for the Seat: Choose something comfortable for long rides.
Various Bolts and Tools: You’ll need these for assembly.
Welding Equipment: If you plan to weld parts together.
Step-by-Step Instructions
Gather Tools and Parts: Start by collecting your two old bicycles, steel sticks, and other materials. Make sure you have everything ready before you begin.
Assemble the Front Steering Rack: Use the steel lengths and spindles to create the front steering rack. This part is crucial for steering your trike.
Attach the Frame: Take the rear section of a mountain bike and attach it to the frame. Ensure that the pedals and sprockets align properly. This step is vital for smooth pedaling.
Welding Finished! Tie Rods Constructed: Secure all parts in position and prepare for welding. Make sure everything is tight and stable.
Finish the Steering: Complete the steering mechanism. If you plan to add an electric motor later, consider how it will fit into your design.
Tip: Many beginners face challenges during this conversion. Common issues include a lack of experience with building and modifying trikes, concerns about the reliability of components, and the complexity of cutting and welding. Don’t let these worries stop you! Take your time and ask for help if needed.
By following these steps, you can successfully convert a standard bike into a recumbent trike. Enjoy the ride and the satisfaction of creating your own unique bike!
Budget-Friendly Recumbent Bike
Building a budget-friendly recumbent bike is a great way to enjoy cycling without breaking the bank. You can create a comfortable ride while saving money. Here’s how to do it!
Materials Needed
To keep costs low, gather these materials:
Recycled Materials: Look for old bike parts or scrap metal.
Standard Bicycle Parts: Use components from regular bikes to save money.
Electrical Metallic Tubing (E.M.T.): This is a cost-effective option for your frame.
Comfortable Seat: Find a used or discounted seat that fits well.
Wheels: Standard bike wheels are usually affordable.
Brakes: Ensure you have a reliable braking system.
Chain and Gears: These are essential for smooth pedaling.
Step-by-Step Instructions
Design Your Frame: Sketch a simple design for your recumbent bike frame. Keep it straightforward to save time and materials.
Gather Parts: Collect all the materials listed above. Check local bike shops or online marketplaces for used parts.
Cut the E.M.T.: Measure and cut the tubing according to your design. Always wear safety gear while cutting.
Assemble the Frame: Lay out the pieces on a flat surface. Use clamps to hold them in place. If welding, ensure strong connections.
Attach the Seat: Position your seat at a comfortable angle. Secure it to the frame using bolts.
Install the Wheels: Attach the wheels to the frame. Make sure they spin freely.
Add Handlebars: Set the handlebars at a comfortable height. Secure them firmly.
Set Up the Brakes: Install the brakes and test them to ensure they work properly.
Add the Chain and Gears: Finally, attach the chain and gears. Adjust them for smooth shifting.
By following these steps, you can build a recumbent bike frame design that fits your budget.
Here’s a quick look at the average costs for building a budget-friendly recumbent bike:
Category | Price Range |
|---|---|
Entry-level trikes | $2,000–$3,000 |
Basic upgrades | $500–$1,000 |
Total accessory allowance | $250–$500 |
You can see that entry-level basic recumbent trikes cost between $1,500 and $3,200. These bikes usually feature durable frames and essential components.
With some creativity and resourcefulness, you can enjoy cycling without spending a fortune. Happy building!
High-Performance Recumbent Bike
Making a high-performance recumbent bike can improve your cycling fun. These bikes are built for speed and efficiency. They are great for serious cyclists. You will enjoy features that make your ride better, like better aerodynamics and easier handling. Let’s look at what you need and how to build your own high-performance recumbent bike frame.
Materials Needed
To build your high-performance bike, gather these materials:
Lightweight Aluminum or Carbon Fiber Tubing: These materials help make the bike lighter and faster.
Aerodynamic Seat: A slim seat helps you stay low while riding.
High-Quality Wheels: Choose light wheels made for speed.
Adjustable Handlebars: These let you find the best riding position.
Advanced Braking System: Make sure you have good brakes for safety.
Chain and Gears: Pick high-quality parts for smooth shifting.
Step-by-Step Instructions
Design Your Frame: Start by drawing a design that focuses on aerodynamics. Think about how the frame will affect your speed and comfort.
Cut the Tubing: Measure and cut your aluminum or carbon fiber tubing based on your design. Always wear safety gear when cutting.
Assemble the Frame: Lay out the pieces on a flat surface. Use clamps to hold them steady. If welding, make sure each joint is strong.
Attach the Aerodynamic Seat: Place your seat to reduce wind resistance. Secure it to the frame with bolts or welds.
Install the Wheels: Attach the lightweight wheels to the frame. Check that they spin freely and are lined up correctly.
Add Adjustable Handlebars: Set the handlebars at a comfortable height. Ensure they can be adjusted easily for the best performance.
Set Up the Braking System: Install the advanced brakes and test them to make sure they work well.
Add the Chain and Gears: Finally, attach the chain and gears. Adjust them for smooth shifting.
High-performance recumbent bikes have many benefits compared to regular models. Here’s a quick comparison:
Feature | High-Performance Recumbent Bikes | Standard Models |
|---|---|---|
Speed Capabilities | Much higher speeds | Similar to riding an upright on the drops |
Maneuverability | Better in pacelines and downhill | Less focused on speed in groups |
Safety Aspects | Focus on safety for falls and crashes | Varies, usually less focused on speed safety |
You will see that high-performance recumbent bikes can go faster on flat ground because of their design. They may be quicker on flat surfaces than regular recumbent bikes. But remember, they usually do not climb as well as traditional road bikes.
By following these steps, you can build a high-performance recumbent bike that fits your cycling needs. Enjoy the excitement of speed and the comfort of your custom design!
Recumbent Bike with Storage
Adding storage to your recumbent bike can make your rides more enjoyable. You can carry essentials like water bottles, snacks, or even a small bag for tools. Let’s explore how to create a recumbent bike frame design that includes practical storage solutions.
Materials Needed
To build your bike with storage, gather these materials:
Storage Bags or Panniers: These attach to the sides or back of your bike.
Aluminum or Steel Tubing: Use this for the frame if you want to create a custom storage rack.
Wood or Plastic Board: This can serve as a base for your storage area.
Straps or Velcro: These help secure your bags or items in place.
Comfortable Seat: A good seat is still essential for long rides.
Wheels: Standard bike wheels will work well.
Brakes: Ensure you have a reliable braking system.
Chain and Gears: These parts help with smooth pedaling.
Step-by-Step Instructions
Design Your Storage Area: Start by sketching where you want to place your storage. Think about how much space you need and how it will affect your ride.
Cut the Tubing: Measure and cut your aluminum or steel tubing to create a frame for your storage. Always wear safety gear when cutting.
Assemble the Frame: Lay out the pieces on a flat surface. Use clamps to hold them steady. If welding, ensure each joint is strong.
Attach the Storage Base: Secure the wood or plastic board to the frame. This will be the base for your storage bags.
Install Storage Bags or Panniers: Attach your storage bags to the frame. Use straps or Velcro to keep everything secure.
Attach the Seat: Position your seat at a comfortable angle. Secure it to the frame with bolts.
Install the Wheels: Attach the wheels to the frame. Check that they spin freely.
Set Up the Brakes: Install the brakes and test them to ensure they work well.
Add the Chain and Gears: Finally, attach the chain and gears. Adjust them for smooth shifting.
By following these steps, you can create a recumbent bike with storage that meets your needs. Enjoy the convenience of having everything you need right at your fingertips!
Customizable Recumbent Bike
Making a customizable recumbent bike lets you change your ride to fit your needs. You can adjust the frame design and the seating position. This flexibility helps you feel more comfortable and perform better. Let’s look at what materials you need and how to build your own customizable recumbent bike frame.
Materials Needed
Gather these materials to start:
Steel or Aluminum Tubing: Pick lightweight materials for easy handling.
Adjustable Seat Mechanism: This lets you change the seat position easily.
Comfortable, Padded Seat: A good seat makes long rides fun.
Wheels: Standard bike wheels will work well.
Adjustable Handlebars: These help you find the best riding position.
Brakes: A good braking system is important for safety.
Chain and Gears: These parts ensure smooth pedaling.
Step-by-Step Instructions
Design Your Frame: Start by drawing a design that has adjustable features. Think about how you want to change the seat and handlebars.
Cut the Tubing: Measure and cut your tubing based on your design. Always wear safety gear when cutting.
Assemble the Frame: Lay out the pieces on a flat surface. Use clamps to hold them steady. If welding, make sure the connections are strong.
Install the Adjustable Seat: Attach the seat mechanism to the frame. Make sure it can slide or tilt easily.
Attach the Wheels: Secure the wheels to the frame. Check that they spin freely.
Add Handlebars: Set the handlebars at a comfortable height. Ensure they can be adjusted as needed.
Set Up the Brakes: Install the brakes and test them to make sure they work well.
Add the Chain and Gears: Finally, attach the chain and gears. Adjust them for smooth shifting.
You can customize your recumbent bike frame design with different features. You can choose frame designs, wheelbase styles, and steering options. Here’s a quick look at some popular customization features:
Customization Feature | Description |
|---|---|
Frame Design | Main frame parts welded from straight tubes, with specific sizes and thickness. |
Lets riders find their best position for comfort and support. | |
Comfortable and Padded Seat | Makes long rides more comfortable, reducing strain on the back. |
Adjustable Reclining Position | Reduces pressure on the back, allowing for longer rides without discomfort. |
With these steps and options, you can create a recumbent bike that fits your style and needs perfectly. Enjoy the ride!
Recumbent Bike for Tall Riders
Building a recumbent bike for tall riders needs careful design. You want to make sure it is comfortable and works well while riding. Here are some important design points to think about:
Head Angle: Use shallow head angles. This keeps taller riders comfortable.
Fork Offset (Rake): Increase the fork offset for better steering. This change makes handling easier and more responsive.
Seat Height: Adjust the seat height for a comfy recline. A higher seat helps with leg extension and reduces knee strain.
Materials Needed
To start, gather these materials:
Steel or Aluminum Tubing: Pick lightweight materials for the frame.
Comfortable Seat: Find a seat that gives good back support.
Wheels: Standard bike wheels will work well.
Adjustable Handlebars: These help you find the best riding position.
Brakes: A good braking system is very important for safety.
Chain and Gears: These parts help with smooth pedaling.
Step-by-Step Instructions
Design Your Frame: Start by drawing a frame that fits your height. Make sure to include the design changes mentioned above.
Cut the Tubing: Measure and cut your tubing based on your design. Always wear safety gear when cutting.
Assemble the Frame: Lay out the pieces on a flat surface. Use clamps to hold them steady. If welding, make sure each joint is strong.
Attach the Seat: Place your seat at a comfortable height. Secure it to the frame with bolts or welds.
Install the Wheels: Attach the wheels to the frame. Check that they spin freely and are lined up correctly.
Add Handlebars: Set the handlebars at a comfortable height. Make sure they can be adjusted easily.
Set Up the Brakes: Install the brakes and test them to make sure they work well.
Add the Chain and Gears: Finally, attach the chain and gears. Adjust them for smooth shifting.
By following these steps, you can build a recumbent bike frame design that fits tall riders perfectly. Enjoy the ride and the comfort of your custom creation!
Recumbent Bike for Short Riders
Building a recumbent bike for short riders means focusing on comfort and fit. You want to ensure that your bike frame design accommodates your height. This way, you can enjoy a smooth and enjoyable ride. Here’s what you need to get started.
Materials Needed
Gather these materials to create your bike:
Steel or Aluminum Tubing: Choose lightweight materials for easy handling.
Comfortable Seat: Look for a seat that provides good back support.
Wheels: Standard bike wheels will work well.
Adjustable Handlebars: These help you find the best riding position.
Brakes: A reliable braking system is crucial for safety.
Chain and Gears: These parts ensure smooth pedaling.
Step-by-Step Instructions
Design Your Frame: Start by sketching a frame that fits your height. Make sure to include adjustments for comfort.
Cut the Tubing: Measure and cut your tubing based on your design. Always wear safety gear when cutting.
Assemble the Frame: Lay out the pieces on a flat surface. Use clamps to hold them steady. If welding, ensure each joint is strong.
Attach the Seat: Position your seat so that when the pedal is at its furthest point from your body, your knee remains slightly bent (about 10–15°). This adjustment is essential for comfort and optimal leg extension.
Install the Wheels: Attach the wheels to the frame. Check that they spin freely and are aligned correctly.
Add Handlebars: Set the handlebars at a comfortable height. Ensure they can be adjusted easily.
Set Up the Brakes: Install the brakes and test them to make sure they work well.
Add the Chain and Gears: Finally, attach the chain and gears. Adjust them for smooth shifting.
By following these steps, you can create a recumbent bike that fits shorter riders perfectly. Remember to ensure your back fully contacts the backrest for proper support. Keeping your hips level while pedaling is also important; if they rock side to side, the seat may be too far back. Enjoy the ride and the comfort of your custom creation!
Electric Recumbent Bike
Building an electric recumbent bike can make your rides much better. With the right electric parts, you can go longer distances without getting tired. Let’s see how to add these parts to your recumbent bike frame design.
Materials Needed
To start, gather these materials:
Electric Motor: Pick a motor that matches your riding style. A mid-drive motor works well on hills, while a hub motor is easier to set up.
Battery Pack: Look for a lithium-ion battery. A 48V 15Ah battery is a good choice, balancing weight and distance.
Controller: This part controls the power from the battery to the motor. Make sure it works with your motor.
Throttle: This lets you easily control how much power the motor uses.
Disc Brakes: These are important for safety, especially with the extra weight from electric parts.
Wiring and Connectors: Use good quality wiring to connect everything safely.
Step-by-Step Instructions
Design Your Frame: Start by drawing your recumbent bike frame design. Make sure to plan where the motor and battery will go.
Install the Motor: If you have a mid-drive motor, attach it to the bottom bracket. For a hub motor, swap out the front or back wheel with the motor wheel.
Attach the Battery: Secure the battery pack to the frame. You can use a rack or a custom mount. Make sure it’s easy to reach for charging.
Connect the Controller: Place the controller in a dry spot on the frame. Connect it to the motor and battery following the instructions from the manufacturer.
Install the Throttle: Put the throttle on the handlebars. Make sure it’s easy to reach for smooth use.
Set Up the Wiring: Carefully connect all the wires and make sure they are secure. Use zip ties to keep everything neat and avoid loose connections.
Test the System: Before riding, check the electric parts. Test the brakes and make sure everything works well.
Adding electric parts to your recumbent bike can improve your riding experience. With the right setup, you’ll enjoy more power and comfort on your rides.
Enhanced Comfort Recumbent Bike
When you build an enhanced comfort recumbent bike, you focus on features that make your ride enjoyable. You want to make sure your bike supports your body well, especially on long rides. Here are some key features that can really improve your comfort:
Ergonomic Design: Recumbent bikes have a special riding position. This design is easier on your wrists and hands. It’s a great choice if you have issues like carpal tunnel syndrome.
Back Support: The ergonomic shape gives great back support. This reduces stress on your neck, back, wrists, and hands. You’ll feel less tired during your rides.
Weight Distribution: With a recumbent bike frame design, weight is spread evenly. This lowers pressure on the seat, making your ride more comfortable.
Reclined Position: The reclined position takes pressure off your back, neck, and shoulders. This is especially helpful for those who feel pain in these areas.
Cushioned Seat: A cushioned seat with good lumbar support is very important. It helps keep your body aligned and reduces strain, especially on longer rides.
Proper Alignment: Focusing on back support and alignment is key. This is especially important for older riders, as it helps reduce strain on the back and joints.
Materials Needed
To create your enhanced comfort recumbent bike, gather these materials:
High-Quality Seat: Look for a seat that has good padding and lumbar support.
Adjustable Backrest: This lets you find the best angle for comfort.
Soft Handlebars: Choose handlebars with padding to lessen pressure on your hands.
Suspension System: Think about adding a suspension system to soak up bumps and improve ride quality.
Step-by-Step Instructions
Design Your Frame: Start by sketching a frame that includes the ergonomic features you want.
Cut the Tubing: Measure and cut your tubing based on your design. Always wear safety gear when cutting.
Assemble the Frame: Lay out the pieces on a flat surface. Use clamps to hold them steady. If welding, make sure each joint is strong.
Attach the Seat: Place your cushioned seat at a comfy height. Secure it to the frame with bolts.
Install the Backrest: Attach the adjustable backrest to the seat. Make sure it can be easily adjusted.
Add Handlebars: Set the padded handlebars at a comfortable height. Ensure they are securely attached.
Install the Suspension: If you’re adding a suspension system, follow the manufacturer’s instructions for installation.
Test the Setup: Before taking your bike out, test all parts to make sure they work well together.
By focusing on these features, you can create a recumbent bike that puts comfort first. Enjoy your rides knowing your bike supports you well!
DIY Recumbent Tandem Bike
Building a DIY recumbent tandem bike is a fantastic way to enjoy cycling with a partner. This design allows two riders to share the experience while enjoying the comfort of a recumbent position. You’ll find that riding together can be a fun way to bond and explore new places. Let’s dive into what you need and how to create your own tandem bike frame.
Materials Needed
Gather these materials to get started:
Steel or Aluminum Tubing: Choose lightweight materials for easy handling.
Two Comfortable Seats: Look for supportive seats that keep both riders comfortable.
Wheels: Use standard bike wheels that can handle the extra weight.
Adjustable Handlebars: These help both riders find their best riding position.
Brakes: A reliable braking system is crucial for safety.
Chain and Gears: These parts ensure smooth pedaling for both riders.
Welding Equipment: If you’re using metal, you’ll need a welder. Alternatively, consider using bolts and brackets.
Step-by-Step Instructions
Design Your Frame: Start by sketching a frame that accommodates two riders. Make sure to consider the length and width for stability. A longer frame will help balance the weight of both riders.
Cut the Tubing: Measure and cut your tubing according to your design. Always wear safety gear while cutting.
Assemble the Frame: Lay out the pieces on a flat surface. Use clamps to hold them in place. If welding, ensure you have strong connections at each joint.
Attach the Seats: Position both seats at comfortable angles. Secure them to the frame using bolts or welds.
Install the Wheels: Attach the wheels to the frame. Check that they spin freely and are aligned properly.
Add Handlebars: Set the handlebars at a comfortable height for both riders. Ensure they can be adjusted as needed.
Set Up the Brakes: Install the brakes and test them to make sure they work well for both riders.
Add the Chain and Gears: Finally, attach the chain and gears. Adjust them for smooth shifting.
By following these steps, you’ll create a recumbent bike frame design that allows you and your partner to enjoy cycling together. Happy riding!
Now that you’ve explored these 15 easy DIY plans, it’s time to pick one that fits your needs. Whether you want comfort, speed, or storage, you can create a recumbent bike that’s just right for you.
Remember: Building your own bike isn’t just about saving money. It’s about the joy of creating something unique. You’ll feel proud every time you ride it! So grab your tools and start your project today. Happy building! 🚴♂️
FAQ
What tools do I need to build a recumbent bike frame?
You’ll need basic tools like a welder, saw, measuring tape, and wrenches. A drill and clamps are also helpful for assembly.
How long does it take to build a recumbent bike?
Building a recumbent bike can take anywhere from a few days to a couple of weeks. It depends on your experience and the complexity of your design.
Can I customize my recumbent bike?
Absolutely! You can customize your bike’s frame, seat, handlebars, and even add storage options. Make it fit your style and comfort needs.
Is it difficult to ride a recumbent bike?
Not at all! Many find recumbent bikes easier to ride due to their comfortable seating position. You may need a little practice to get used to steering.
Where can I find parts for my DIY bike?
You can find bike parts at local bike shops, online retailers, or even second-hand stores. Check out forums and DIY communities for recommendations too!
See Also
Key Supplies Needed To Create Your Custom Bike Frame
10 Unique Custom Bike Frame Ideas To Inspire You
Simple Methods For Building A Bamboo Bicycle Frame