
Fillet brazing your first fillet brazed bike frame is an exciting adventure. You will feel a thrill as your custom fillet brazed bike frame starts to form. But, don’t forget about the learning curve! Each step gives you important lessons. You will learn the right techniques and the value of patience. Your experience with fillet brazed bike frame brazing will help you in future projects. If you think about taking a framebuilding course or a brazing class, you will see that the journey is just as rewarding as reaching your goal.
Key Takeaways
Get ready by collecting the right tools. Make a safe and clean workspace before you start fillet brazing.
Follow a clear brazing process: clean the joints, heat them evenly, add filler metal carefully, let it cool naturally, and finish it smoothly.
Use strong joint designs and good techniques to make bike frames that last and resist stress.
Look out for common issues like incomplete penetration, porosity, and cracking. Use simple fixes like even heating and good cleaning.
Practice patiently and learn from your mistakes. Good advice and careful attention will help you improve your brazing skills and results.
Getting Ready for Fillet Brazing
Tools and Materials
Before you start fillet brazing, get the right tools and materials. Having everything ready makes it easier and more fun. Here’s a list of important tools you will need:
Different types of files, including ones with smooth sides for tight spots.
Emery cloth, especially 3M 80 grit, and sandpaper to smooth fillets.
Belt sanders, including handheld ones like the Milwaukee M12, to finish faster.
Die grinders with sanding or grinding bits, like sandpaper cones.
Dremel tools with spiral sanding rolls for shaping and smoothing fillets.
Dynafiles for specific parts of the fillet, but they are limited in size.
Good work holding setups, like stands bolted to the floor, help you apply pressure comfortably while finishing. Remember, practicing your brazing technique is very important. It helps you make smoother fillets that need less finishing.
Setting Up Your Workspace
Setting up your workspace is just as important as having the right tools. A neat area can stop accidents and help you work better. Here are some safety tips to think about:
Do brazing in a safe spot, keeping flammable things at least 10 meters away.
Protect your area from fire risks by using tools to control heat, sparks, and hot slag.
Check for risks to find and manage health and safety problems.
Take care of your equipment and keep cables and tools out of walkways.
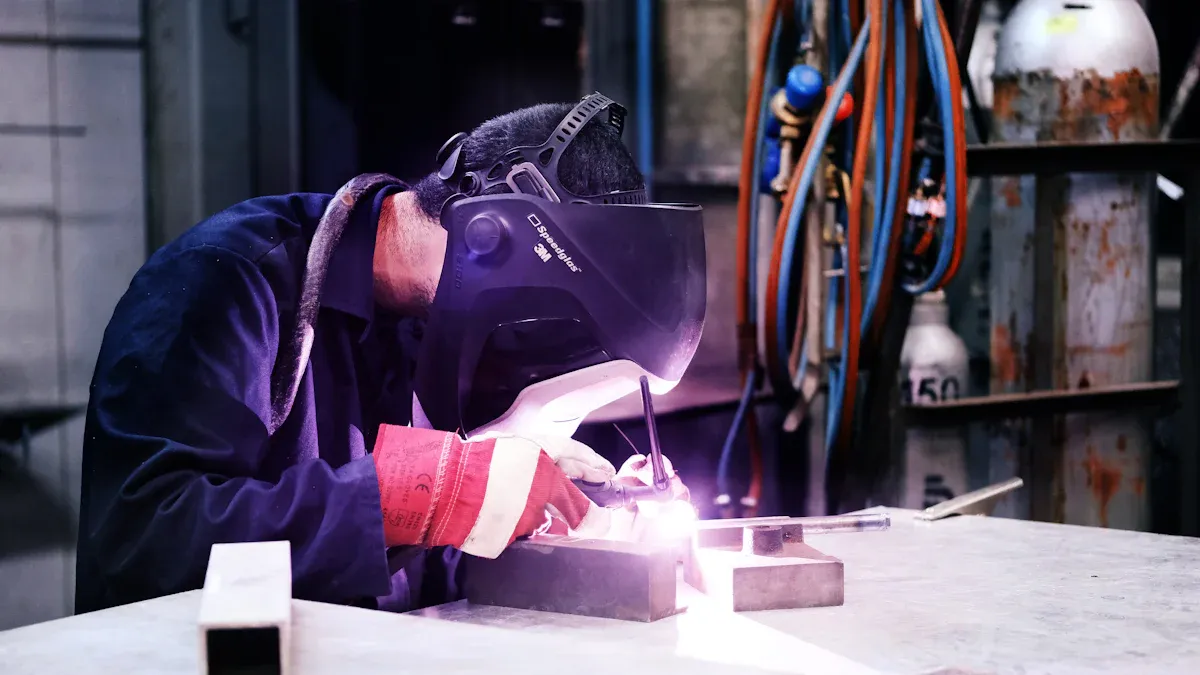
Wear the right personal protective equipment (PPE) like long-sleeved shirts, gloves, and welding helmets.
Make sure there is enough ventilation to remove bad air and stop flammable gases from building up.
By following these tips, you will create a safe and efficient space for your fillet brazing project. With the right tools and a good workspace, you are ready to start your first bike frame with confidence!
Fillet Brazing Technique
Step-by-Step Process
Fillet brazing might seem daunting at first, but breaking it down into steps makes it manageable. Here’s a simple guide to help you through the process:
Prepare Your Frame: Start by cleaning the surfaces of the tubes where you’ll apply the filler metal. Use emery cloth or sandpaper to remove any oxidation or dirt. This ensures a good bond.
Set Up Your Torch: Choose the right torch for your project. A propane torch works well for most bike frames. Adjust the flame to a neutral setting, which means you want a balanced mix of oxygen and fuel.
Heat the Joint: Focus on the joint area. Move the flame in a circular motion to evenly heat the metal. You want to reach the recommended temperature for your chosen filler alloy. For example, if you’re using a silver brazing alloy, aim for around 1145°F.
Apply Filler Metal: Once the joint reaches the right temperature, introduce the filler metal. It should flow into the joint by capillary action. Make sure to apply enough to create a solid fillet, but avoid overfilling.
Cool Down: After you’ve applied the filler, remove the heat and let the joint cool naturally. Rapid cooling can lead to cracks, so be patient.
Finish the Joint: Once cooled, use files and sanders to smooth out the fillet. This not only improves aesthetics but also helps with frame strength.
Tips for Strong Joints
Achieving strong joints in fillet brazing is crucial for the durability of your bike frame. Here are some effective techniques to consider:
Use lap or scarf joint designs instead of butt joints. This maximizes the bonding area and enhances joint strength.
Design joints to spread stress. Modify joint geometry or add fillets to avoid stress concentration.
Create a stress-distribution fillet by applying slightly more filler metal. Using a more sluggish alloy can help distribute stress, especially in small-part assemblies.
Follow the rule of thumb for lap length. Aim for about three times the thickness of the thinner member to optimize joint strength without wasting filler metal.
Ensure proper joint clearance and venting. This prevents flux or gas entrapment, which can weaken the joint or cause leaks.
Consider joint self-support during brazing. Rest one member on another or nest tubular parts to maintain uniform clearance and alignment.
By following these steps and tips, you’ll be well on your way to creating strong, reliable fillet brazed joints in your bike frame. Remember, practice makes perfect, so don’t hesitate to experiment and refine your technique!
Troubleshooting Fillet Brazing Issues
Common Problems
When you start fillet brazing, you may face some common problems. Spotting these issues early can save you time and stress. Here are some frequent challenges you might encounter:
Incomplete Penetration: This happens when the filler metal does not flow into the joint completely. You might see this if the joint looks uneven or weak.
Porosity: Small holes or gaps can form in the fillet, making the joint weaker. This often happens because of bad heating or dirt.
Oxidation: If the metal gets too hot, it can oxidize. This stops the filler from sticking well.
Cracking: Quick cooling or too much heat can cause cracks in the fillet. This can hurt the frame’s strength.
Poor Fillet Appearance: Sometimes, the fillets may not look smooth or even. This can affect how strong and nice they look.
To help you fix these problems, here are some reasons for incomplete penetration in fillet brazed joints:
Uneven heating of the joint, where the outside gets hot but the inside does not reach brazing temperature.
Flux breaking down from too much heat, causing it to fill with oxides and blocking alloy flow.
Bad heating technique, like melting the alloy with the torch flame before the base metals get hot enough.
Base metals not cleaned well, leading to poor wetting and alloy flow.
Wrong torch flame setting or overheating, which can cause oxidation or loss of elements, making penetration worse.
Solutions and Best Practices
Now that you know some common problems, let’s see how to fix them. Here are some solutions and best practices to improve your fillet brazing results:
For Incomplete Penetration: Make sure to heat the joint evenly. Use a circular motion with your torch to spread heat. Also, clean the fillets well before brazing to help the alloy flow better.
To Reduce Porosity: Think about using nickel bronze filler materials. They do not create porosity and work well at different angles. If you want to use silver fillers, pick those with less zinc and a flux coating. Change your welding technique by welding slightly uphill and controlling the fillet size.
Prevent Oxidation: Watch your torch flame closely. A neutral flame works best. If you see oxidation, lower the heat and make sure there is good airflow in your workspace.
Avoid Cracking: Let the joint cool down naturally after brazing. Quick cooling can cause cracks, so be patient. If you use nickel bronze, remember it needs higher welding temperatures, which can cause distortion. You may need to machine it after welding to fix this.
Improve Fillet Appearance: Take your time when adding the filler. A well-made fillet not only looks nicer but also adds strength. Use files and sanders to smooth out rough spots after the joint has cooled.
By following these tips and being aware of common issues, you can get better at fillet brazing. Remember, practice makes perfect, so don’t be afraid to try new things and improve your technique!
Reflections on My Experience Fillet Brazing
Successes
Looking back on my fillet brazing journey, I can say some things went well. First, I made a strong fillet on my custom frame. The joints felt secure, which made me proud. I also learned to control the heat better than I thought. By focusing on the joint and changing my technique, I avoided overheating the metal. This was a big win for me!
Another success was noticing when things were not going right. Early on, I saw signs of incomplete penetration. Instead of pushing through, I stopped to rethink my approach. This helped me make changes in time, which improved my work quality.
Lessons Learned
Of course, every fillet brazing experience has lessons. One important lesson was cleanliness. I learned that even a little oil or dirt could cause bad joint quality. Now, I always clean all surfaces well before starting.
I also found out that practice is very important. Beginners often make mistakes, like using a flame that is too big or missing heat signs. I discovered that practicing on thicker materials first helped me find my rhythm and technique. This way, I built confidence before working on my fillet brazed bike frame.
Lastly, I learned that good teaching is key to mastering fillet brazing. Having someone guide you can help you understand important signals. This guidance can improve your intuition and judgment, making learning easier.
Fillet brazing your bike frame can be a fun experience. You learn important skills and feel more confident in your work. Here are some main points to remember:
Patience is key: Finishing fillet brazed frames takes time. It needs skill and careful attention.
Cost considerations: Fillet brazed frames usually cost more than TIG welded ones. This is because they need more work to smooth the fillets.
Artisan touch: Many builders ask for more money for fillet brazing. This is due to the detailed finishing work needed.
So, why not try it? You might find a new love for building frames. Share your stories with others; you never know who you might inspire! 🚴♂️✨
FAQ
What is fillet brazing?
Fillet brazing is a way to join metal parts. It melts a filler metal into the joint. This makes a smooth, rounded joint. It adds strength and looks nice on bike frames.
Do I need a special course to learn fillet brazing?
You can learn by yourself, but a framebuilding course helps a lot. A course teaches you techniques and helps you avoid mistakes. This makes learning easier.
How long does it take to fillet braze a bike frame?
The time it takes depends on your skill and the frame’s complexity. Beginners may need several hours. Experienced builders can finish in just a few hours.
Can I use any filler metal for brazing?
Not every filler metal works for all projects. You should pick a filler metal that matches your frame material. Silver and bronze alloys are good choices for bike frames because they are strong and flow well.
What safety gear should I wear while brazing?
Always wear protective gear like gloves, a welding helmet, and long-sleeved clothes. This gear keeps you safe from heat, sparks, and harmful fumes during brazing.