
You can put a gas frame bike engine on your bike easily if you follow the right steps. A strong frame makes your bike safer and holds everything tight. Many people pick a gas frame bike because it can handle the engine’s power better than a normal frame. The engine fits well and works smoothly if you use the right frame. Go slow, check your work twice, and you will have a bike you can trust.
Tip: Always make sure your engine kit fits your bike frame before you begin.
Key Takeaways
Pick a sturdy gas frame bike made for engines. This helps hold your engine safely and cuts down shaking. – Get all the tools and parts you need before you start. This makes the job easier and faster. – Put the engine inside the frame’s triangle and make sure it is tight. This keeps the bike balanced and lined up right. – Look at the chain, clutch, throttle, and wiring. Adjust them so everything works well and is safe. – Check everything before you ride. Look at bolts, brakes, fuel lines, and controls to make sure they are safe.
Prep for Gas Frame Bike
Tools & Parts
Before you start, gather all the tools and parts you need. This step saves you time and keeps the process smooth. Most gasoline engine kits come with many parts, but you may need extra items for your specific gas frame bike. Here’s a handy checklist:
Screwdrivers and Allen keys
Pliers and wire cutters
Utility knife
Drill with cobalt bits
Clamps (C-clamp or quick release)
Grinder or band saw (for custom mounts)
Threaded rods, nuts, bolts, and lock washers
Sheet metal and steel plates
Brass pipe fittings and Teflon tape
1/4″ ID fuel line and in-line fuel filter
Old bike inner tube (for vibration dampening)
Tool kit (often included in the engine kit)
Universal motor mount and mounting brackets
Tip: Always test fit the motor before final assembly. This helps you spot any issues early.
Frame Check
A strong frame is the heart of a safe motorized bicycle. You want a gas frame bike built for engine power and vibration. Look for features like heavy-duty alloy construction, reinforced joints, and smooth welds. Many purpose-built frames have a built-in gas tank and a midframe kickstand for better balance. These frames handle the extra weight and stress from the engine much better than regular bicycle frames.
Check the frame for cracks, rust, or weak spots. Make sure the geometry matches your engine kit. Test fit the motor to see if it sits snugly and lines up with the chain path. If you need to drill or modify anything, do it carefully and double-check your measurements.
Engine Kit Inspection
Before you bolt anything down, inspect your engine kit. Lay out all the parts and compare them to the manual. Look for common issues like stuck throttle cables, dirty carburetor jets, or damaged spark plugs. Here’s a quick table to help you spot problems:
How to Check | What You Might Notice | |
|---|---|---|
Carburetor Problems | Inspect jets, adjust fuel screws | Sputtering, hard starts, poor performance |
Stuck Throttle | Check cable and mechanism | Sudden speed changes, loss of power |
Spark Plug Issues | Examine plug, check gap | Misfires, rough running, oily deposits |
Muffler/Exhaust | Listen for noise, check for blockage | Loud sounds, engine stalls |
Chain/Sprocket | Check tension, look for damage | Slipping, no power transfer |
Note: If you find rust in the muffler or a blocked exhaust, replace it before you ride. This keeps your engine running strong.
Install Engine & Mounts
Engine Position
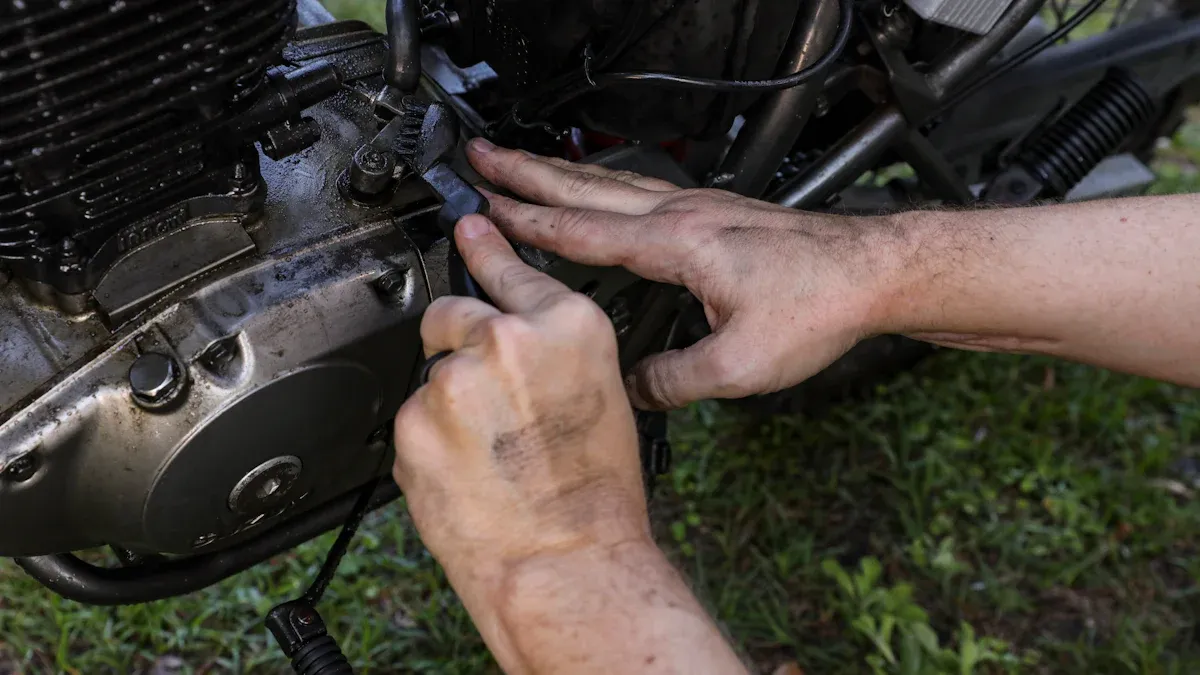
Getting the engine in the right spot is the first big step. You want to place the engine inside the triangle area of your bike frame, just below the top tube. This spot gives your motorized bicycle the best balance and keeps the weight low. Start by holding the engine up to the frame and checking how it fits. Make sure nothing blocks the pedals or the chain path. If you see any tight spots, adjust the position until everything lines up.
Here’s a simple way to position your engine:
Slide the engine into the frame’s triangle, just under the top tube.
Check that the engine sits straight and doesn’t tilt to one side.
Make sure you have enough space for the chain to run from the engine to the rear wheel.
Look at the pedals and crank arms to be sure they spin freely.
Test fit the rear sprocket on the wheel and see if it lines up with the engine’s drive sprocket.
Tip: Take your time with this step. A good fit now makes the rest of the install much easier.
Secure Mounts
Once you have the engine in the right spot, it’s time to lock it down. Use the mounting brackets and bolts that came with your kit. These parts hold the engine tight to the frame and stop it from moving around. If your frame is steel, you can use clamps or even weld the mounts for extra strength. For carbon frames, be extra careful. Don’t over-tighten the bolts, or you might crush the frame. Always follow the torque specs in your manual.
Here are some common mistakes people make when mounting the engine and how you can avoid them:
Over-tightening bolts can damage your frame or strip the threads.
Loose bolts can let the engine shift or even break the mounting holes.
Using the wrong torque wrench setting can lead to problems. Double-check the units (Nm vs. ft/lbs).
Skipping thread locker means bolts might work loose over time.
Note: Always use thread locking compound on your bolts. Check bolt tightness before every ride, especially if you ride your motorized bicycle a lot.
If you want extra security, you can add a strip of old bike inner tube between the mount and the frame. This helps dampen vibration and keeps the engine from slipping.
Alignment
Proper alignment keeps your engine running smooth and your ride safe. Start by checking that the rear sprocket lines up with the engine’s drive sprocket. If the chain runs at an angle, it can jump off or wear out fast. Adjust the sprocket position until the chain runs straight.
Follow these steps for perfect alignment:
Spin the rear wheel and watch the chain. It should move in a straight line from the engine to the wheel.
Check the tension on the chain. You want a little bit of give, but not too much slack.
Look at the engine mounts. If you see any worn rubber or metal, replace them right away.
Make sure the tires and wheels are straight. Wobbly wheels can cause vibration and make the engine shake.
Lubricate the chain and check alignment every few hundred miles to keep everything running smooth.
Callout: Good alignment means less vibration, less noise, and a longer life for your engine and bike parts.
When you finish this part of the install, double-check all your bolts, mounts, and chain tension. A careful setup now means fewer problems later.
Install Key Components
Clutch & Controls
You want your clutch and controls to work smoothly every time you ride. Start by mounting the clutch lever on the left side of your handlebars. Make sure you can reach it easily with your fingers. Run the clutch cable down to the engine, keeping it away from moving parts. Adjust the cable tension so the clutch engages and releases without sticking. Test the lever a few times. If it feels stiff, add a drop of oil to the cable. For the kill switch, place it near your right thumb. This lets you shut off the engine quickly if you need to.
Tip: Zip-ties help keep cables neat and prevent them from getting tangled.
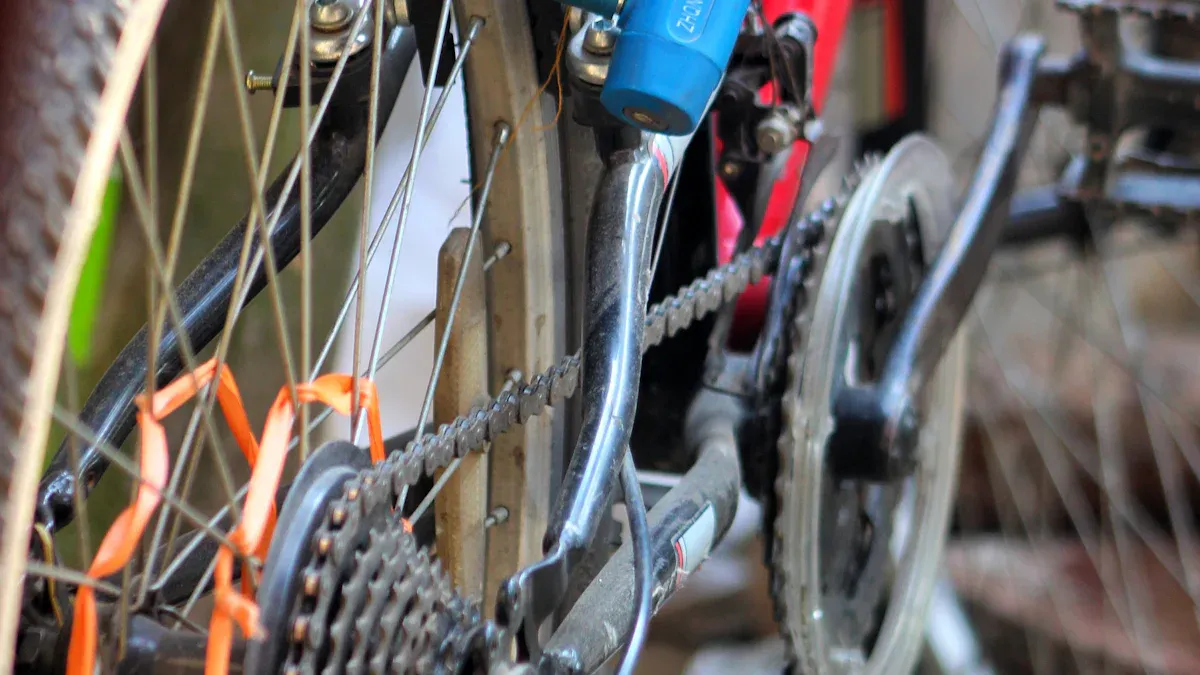
Chain Setup
Now it’s time to attach the rear sprocket. Line up the sprocket with the engine’s drive gear. Use the bolts and rubber spacers from your kit to secure it to the rear wheel. Make sure the sprocket sits flat and doesn’t wobble. Next, hook up the drive chain. Check that the chain runs straight from the engine to the rear sprocket. Adjust the tension so the chain has a little slack but doesn’t sag. Spin the pedals and rear wheel to make sure nothing rubs or catches.
Step | What to Do | What to Check |
|---|---|---|
Attach Sprocket | Bolt sprocket to rear wheel | Sits flat, lines up straight |
Hook Up Chain | Connect chain to sprockets | Tension, no rubbing |
Test Movement | Spin pedals and wheel | Smooth, no noise |
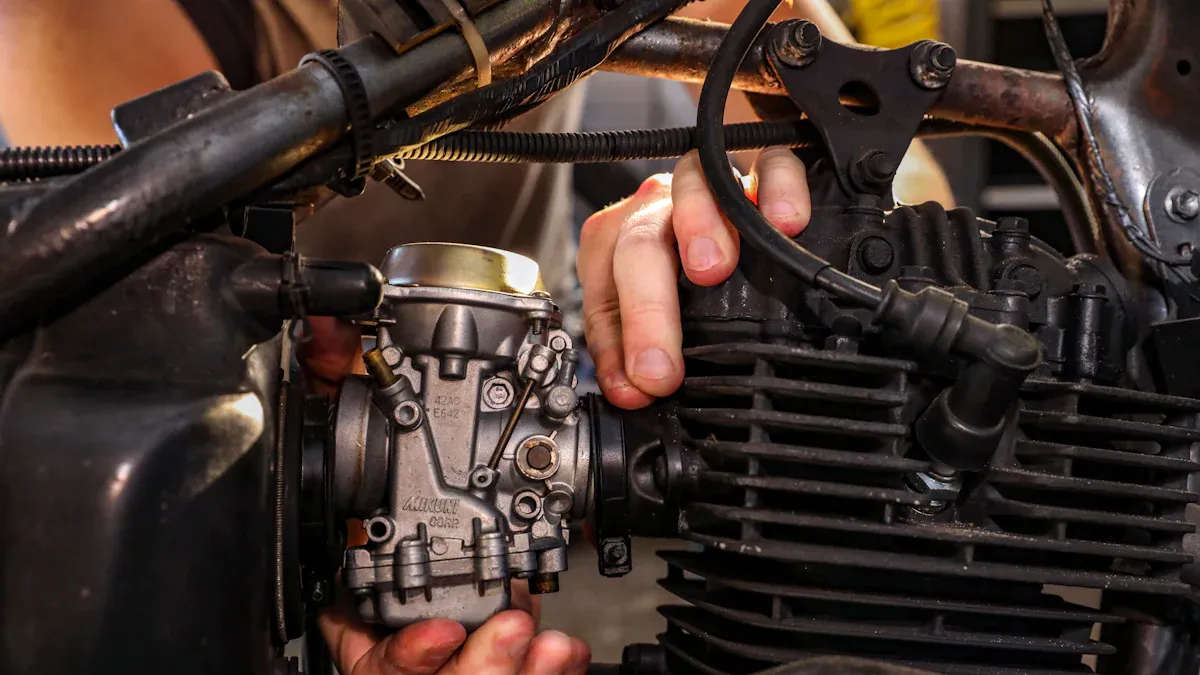
Throttle & Carburetor
Mount the throttle grip on the right handlebar. Slide the throttle cable into the carburetor and secure it with the set screw. Make sure the cable moves freely when you twist the grip. If it sticks, loosen the screw and try again. Position the carburetor so the fuel line runs downhill from the tank. This helps fuel flow better. Double-check that the carburetor sits tight and doesn’t leak. If you see any drips, tighten the hose clamps or replace the fuel line.
Callout: Always keep the fuel tank higher than the carburetor for steady fuel supply.
Wiring
Wiring keeps your bike safe and reliable. Use wire cutters and strippers to prepare your wires. Soldering gives you strong, shiny joints. Crimping with special tools makes connections that resist vibration. Choose gold-plated connectors to stop rust. Slide heat shrink tubing over each joint and shrink it with a heat gun for a clean finish. Add dielectric grease to connectors to prevent corrosion. Secure all wires with zip-ties. Keep them away from sharp edges and hot engine parts.
Follow these steps for a safe setup:
Connect the battery negative terminal to a clean metal spot on the frame.
Use an inline fuse holder with a 20-30 amp fuse on the battery positive terminal.
Run a power wire from the fuse holder to the ignition switch.
Create a backbone power wire from front to back for accessories.
Ground headlights and taillights to the frame.
Keep wires away from heat and sharp edges.
Insulate connections with heat shrink tubing.
Note: Neat wiring looks good and helps you spot problems fast.
Final Assembly & Safety
Gas Tank Mount
Mounting your gas tank the right way keeps your ride safe and steady. Place the tank on the top tube of your frame. Use the clamps from your kit or make custom brackets if needed. Tighten the bolts so the tank does not move, but do not crush the frame. Check that the fuel line runs downhill to the carburetor. This helps fuel flow without problems. If your tank wobbles, add rubber strips under the clamps for a snug fit. Always double-check for leaks before you fill up.
Tip: A secure tank means fewer fuel spills and less chance of damage on bumpy roads.
Muffler & Guard
A good muffler keeps your bike quiet and legal. Start by removing the old exhaust if you have one. Save any hardware you can reuse. Test fit the new muffler and guard before you tighten anything. Make sure nothing touches the frame or cables. Tighten the bolts to the specs in your manual. Keep the heat shield in place to protect your legs from burns. After you start the engine, listen for leaks and check for rattles.
Here’s a quick table to help you stay safe and follow the rules:
What You Need | Why It Matters |
|---|---|
Muffler (no straight pipes) | Lowers noise, meets legal limits |
Heat shield | Stops burns from hot exhaust |
No exhaust leaks | Keeps fumes away from you and your bike |
Shows your exhaust is certified and legal |
Note: Loud pipes can get you a ticket. Always check your local noise laws.
Safety Check
Before you ride, run through a full safety check. Look at the chain tension and make sure all nuts and bolts are tight. Check the carburetor for air leaks and the spark plug for dirt or oil. Test your brakes and lights. Wear a helmet, gloves, and eye protection every time you ride. Practice starting and stopping in a safe place.
Make sure the fuel valve is open and the line is clear.
Inspect the clutch and gears for smooth action.
Look for loose wires or parts.
Warm up the engine before you go.
Callout: Most problems show up in the first few rides. Stop and check your bike if you hear strange noises or feel something off.
If you spot any issues, fix them before you hit the road. A careful check now saves you trouble later.
You’ve learned how to install your gas frame bike engine step by step. Always use a strong frame and secure every mount. Before you ride, double-check bolts, brakes, and controls. Keep your bike running smooth with these tips:
Clean and lube the chain often.
Check tire pressure and brake pads.
Tip: Manuals and YouTube guides make tricky steps easier. Local groups and forums can help with upgrades or troubleshooting.
FAQ
How long does it take to install a gas frame bike engine?
Most people finish in 3 to 5 hours. If you are new, you might need a little more time. Take breaks and check your work as you go. You will get faster with practice.
Can I use any bike frame for a gas engine kit?
You need a strong frame. Look for reinforced or purpose-built gas frame bikes. Regular frames can bend or break. Always check your engine kit for fit before you start.
What should I do if my engine will not start?
First, check the fuel and spark plug. Make sure the kill switch is off. Look for loose wires or clogged carburetor jets. If you still have trouble, ask for help in online forums.
Do I need special tools for this project?
You need basic hand tools like wrenches, screwdrivers, and pliers. A drill and zip-ties help too. Some kits include a tool kit. If you want a cleaner install, use a torque wrench and thread locker.
See Also
Important Tips For Building A Reliable Gas Bike Frame
Key Advice For Assembling A Dirt Bike Frame Kit
Step-By-Step Welding Guide To Build A Drift Trike Frame