
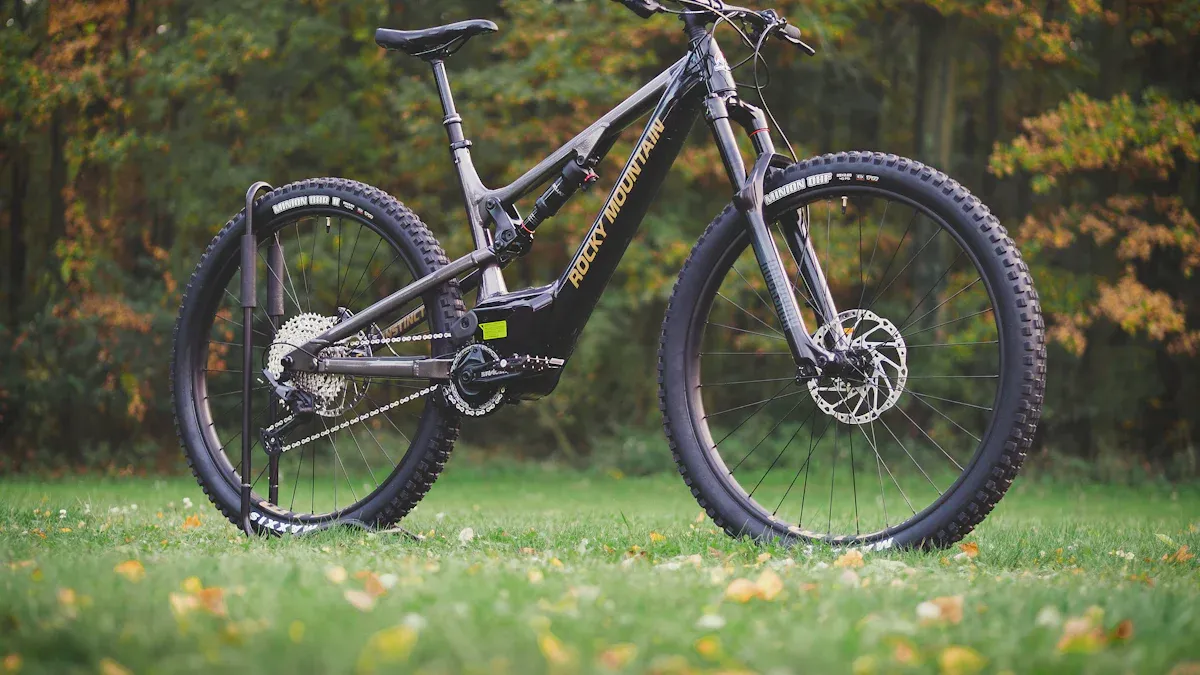
You can get your best ride if you have a clear idea for your custom mountain bike frame. Custom geometry helps you fit your bike to your body, how you ride, and the trails you like. Many riders feel a big change when they use a frame made for them.
Custom mountain bike frame builders let you change fit, handling, and stiffness. This gives you more comfort and control.
Riders often feel more confident and happy with a custom mountain bike frame that fits what they want.
Key Takeaways
Custom geometry helps you make a mountain bike frame that fits your body. It matches how you ride and what trails you use. This gives you more comfort and control.
Knowing your riding goals helps you pick the best frame design. It also helps you choose the right bike type for your skills. You can match your bike to what you like.
Getting your body measured and fitted by a pro makes sure your frame size is right. The geometry will fit you well.
Using CAD software and a good jig setup helps you build a strong frame. The frame will be straight and work well on trails.
Picking the best materials and welding or brazing your frame with care makes it stronger. It lasts longer and rides better.
Riding Goals

When you set clear riding goals, you can build a mountain bike that fits your needs. You might want to work on daily habits, get better at skills, or do well in races. Each goal helps you pick the right frame design and bike geometry.
Tip: Write down your main riding goals before you start building your custom bike. This will help you make good choices.
Mountain Bike Types
There are many types of mountain bikes. Each one has special features. The type you pick changes your frame geometry and how your bike rides on trails.
Goal Type | Description | Examples |
|---|---|---|
Process Goals | Focus on habits and training you can control | Ride 4 times a week, eat well, rest early |
Performance Goals | Aim for better skills or fitness | Climb faster, ride technical trails without stopping |
Outcome Goals | Try to get results in races or events | Win a race, finish an endurance event under a set time |
Different mountain bike types need different frame designs:
Cross-country bikes have shorter downtubes and steeper head angles. This helps you turn fast and climb hills.
Downhill bikes use longer downtubes and slacker head angles. This makes them stable when you go fast.
Enduro and trail bikes mix agility and stability with middle geometry settings.
Dirt jumpers have short wheelbases and top tubes. This lets you do quick, sharp moves.
Style and Geometry
How you ride changes your bike geometry. If you like going downhill fast, you may want a longer wheelbase and slacker head angle. This gives you more stability. If you like tight turns and jumps, a shorter wheelbase and steeper head angle help you move quickly.
Longer chainstays and wheelbases give you more stability and comfort. These are good for cross-country and enduro rides.
Shorter chainstays and wheelbases make your bike easy to move. These are great for tricky trails and jumps.
Changing the top tube length changes how far you reach and how you sit. A longer top tube stretches you out for speed. A shorter one keeps you upright for control.
Seat tube angle and bottom bracket height also change how you pedal and get over things.
You can pick the right geometry to match your goals. This makes your custom mountain bike feel perfect for you.
Fit and Measurements
Body Sizing
Getting the right fit starts with knowing your body measurements. You want your mountain bike to match your height, leg length, and riding style. Start by measuring your inseam. Stand against a wall with your bike shoes on. Place a hardcover book between your legs, like you are sitting on a saddle. Mark where the book spine meets the wall. Measure from this mark to the floor. Repeat this step to make sure you get the same number each time.
Check your standover height. You need at least 2 inches of clearance between your inseam and the bike’s top tube. Aggressive riders often prefer 3 to 5 inches for more room to move. Adjust your seat height so your leg has a slight bend at the bottom of the pedal stroke. Lower the seat about 3 inches for descents to help you stay in control.
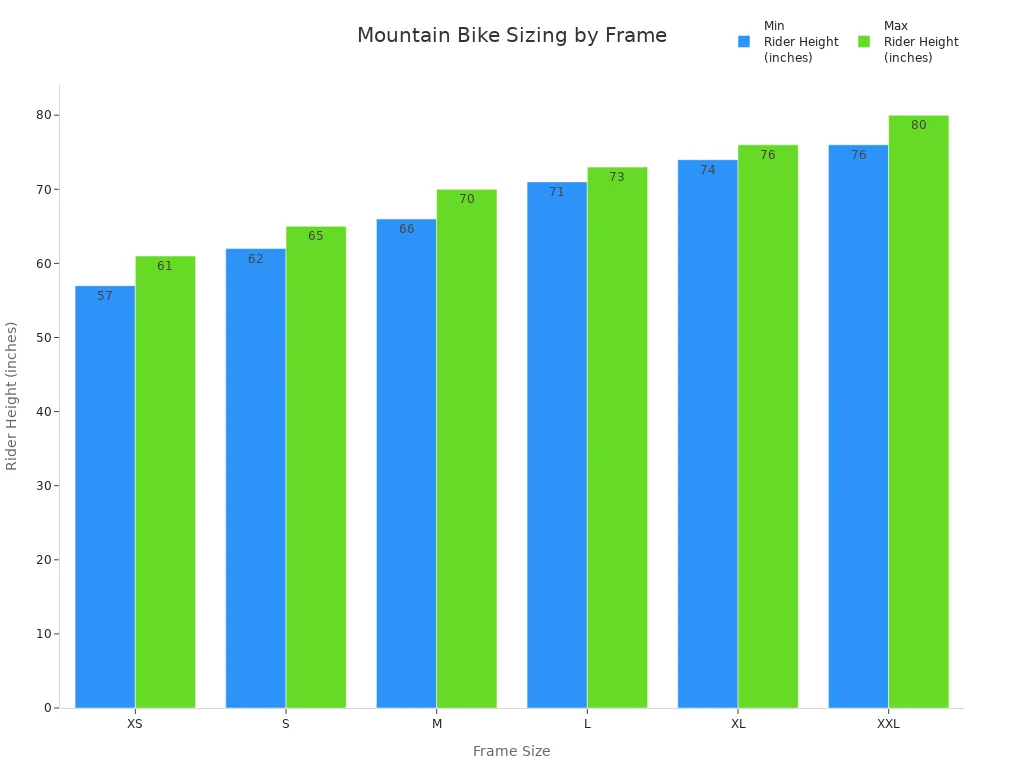
Frame size depends mostly on your height. Most brands use unisex sizing. Wheel size also matters, especially for younger or shorter riders. Use this chart to find your starting point:
Size | Frame Size (inches) | Rider Height Range | Typical Wheel Size | Notes |
|---|---|---|---|---|
XS | 13-14″ | ~4’9″ – 5’1″ | 26″ | Good for younger or shorter riders |
S | 15-16″ | ~5’2″ – 5’5″ | 26″ or 27.5″ | Fits shorter adults or confident youth |
M | 17-18″ | ~5’6″ – 5’10” | 27.5″ or 29″ | Standard adult size |
L | 19-20″ | ~5’11” – 6’1″ | 29″ | Larger adults |
XL | 21-22″ | ~6’2″ – 6’4″ | 29″ | Very tall riders |
XXL | 23″+ | 6’4″+ | 29″ | Extra tall riders |
Tip: Test ride different bikes and ask for help from a professional fitter. They can help you adjust your stem, handlebar, and seat for the best comfort and control.
Sizing Tools
You can use several tools to help you find the right frame size and fit. The Specialized / Retül bike sizing calculator gives you a good starting point. It uses your height and shin length to suggest frame size and saddle height. The Wrench Science Fit System goes deeper. It asks for shoulder width and flexibility, and it gives you clear instructions for each step. This tool helps you find the right top tube length, saddle position, and handlebar width.
Other online calculators, like those from Competitive Cyclist or Jenson, offer basic guidance but may not be as accurate. Bike Insights lets you compare geometry between bikes, but it does not measure your fit directly.
Use a sizing calculator for a quick estimate.
Measure your inseam and height carefully.
Try a professional bike fit for the best results.
Remember, online tools help you get close, but a professional fit ensures your custom frame matches your body and riding style perfectly.
Frame Design
Geometry Specs
When you start designing the perfect frame, you need to understand the main geometry terms. Each measurement changes how your mountain bike feels and handles on the trail. Here are the most important geometry specs and what they mean for your ride:
Geometry Aspect | Description | Typical Range / Notes |
|---|---|---|
Head Tube Angle | The angle of the head tube compared to vertical. A slacker angle (lower number) gives you more stability at high speeds. A steeper angle (higher number) makes the bike turn faster but can feel twitchy. | Cross-country: 67°–69° |
Reach | The horizontal distance from the bottom bracket to the center of the head tube. Reach affects how stretched out you feel when standing or using a dropper post. | No fixed standard; adjust for comfort. |
Stack | The vertical distance from the bottom bracket to the top of the head tube. Stack changes your posture and comfort. | No fixed standard; adjust for rider preference. |
Chainstay Length | The distance from the bottom bracket to the rear axle. Shorter chainstays make the bike easier to turn. Longer chainstays add stability, especially at speed. | No fixed standard; depends on bike type. |
Tip: Always balance stack and reach. If you increase stack, you should reduce reach to keep the bike from feeling too big. Many riders make the mistake of changing one without the other, which leads to a poor fit.
Some common mistakes in frame design include using saddle position to fix reach problems or ignoring the need for a proper fit session. You should design your geometry around your actual riding position, not just your body measurements. A proper fit session helps you avoid errors like a head tube that is too long or a frame that feels awkward.
Suspension Setup
Suspension setup plays a big role in how your bike handles and feels. You need to think about how the suspension changes your geometry when you ride. Here are the main points to consider:
Low Speed Compression (LSC) damping helps your bike keep its shape when you brake or turn. It stops the bike from pitching forward too much and keeps your handling stable.
Adjusting LSC also changes how much weight sits on your tires. If you add more LSC to the rear shock, you can get better grip on the front tire because the load moves through the frame.
Suspension sag is the amount your suspension compresses when you sit on the bike. Sag changes your ride height and the way your frame geometry feels. Too much sag can make the bike feel sluggish. Too little sag can make it harsh and less comfortable.
Progressivity in the suspension, which you can change with volume spacers, affects how the bike resists bottoming out. More progressivity makes the suspension firmer at the end of its travel, which helps on big drops or jumps.
Adjustable suspension lets you change frame angles and linkage ratios. This means you can tune your bike for different trails. For example, a slacker and more progressive setup gives you more stability for fast descents. A steeper and more linear setup helps you climb and turn better on tight trails. If you do not set up your suspension correctly, your bike will not handle as well as it could.
Note: Always check your suspension sag and settings before each ride. Small changes can make a big difference in comfort and control.
Custom Mountain Bike Frame Planning
CAD and Sketching
You start planning your custom mountain bike frame by creating a precise digital sketch. Most professional builders use CAD (Computer-Aided Design) software for this step. CAD lets you draw every part of your frame and check all the angles and lengths before you cut any metal.
BikeCAD Pro is the most widely used CAD software for custom mountain bike frame design. Framebuilders, fitters, and riders around the world trust it for its accuracy and special features. BikeCAD Pro helps you quickly adjust geometry, visualize your bike, and create detailed workshop drawings. RattleCAD is another option, especially if you want open-source software, but BikeCAD Pro remains the top choice for most builders.
CAD modeling improves accuracy in several ways:
You can use digital measurements from motion capture or laser tools. These tools measure your body and bike position down to a tenth of a millimeter.
CAD software turns this data into a frame design that matches your body and riding style.
You can edit your design easily and try different setups before you build.
CAD also helps you design fixtures and laser-cut parts that hold your tubes in perfect alignment during welding.
Tip: Always double-check your CAD drawing before you move to the next step. A small mistake in the digital plan can lead to big problems later.
Jig Setup
After you finish your CAD drawing, you need to set up a jig. A jig is a special tool that holds your frame tubes in the right position while you work. This step is key for keeping your custom mountain bike frame straight and strong.
Follow these best practices for jig setup:
Start with your accurate CAD drawing to set tube angles and lengths.
Place each tube in the jig at the correct angle. Use measuring tools to check your work.
Miter the tubes (shape the ends) so they fit together tightly.
Test fit the tubes in the jig and make small adjustments as needed.
Tack weld the joints while the frame is in the jig. Keep the tacks in the same plane as the frame.
Remove the frame from the jig for final welding or brazing. This helps prevent heat from warping the frame.
Use the jig again for dry fitting and to check alignment after each step.
Hold chain stays and seat stays in place with fixtures or the jig during brazing.
Drill vent holes after dry fitting. This lets you clean out flux and drain moisture.
Use dummy axles or special fixtures to keep dropouts straight and parallel.
Experienced builders know that tubing can move when heated. You must plan for this by checking alignment often and using the jig for both tacking and dry fitting. Many builders use 80/20 extrusion systems and stainless steel pins for extra precision.
Note: Accurate jig setup is one of the most important steps in building a custom bike frame. If your tubes are not held at the right angles, your frame will not ride well.
Tube Mitering
Tube mitering means shaping the ends of your tubes so they fit together perfectly. This step affects both the strength and alignment of your frame. You want each tube to touch its neighbor along the whole joint, with no gaps.
Key points about tube mitering:
The shape of each miter depends on the tube diameters, wall thickness, and the angle where they meet.
Most builders use hole saws on milling machines for precise miters. You can use hand tools, but this takes more skill and can lead to mistakes.
A good miter gives you a snug fit, which makes the welded or brazed joint strong and stable.
If you overheat the joint during brazing, the tube can distort or even burn through. This weakens the frame.
Sometimes, you need to cold-set (bend) the frame after welding to fix small alignment errors caused by heat.
Common challenges during tube mitering include:
Tack welding mistakes that cause misalignment, like a tilted head tube.
Cutting tubes too short, which ruins the fit.
Overheating joints, which can distort or weaken the tubes.
Drilling holes in the wrong place, which creates stress points and can lead to cracks.
Machine setup errors, such as not resetting the tool height, which can damage both the tube and the tool.
Alert: Always check your tube fit before welding. A poor miter can make your frame weak or crooked. Take your time and use the right tools for each cut.
When you follow these steps with care, you improve the strength, safety, and ride quality of your custom mountain bike frame. Careful planning, accurate jig setup, and precise tube mitering are the foundation of building a custom bike frame that fits you and performs well on the trail.
Bike Build Checklist
Building a custom mountain bike frame needs good tools and planning. This checklist helps you finish your project step by step.
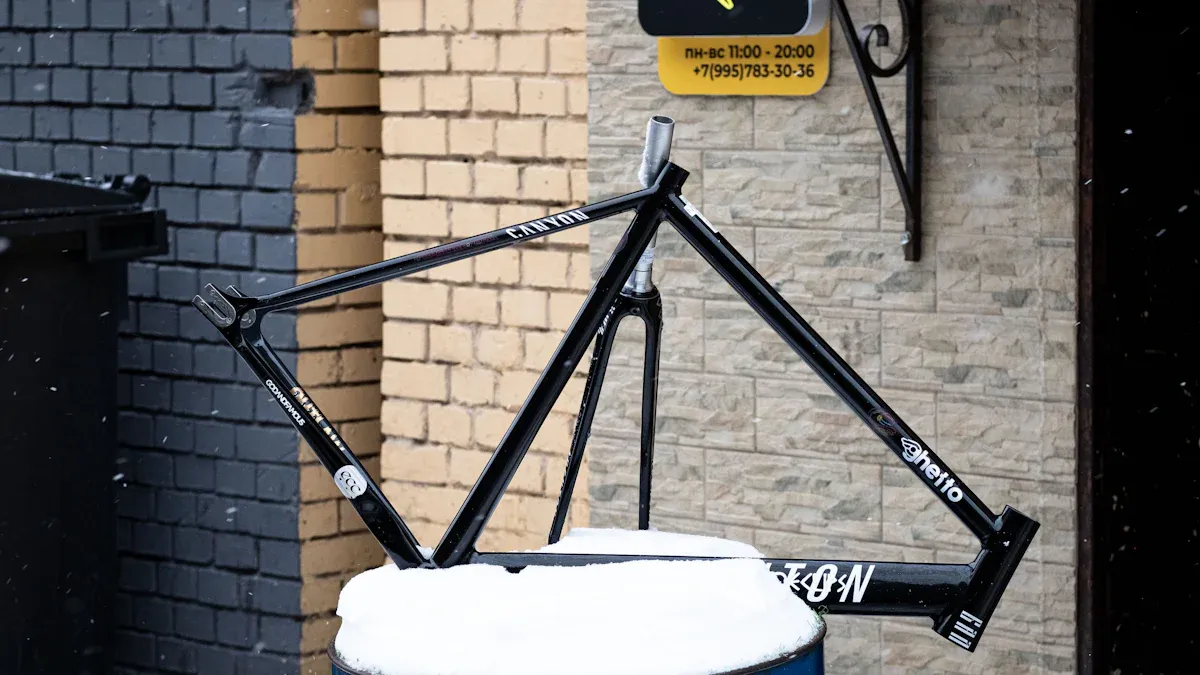
Material Choices
Picking the right material changes how your bike feels and lasts. Each choice has good and bad points.
Material | Reasons for Use | Key Characteristics |
|---|---|---|
Steel | Strong, easy to fix, not expensive | Smooth ride, tough, can rust without protection |
Aluminum | Light, does not rust, cheap | Wears out faster, needs careful welding |
Titanium | Tough, light, does not rust | Costs a lot, lasts long, needs special welding |
Carbon Fiber | Very light, can make cool shapes | Costs a lot, hard to fix, stiff, does not last long |
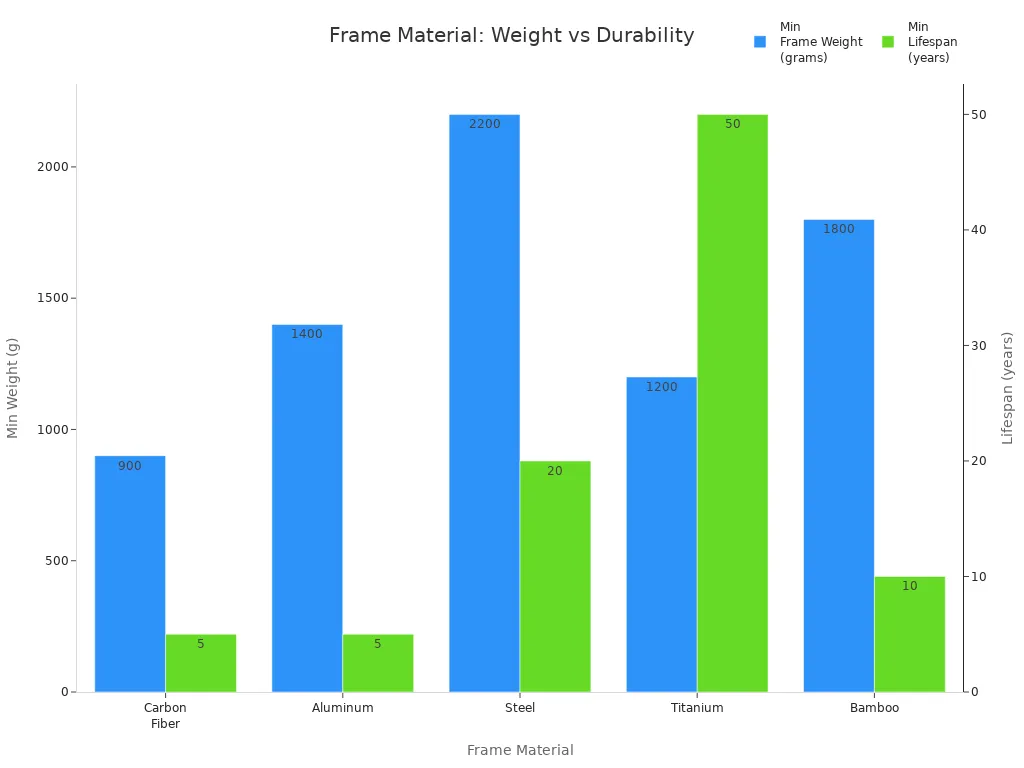
Steel and aluminum are popular for custom frames. They are strong, last long, and do not cost too much. Titanium and carbon fiber are better for performance. They cost more and need special skills.
Welding and Brazing
You must join your tubes with strong welds. TIG welding works well for thin tubes. It gives you good control. MIG welding is easier for beginners. Fillet brazing uses a torch and joins different metals. Many builders learn these skills in classes. TIG welding heats the metal, so you may need heat treatment. Always practice on scrap metal first.
Tip: If you are new to welding, ask a builder for help or take a class to learn safe ways.
Final Review
Check your frame for straightness and strength before you ride. Follow these steps:
Check if the frame is straight after tack welding.
Weld small sections and switch sides to control heat.
Put the frame in the jig often to check for movement.
After welding, measure and fix the frame if needed.
Use jigs to place mounts and hangers.
Test ride the bike to find problems before painting.
A careful check makes sure your frame is safe for trails. Many riders work with a builder for the last steps or testing. This checklist helps you stay organized and build a frame you can trust.
You can make your own mountain bike frame if you follow each step carefully. First, make a checklist and use CAD software to draw your frame. Many builders get help from experts they trust.
Description | |
|---|---|
Paragon Machine Works | Dropouts, brazeons, and framebuilding tools |
United Bicycle Institute (UBI) | Steel and titanium frame tubing and parts |
Custom build guidance and compatibility checks |
Stay on track by asking for help at bike shops or in online groups. Start your project by drawing your ideas or talking to a custom builder.
FAQ
What is custom geometry on a mountain bike frame?
Custom geometry means you choose the angles and lengths for your bike frame. You match the frame to your body and riding style. This helps you ride with more comfort and control.
Tip: Custom geometry can fix problems like sore knees or back pain.
Do I need special tools to build a custom frame?
You need tools like a jig, tube cutter, and welding gear. These tools help you shape and join the tubes. You can rent some tools at bike shops or ask a builder for help.
Jig
Tube mitering tool
Welding machine
How do I know if my frame fits me?
You measure your height and inseam. You test ride bikes with similar geometry. You check for comfort and control. A professional bike fitter can help you adjust your setup.
Fit Check | What to Look For |
|---|---|
Standover Height | Clearance above top tube |
Reach | Comfortable arm stretch |
Saddle Height | Slight knee bend |
Can I use any material for my custom frame?
You can pick steel, aluminum, titanium, or carbon fiber. Each material has strengths and weaknesses. Steel is strong and easy to fix. Aluminum is light. Titanium lasts long. Carbon fiber is very light but costs more.
Note: Choose a material that matches your budget and riding style.
Should I build my own frame or work with a builder?
You can build your own frame if you have skills and tools. Many riders work with custom builders for expert help. Builders guide you through design, fitting, and welding.
DIY: Learn new skills
Builder: Get expert advice