
Restoring vintage bike frames is a fun project. Many people start this work for different reasons. First, good steel frames can last 100 years if cared for. You may notice that vintage bikes feel more comfortable than some new ones. The challenge of fixing them can be exciting. It feels great to bring a classic bike back to life.
Also, personal ties to history and culture often inspire you. The cool colors and stickers of vintage bikes can catch your eye. In the end, these bikes are light and easy to ride, which makes them enjoyable.
Key Takeaways
Look at your bike frame closely before you start. Check for damage and see if you need repairs or a new paint job.
Get the right tools like wrenches, pliers, and screwdrivers. This will make your restoration easier and quicker.
Clean your bike frame gently. Use safe cleaners and soft brushes. This will protect the paint and help avoid rust.
Fix rust and dents the right way. Use sanding, rust converters, and careful dent removal. This will keep the frame strong.
Take your time when painting and putting the bike back together. Keep it maintained to make it look good and work well.
PREPARATION
FRAME ASSESSMENT
Before you start fixing a vintage bike frame, check its condition. Taking the bike apart is important for a good look. This helps you find any damage and see if repairs are needed. Look closely at the original paint and stickers. Think about their state, including any wear or logos that make it special. Check how the frame works. Ask yourself if it can be fixed up well.
Here are some important things to think about during your check:
Look for cracks or bends in the frame.
Decide if repainting is needed, especially if it looks bad.
Know the frame’s shape and material to match with parts.
Make sure the bike can be safely ridden after fixing.
GATHERING TOOLS
After checking the frame, get the right tools for the job. Having the right tools makes fixing easier and faster. Here’s a list of important tools you will need:
Hex wrench set (Allen keys) for different bolts.
Open-end wrenches for nuts on brakes and gears.
Adjustable wrench for different nut sizes.
Pliers, especially needle-nose, for working on cables.
Screwdrivers (Phillips and flathead) for adjustments.
Cutting pliers to cut cables.
Chain wear checker to check chain condition.
Chain tool for breaking and putting chains back together.
Pedal wrench for taking off and putting on pedals.
Headset cup removal tool to safely take off headset cups.
Getting these tools will help you have a successful restoration project. Remember, the time needed for fixing can be very different. A simple clean-up might take a weekend, while a full teardown could take weeks or even months. Patience and hard work are important.
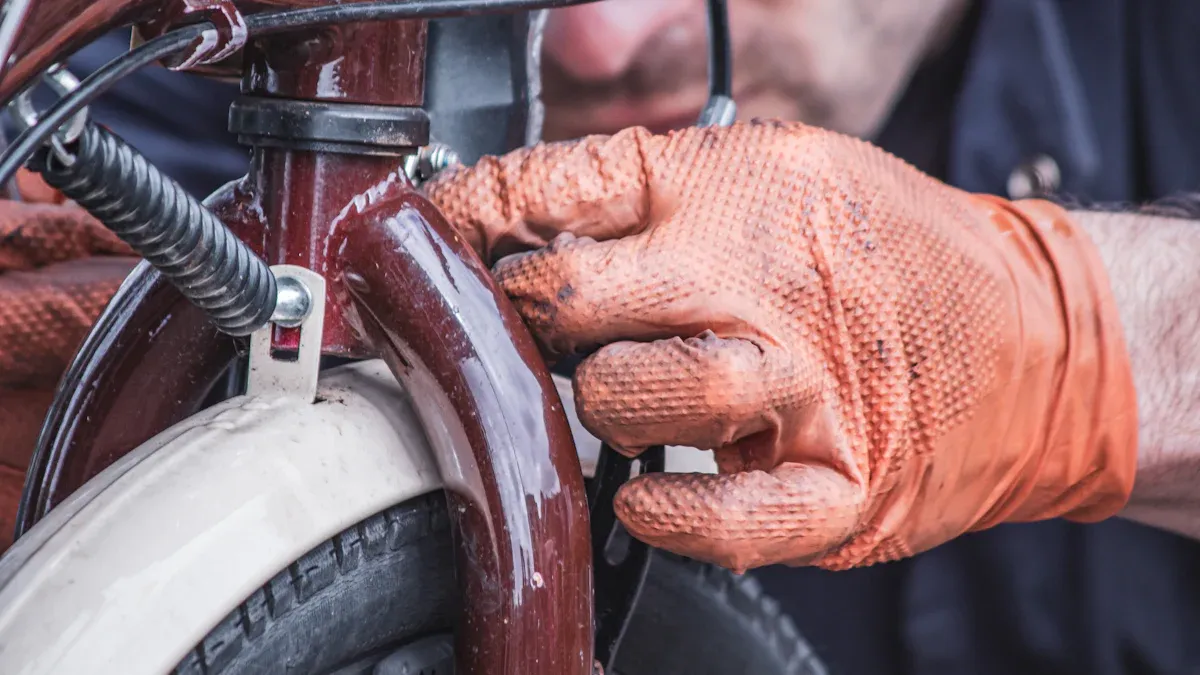
CLEANING VINTAGE BIKE FRAME
Cleaning your vintage bike frame is very important. It helps keep it looking good and lasting longer. Each type of material needs special care. This way, you avoid damage and keep its unique features. Here’s how to clean different frames well.
STEEL FRAME CLEANING
When you clean a steel frame, avoid strong chemicals. They can cause rust or harm the frame. Start with a gentle wash using a bike cleaner like Finish Line’s Super Bike Wash™. This cleaner is safe for the environment and breaks down easily. It removes dirt without hurting the steel.
Make your cleaning solution: Mix the bike cleaner with water as the instructions say.
Use soft brushes and microfiber cloths: These tools help scrub dirt without scratching.
Rinse well: After cleaning, rinse the frame with water to wash away soap.
Dry the frame completely: This step is very important to stop rust. You can use a soft towel or let it air dry.
Use a protective silicone spray: This helps keep water and dirt away, protecting the frame.
Watch out for common problems like rust spots or old paint layers. You might need to sand or use special treatments to fix these issues.
ALUMINUM FRAME CLEANING
Aluminum frames need special care to stop corrosion. Follow these steps to clean your aluminum bike frame safely:
Use mild soap and water: Stay away from strong chemicals that can hurt the aluminum.
Avoid rough materials: These can scratch or wear off protective coatings.
Dry the frame well: After cleaning, make sure no moisture is left to avoid corrosion.
Use rust protectants: Products like WD-40 create a barrier against moisture on metal parts.
Also, think about using frame protection tapes where cables or bag straps touch the frame. This helps stop paint wear and damage. Regular checks will help you find early signs of corrosion so you can fix them quickly.
CARBON FRAME CLEANING
Cleaning carbon bike frames needs a gentle touch to keep them strong. Here’s how to do it:
Use warm soapy water: This is safe for carbon frames. Don’t spray water directly on bearings to keep grease in place.
Use bike-safe degreasers: These clean greasy parts without harming the carbon fiber.
Rinse well: Especially in salty or sweaty conditions, rinsing protects metal parts from rust.
Dry the bike after cleaning: This stops moisture damage.
Use bike polish or spray wax: This adds a protective layer after cleaning.
Avoid strong chemicals and pressure washing. They can harm the carbon fiber layers. By following these steps, you can keep your carbon frame looking good and working well.
Preserving Original Paint and Decals
While cleaning, it’s important to keep the original paint and decals on your vintage bike frame. Here are some tips to help you do this:
Know the type of markings: Check if they are silk screen or decals. Silk screen markings are more sensitive to liquids.
Use a damp clean rag: Lightly clean decals with gentle cleaners like Finish Line bicycle cleaner.
Avoid rough materials: These can harm decals and paint.
Use a soft bristle toothbrush: Lightly scrub yellowing decals without soaking them.
Test cleaning products: Always try on a small hidden area to avoid removing too much paint.
By taking these steps, you can keep the vintage look of your bike while making sure it stays in great shape.
REPAIRING VINTAGE BIKE FRAME
Fixing a vintage bike frame often means dealing with common problems like rust and dents. These issues can change how your bike looks and works. By using the right methods, you can make your bike frame look great again.
RUST REMOVAL TECHNIQUES
Rust is a big worry for vintage bike frames, especially steel ones. Here are some good ways to remove rust:
Mechanical Removal: Start by sanding or using an angle grinder with a brass brush. This method gets rid of rust without hurting the metal below.
Rust Converters: For rust inside the frame, use rust converters in the tubes. Block the openings and shake the frame to cover the rusted spots.
Protective Coatings: After removing rust, protect the frame with coatings. You can use powder coating for a nice finish, galvanizing for strength, or spray paint with compatible primers and clear coats.
Internal Lubrication: Seal frame spaces with products like fish oil or automotive sprays. This helps stop new rust from forming.
Chrome Parts Care: Clean and polish chrome parts separately with polishing paste and buffing wheels to keep them shiny.
To stop rust from happening in the first place, follow these maintenance tips:
Gently wash the bike with water and a good bike cleaner to find rust-prone spots.
Check the paint for chips or damage. Touch up with matching paint to protect exposed steel.
Store the bike in a dry, ventilated area and use protective coatings like silicone sprays to keep water and dirt away.
DENT REPAIR METHODS
Dents are another common problem in vintage bike frames. They often happen from riding or small crashes. While many dents just affect looks, they can lower the bike’s value. Here are some common repair methods:
Pounding Technique: Use a brass or wooden plug (called a ‘bugie’) to push out the dent from inside the tube. You need access to the tube ends for this method.
Drilling Method: Drill a small hole opposite the dent. Use a brass drift to push the dent out, then plug the hole with silver brazing rod. Sand and repaint the area afterward.
Tack-Weld Technique: For tougher dents, try using a tack-weld post or slide-hammer method to pull out the dent.
Rolling Method: Roll dents out using a tube block and grease. This method might not be perfect and often needs filler materials like brass, tin, lead, or Bondo before repainting.
Sometimes, you may need to replace damaged tubes or make them stronger. Here are some ways to reinforce damaged areas:
Brazing or Welding: Use steel plates to strengthen joints after straightening damaged tubes. This keeps the frame strong.
Splicing: Put a piece of tubing inside the damaged section and braze or weld it in place.
Complete Replacement: If needed, replace damaged tubes completely with parts from broken frames.
By using these methods, you can fix rust and dents, making sure your vintage bike frame stays both useful and good-looking.
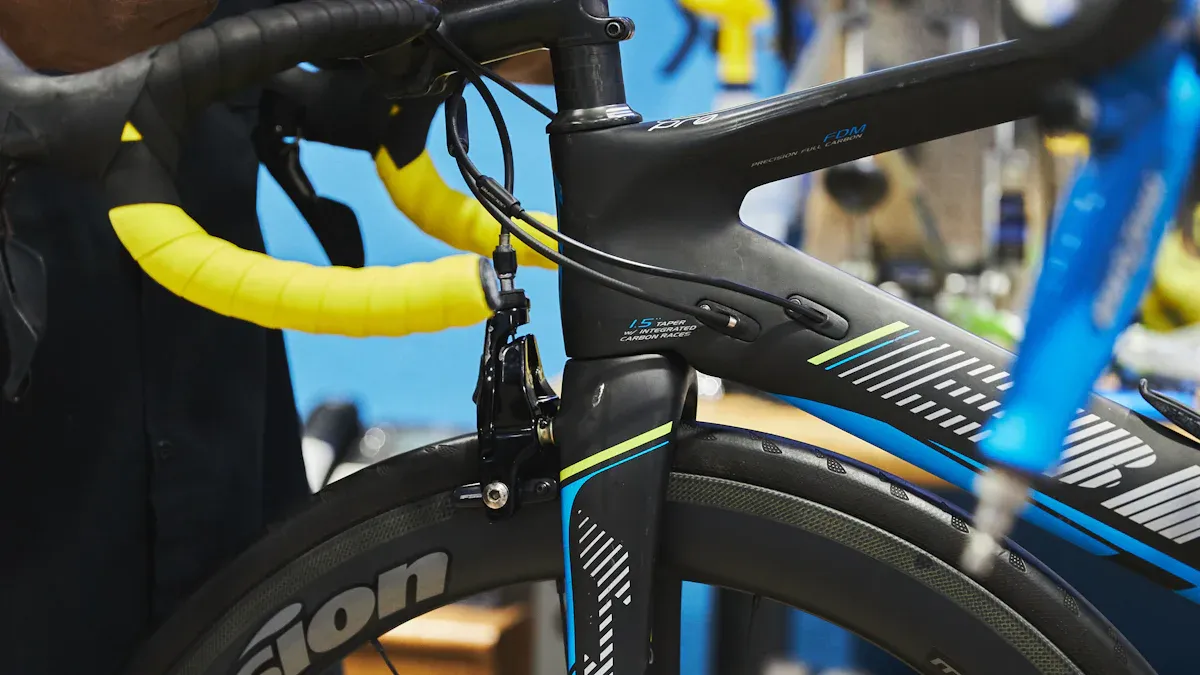
PAINTING AND FINISHING
Painting and finishing your vintage bike frame is very important. It helps how the bike looks and protects it too. Choosing the right paint and using it well can really change how your bike looks and lasts.
PAINT SELECTION
When picking paint for your vintage bike frame, think about how long it will last and if it matches history. For example, restoring a vintage Colnago Nuovo Mexico bike frame from the early 1980s shows that a multi-step wet paint process works best. Start with a shiny silver base coat, then add a red-tinted clear coat to get the famous ‘candy red’ finish. This way, you can copy the original ‘Saronni Red’ color. For blue finishes, special mixed metallic paints match the original colors, called ‘Candy Blue’. Chrome plating on some parts, like the fork and dropouts, makes it stronger and more authentic.
APPLICATION TECHNIQUES
Using the right application techniques is key for a great finish. Here are some tips to help you avoid common mistakes while painting:
Surface Preparation: Make sure to sand the frame well and take off all old paint. Not preparing well can cause problems with sticking.
Cleaning: Use good solvents to clean the frame. Stay away from cheap cleaners that might leave behind residues.
Drying Time: Give enough drying time between coats. Rushing this step can lead to scratches and poor sticking.
The average cost for a professional paint job is between $350 and $750, depending on how complex the work is. Powder coating is a cheaper choice, costing around $151. However, wet paint jobs give a more real look and feel, especially for high-end vintage bicycles.
Service Type | Notes | |
|---|---|---|
Powder Coating | $100 – $150 | Strong finish; includes prep work; examples: $108 (Denver), $150 minimum charge |
Wet Paint Job | $350 – $700+ | Takes more work; using multiple colors and masking raises cost; local shop average $495 |
Frame Stripping & Prep | Additional $125+ | Includes taking off old finish and rust |
Decals Installation | $75 | Optional extra service |
By following these tips, you can make sure your vintage bike frame looks great and lasts a long time.
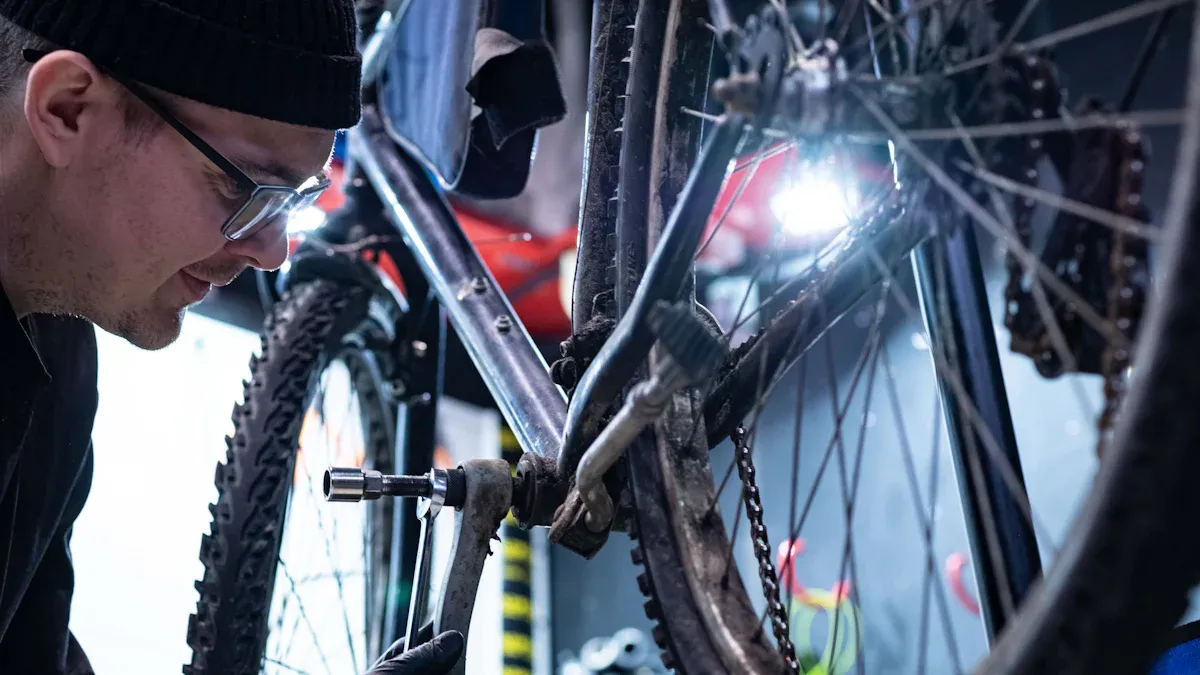
REASSEMBLY AND MAINTENANCE
REASSEMBLY STEPS
After you fix your vintage bike frame, it’s time to put it back together. Follow these steps to make reassembly easy:
Gather Parts and Tools: First, check that you have all the parts, tools, and manuals you need.
Organize Components: Group similar parts like brakes, wheels, and handlebars. This helps you find what you need quickly.
Refer to Manuals: Keep your parts catalog and repair manual close. Mark off parts as you put them together to avoid missing anything.
Use Proper Tools: Always use the right tools for each job. Don’t hammer to avoid hurting delicate parts.
Pre-lubricate: Put lubricant on gears and moving parts before putting them together. This helps them work smoothly.
Follow Assembly Order: Start with the frame, then add the fork, wheels, and handlebars in the opposite order you took them apart.
Tighten Bolts: Use a torque wrench to tighten bolts as the manufacturer says. This keeps everything safe and prevents damage.
Remember, proper torque is very important. It keeps parts tight and stops them from loosening because of vibrations. For example, upper fork pinch bolts should be tightened to about 12 ft/lbs to avoid breaking the triple tree.
MAINTENANCE TIPS
Taking care of your vintage bike frame is key to keeping it looking good and working well. Here are some helpful maintenance tips:
Regular Cleaning: Clean your bike gently to protect the original paint or decals. Use mild soap and water, and don’t use strong polish.
Inspect for Rust: Look for rust often. Fix any rust spots right away to stop more damage.
Store Properly: Keep your bike in a dry, cool spot. Avoid moisture and direct sunlight, which can cause damage.
Handle with Care: Be careful when you handle your bike. Don’t treat it roughly to avoid scratches or dents.
Check Components: Regularly check tires, brakes, and cables for wear. Replace any worn parts to keep riding safe.
By following these maintenance tips, you can keep your vintage bike frame looking great and working well for many years. Remember, you are taking care of a piece of history, so treat it with respect.
Restoring vintage bike frames is a fun adventure with ups and downs. You get to connect with cycling history while making a bike that shows your style. Here are some important tips for your restoration project:
Assess Frame Damage: Look closely at your bike frame’s condition before you start.
Choose Quality Parts: Finding good vintage frames and parts is key for success.
Consider Customization: Adding personal touches can make the bike more special and valuable.
Join Communities: Get involved with local bike shops or online groups for help and ideas.
By mixing your passion with smart choices, you can restore a vintage bike frame and enjoy an amazing ride! 🚴♂️
FAQ
What tools do I need to restore a vintage bike frame?
You will need some basic tools. These include hex wrenches, open-end wrenches, pliers, screwdrivers, and a chain tool. These tools help you take apart, clean, and put the bike back together easily.
How can I remove rust from my bike frame?
You can use mechanical methods like sanding or a brass brush to remove rust. For deeper rust, use rust converters. Always protect the frame with coatings after removing rust to stop future problems.
Is it necessary to repaint a vintage bike frame?
Whether you need to repaint depends on the frame’s condition. If the paint is chipped or faded, you might want to repaint. However, keeping the original paint and decals can make the bike more valuable and authentic.
How often should I maintain my vintage bike?
Regular maintenance is very important. Clean your bike after rides, check for rust, and look at parts every month. Taking good care of your vintage bike keeps it in great shape for many years.
Can I customize my vintage bike frame?
Yes, you can! Customization adds your personal touch. You can change parts, colors, or decals. Just make sure that changes respect the bike’s historical value and integrity.