A straight bike frame is very important for your safety and how well you ride. When your frame is lined up correctly, you have a smoother ride and better control. You can get great results at home with the right tools and methods. By paying close attention to details, your bike frame straightening can be as good as a repair shop’s work.
Key Takeaways
A straight bike frame makes riding safer and better. Checking it often can stop big problems.
Important tools like a frame alignment gauge and derailleur alignment tool are key for straightening. Buy these tools to save money and feel good about fixing your bike yourself.
Use a step-by-step method to straighten your bike frame. Look for damage, get the frame ready, apply pressure gently, and check the alignment to keep it safe.
Tools for Bike Frame Straightening

When you want to straighten your bike frame, the right tools are very important. They help you get the best results. They also keep you safe while you work. Let’s look at the main tools you need and some extra materials that can help.
Essential Tools
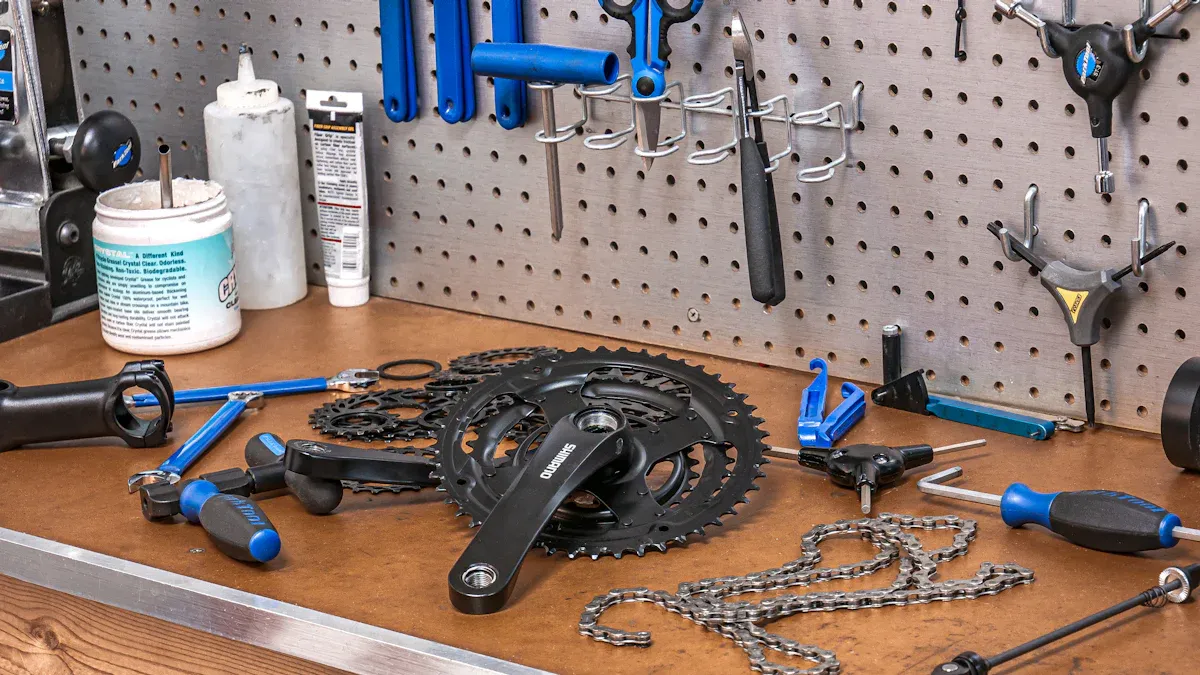
Here’s a list of the tools you must have for bike frame straightening:
Frame Alignment Gauge: This tool checks if your bike frame is straight. It’s important for making sure everything lines up.
Derailleur Alignment Tool: If your derailleur hanger is bent, this tool fixes it. A misaligned derailleur can cause shifting problems, so don’t skip this step.
Frame and Fork Straightener: This tool pushes on the frame to help straighten it. It’s especially helpful for big bends.
Measuring Tape: You need accurate measurements. Use a measuring tape to check the frame’s alignment before and after straightening.
Additional Materials
Besides the main tools, think about these materials to make your job easier:
Protective Gear: Always wear safety glasses and gloves. Protecting yourself from sharp edges and debris is very important.
Lubricant: A good lubricant helps moving parts, especially on older bikes.
Rags: Keep some rags nearby to clean up any grease or dirt that might get messy during the work.
Safety Tip: Always keep your workspace clean and organized. A tidy area lowers the chance of accidents while you fix your bike.
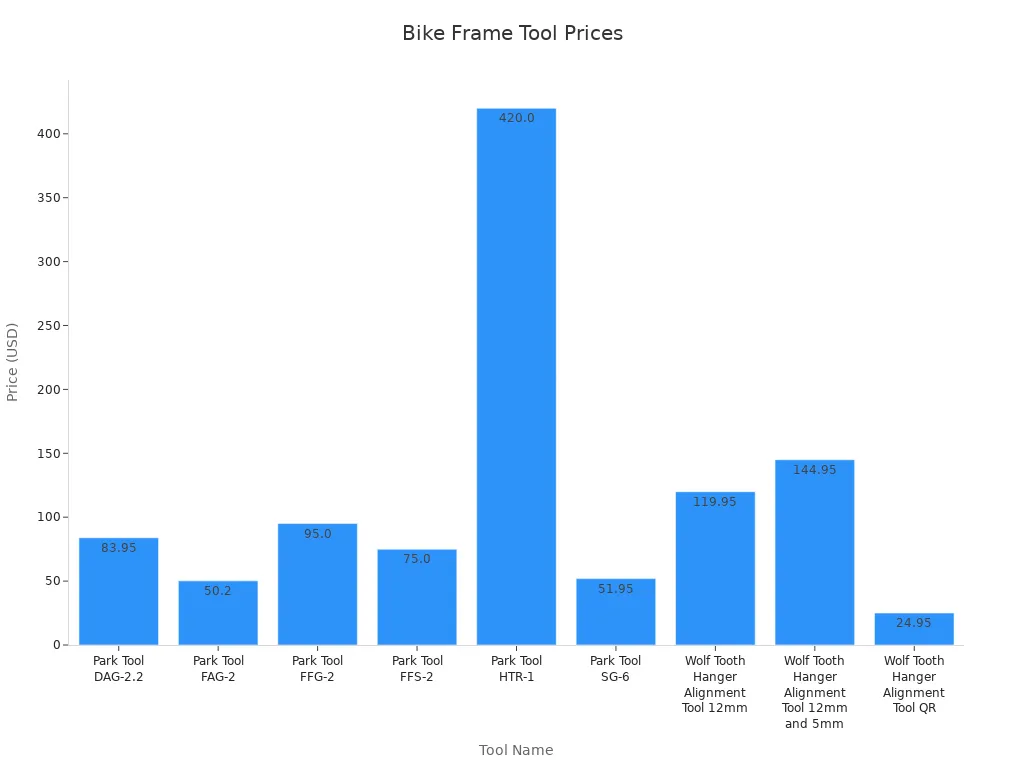
Here’s a quick look at the average costs for some important tools you might need:
Tool Name | Price |
|---|---|
Park Tool DAG-2.2 Derailleur Alignment Gauge | $83.95 |
Park Tool FAG-2 Frame Alignment Gauge | $50.20 |
Park Tool FFG-2 Frame and Fork End Alignment Gauge Set | $95.00 |
Park Tool FFS-2 Frame and Fork Straightener | $75.00 |
Park Tool HTR-1 Head Tube Reaming and Facing Set | $420.00 |
Park Tool SG-6 Threadless Saw Guide | $51.95 |
Wolf Tooth Hanger Alignment Tool for 12mm Thru Axle | $119.95 |
Wolf Tooth Hanger Alignment Tool for 12mm Thru Axle and 5mm Quick Release | $144.95 |
Wolf Tooth Hanger Alignment Tool QR conversion for TA-KIT | $24.95 |

Buying these tools saves you money over time. They also give you the confidence to straighten your bike frame by yourself. Remember, a straight bike frame is very important for your safety and how well you ride.
Bike Frame Straightening Steps

Assessing Damage
Before you start straightening your bike frame, check for damage. This step is very important. It helps you know what problems you have. Use a frame alignment gauge to find any bends or misalignments. A strong bench vise with a rotating pipe jaw is needed. It helps you apply force without slipping. You can also use a Park frame straightening tool to fix bent tubes well.
Tip: Be careful with frames made of thin materials. They can bend or ripple easily. Check your bike for cracks often. These can appear slowly and may not be easy to see.
Preparing the Frame
After checking the damage, get the frame ready for straightening. Follow these steps:
Make sure the frame is at room temperature. Do not apply heat, this is called ‘cold-setting’.
Use a flat table with a fixture to hold the frame by the bottom bracket shell. This helps with accurate alignment.
Clamp the frame on the table and do a quick check to see if it is straight.
Adjust the seat tube and head tube with a ‘V’ tool to make sure they are straight and parallel.
Check the rear dropouts to ensure they are straight and parallel to the frame. This affects the rear derailleur and axle.
After making adjustments, check the whole frame again to confirm it is straight before finalizing the alignment.
Applying Pressure
Now comes the tricky part: applying pressure to straighten the frame. Here are some good techniques:
Put planks of wood on both sides of the bent area and clamp them to straighten the stay.
Use custom wood frame blocks to push behind the dent. This limits its expansion.
Use frame bending cauls to support the tube walls while applying pressure.
Lining cutouts with soft materials protects the frame’s finish.
If needed, heat the bent area until it is cherry red before applying pressure to straighten it.
Note: Think about using a jig for more precise straightening, but it may not be needed for a one-time job.
Checking Frame Alignment
After applying pressure, check the frame alignment to make sure everything is straight. Use tools like the Straight Shooter™ for aligning the rear swing arm or a derailleur hanger alignment tool to fix bent derailleur hangers. These tools help you see if everything is aligned correctly.
Safety Reminder: Always double-check your work. A misaligned frame can cause serious safety problems while riding.
By following these steps, you can straighten your bike frame and make sure it’s safe for riding. Remember, measuring for frame alignment during the process is key to getting the best results.
Fixing your bike frame is a fun DIY project. It makes your bike safer and helps it perform better. Don’t forget to:
Look closely at the spots near suspension pivots and weld edges.
Being proud of your work saves you money and keeps your bike in great condition. So, keep checking your frame and have fun riding! 🚴♂️
FAQ
What should I do if my bike has a bent derailleur hanger?
If your bike has a bent derailleur hanger, use a derailleur alignment tool. This will help straighten it. It makes sure your bike shifts properly and stops more damage.
How can I check my bike’s frame alignment?
You can check your bike’s frame alignment with a frame alignment gauge. This tool shows you any bends or misalignments in the frame.
Is it safe to repair a carbon-fiber bike frame?
Yes, you can safely repair a carbon-fiber bike frame. Just follow the right techniques. Make sure to check for cracks carefully before you start.
See Also
Key Insights For Builders On Gas Bike Frames
Comprehensive Tips For Choosing The Ideal Surly Frame
Three Simple Tips For Comfortable Bike Frame Fitting
