
Choosing the right bike size for your child is crucial, especially when you want to find bike frame size that fits them perfectly. It directly affects their safety, comfort, and enjoyment while riding. When you select the correct size, your child can plant their feet firmly on the ground during stops, enhancing their confidence. Remember, a well-fitted bike makes learning to ride smoother and more fun!
Key Takeaways
Measure your child’s height accurately to find the right bike frame size. This ensures comfort and safety while riding.
Always measure your child’s inseam. This helps determine the correct seat height for better control and confidence.
Conduct a test ride to check the bike’s fit. Look for signs like feet touching the ground and knees not hitting the handlebars.
Measure Height

Measuring your child’s height is one of the first steps to find bike frame size. It’s essential because height directly influences the bike’s fit. A bike that’s too big or too small can make riding uncomfortable and unsafe. So, let’s dive into how you can accurately measure your child’s height.
Use a Measuring Tape
To get an accurate measurement, grab a measuring tape. Here’s how to do it:
Have your child stand straight against a wall with their shoes on.
Place a book between their legs, sliding it up until it touches the crotch seam.
Measure from the top of the book to the floor. This gives you the inseam length, which is crucial for bike sizing.
Understand Height Ranges
Once you have your child’s height, you can match it to the appropriate bike frame size. Here’s a handy table to help you:
Bike Size | Height Range | Age Range |
|---|---|---|
12-Inch | 28” – 38” | Under 4 years |
14-Inch | 36” – 40” | 3 – 4 years |
16-Inch | 38” – 48” | 3 – 7 years |
18-Inch | 42” – 52” | 5 – 9 years |
20-Inch | 48” – 60” | 7 – 13 years |
24-Inch | 56” – 66” | 10 years and up |
This chart helps you see which bike size fits your child based on their height. Remember, as kids grow, they may need a new bike sooner than you think. Growth spurts can happen quickly, so keep an eye on their height and adjust the bike size as needed.
By measuring height accurately, you ensure your child has a bike that fits them well from day one. This not only enhances their comfort but also boosts their confidence while riding.
Find Bike Frame Size with Inseam
When it comes to finding the right bike frame size for your child, measuring the inseam is a critical step. The inseam measurement helps ensure that the bike seat height is comfortable, allowing your child to reach the ground easily. This is especially important for safety and confidence while riding. In fact, inseam is often considered a more reliable indicator than age or height alone. Here’s why:
The inseam measurement ensures that the seat height is at least 1-2 inches lower than your child’s inside leg length for comfort.
Age can vary significantly among children, making inseam a more accurate measurement for sizing.
How to Measure Inseam
Measuring your child’s inseam is straightforward. Follow these steps for an accurate measurement:
Have your child stand barefoot with their back straight against a wall.
Place a book firmly between their legs to simulate sitting on a bike saddle.
Measure from the top of the book (where it touches the crotch) down to the floor.
This method gives you the inside leg length, which is essential for determining the right bike frame size.
Matching Inseam to Frame Size
Once you have the inseam measurement, you can match it to the appropriate bike size. Here’s a handy chart to guide you:
Bike Size | Inseam Length (inches) |
|---|---|
12″ | 14-17 |
14″ | 16-20 |
16″ | 18-22 |
18″ | 20-24 |
20″ | 22-25 |
24″ | 24-28 |
Using this chart, you can find bike frame sizes that correspond to your child’s inseam. Always refer to the manufacturer’s guide, as sizes can vary slightly between models. By measuring inside leg length accurately, you ensure your child has a bike that fits them well, making their riding experience safe and enjoyable.
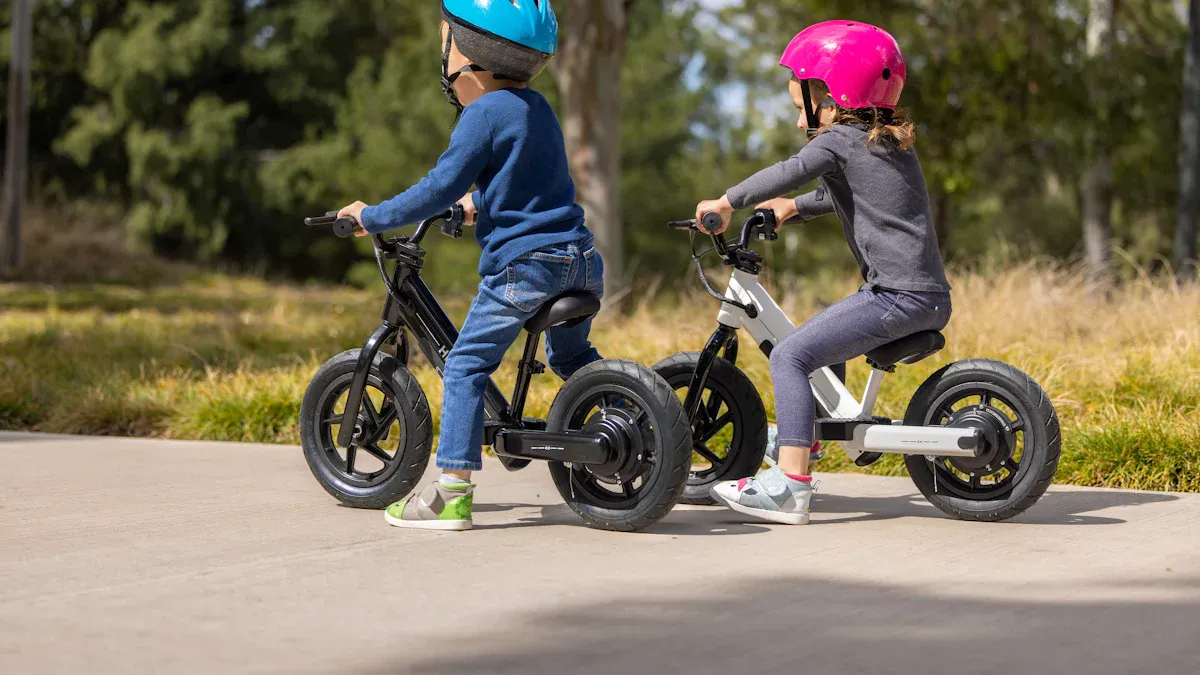
Test Ride for Right Size Bike

When you’re ready to find bike frame size for your child, don’t skip the test ride! This step is crucial. A test ride allows you to see how well the bike fits your child in real-time. It’s not just about measurements; it’s about how your child feels on the bike.
Importance of a Test Ride
A test ride helps you assess comfort and control. You want your child to feel confident while riding. If they struggle to reach the ground or can’t pedal comfortably, it’s a sign the bike isn’t the right size. Plus, riding the bike gives you a chance to see how it handles.
Signs of a Good Fit
During the test ride, look for these signs to ensure your child has a comfortable fit:
Feet Should Hit the Ground: When seated, your child should be able to touch the ground with the balls of their feet. This ensures they can stop safely.
No Knees Hitting the Handlebars: If your child’s knees bump into the handlebars while pedaling, the bike is too small. This can lead to discomfort and even accidents.
Straddling Should Be Easy: Your child should be able to step over the bike without any awkward tilting. This indicates that the frame size is appropriate.
By paying attention to these signs during the test ride, you can confidently choose the right size bike for your child. A comfortable fit not only enhances their riding experience but also keeps them safe on the road.
Check Standover Height
When you’re looking to find bike frame size for your child, checking the standover height is a key step. But what exactly is standover height, and why does it matter?
What is Standover Height?
Standover height is the vertical distance from the ground to the bike’s top tube, measured at your child’s crotch. This measurement is crucial for safety and comfort. Here are a few important points to consider:
You should aim for a minimum clearance of 1 to 2 inches. This space helps prevent painful contact during sudden stops.
Adequate standover height enhances balance and control, which is vital when your child mounts, dismounts, or needs to stop quickly.
For shorter riders, proper standover height is especially important. It allows them to feel secure and confident while riding.
Ensuring Safe Clearance
To ensure your child has the right standover height, follow these simple steps:
Have your child stand over the bike: They should straddle the top tube with both feet flat on the ground.
Check the clearance: There should be at least 1 to 2 inches of space between the top tube and your child’s crotch. This clearance is crucial for preventing injuries if they fall forward off the seat.
Consider the bike type: Remember that standover height recommendations can vary based on the bike type and your child’s height. While age can provide a general guideline for bike sizing, it’s more effective to use height measurements to ensure a proper fit.
By ensuring the right standover height, you help your child ride safely and confidently. This small adjustment can make a big difference in their overall biking experience.
Consult Size Charts
When you’re trying to find the right bike frame size for your child, consulting size charts is a smart move. These charts provide valuable information that can guide you in selecting the perfect bike.
Using Manufacturer Size Charts
Every bike manufacturer has its own size chart. These charts typically include details like wheel size, age range, and height range. Remember, the size of the bike isn’t just about the wheel size. The frame size and geometry also play a significant role. For example, two bikes with the same wheel size might fit children of different heights. Here’s a quick reference table to help you understand common sizes:
Wheel Size | Common Age Range | Height Range |
|---|---|---|
12 inches | 2-4 years | 36-42 inches |
16 inches | 4-6 years | 42-48 inches |
20 inches | 6-8 years | 48-54 inches |
24 inches | 8-12 years | 54-60 inches |
Using this bike size chart, you can find a suitable bike for your child based on their height and age.
Seeking Expert Advice
Don’t hesitate to visit your local bike shop. The experts there can provide tailored advice that fits your child’s needs. They can help you assess the right size based on your child’s abilities and comfort level. Plus, your child can physically try out different bikes, which is crucial for finding the best fit.
Tip: Always ensure the bike model being tested is the same as the one you plan to purchase. This way, you can be confident that the fit will be just right!
By consulting size charts and seeking expert advice, you can make an informed decision that ensures your child rides safely and comfortably.
Choosing the right bike size for your child is essential for their safety and enjoyment. Proper sizing prevents injuries and ensures comfort while riding. Remember to check the fit regularly as your child grows. Here are a few reminders:
If your child’s knees come close to the handlebars, the bike is too small.
If the seatpost is maxed out and your child feels cramped, it’s time for a larger bike.
A slight bend in the leg at the bottom of the pedal stroke indicates a good fit.
By following these tips, you can help your child enjoy a safe and fun biking experience!
FAQ
How do I know if my child has outgrown their bike?
Look for signs like knees hitting handlebars or maxed-out seat height. If your child struggles to ride comfortably, it’s time for a new bike.
What if my child is between sizes?
If your child falls between sizes, choose the smaller bike for better control. You can adjust the seat height as they grow.
Can I buy a bike that my child will grow into?
While it’s tempting, avoid buying a bike too big. A proper fit ensures safety and comfort, making riding enjoyable for your child.
See Also
Utilizing A Bike Frame Size Chart For Perfect Fit
Determine Your Bike Frame Size Using Inseam And Height
Discover Your Perfect Bike Fit With A Sizing Calculator