
Your bike frame shows your story and who you are. When you make your bike special, you get comfort, style, and better performance. These things fit you well. Many people pick custom bike frames for different reasons. They want the right fit. They want less back pain. They want to show their own style.
Make the frame match your body and how you ride.
Fix body problems.
Show your personality with special details.
Be creative and make your bike your own.
Key Takeaways
Changing your bike frame and parts helps you make a bike that fits you and shows who you are.
You can use colors, decals, stickers, and paint tricks like ombre or stencils to make your bike look cool and different.
Pick good materials like vinyl decals, pro spray paints, and shiny tape to help your design last and stay safe.
Small things like custom stem caps, bar tape designs, and colorful spokes add style and help your bike get noticed.
Start with one easy change and add more ideas later so your bike feels special and shows your style.
Colorful Components
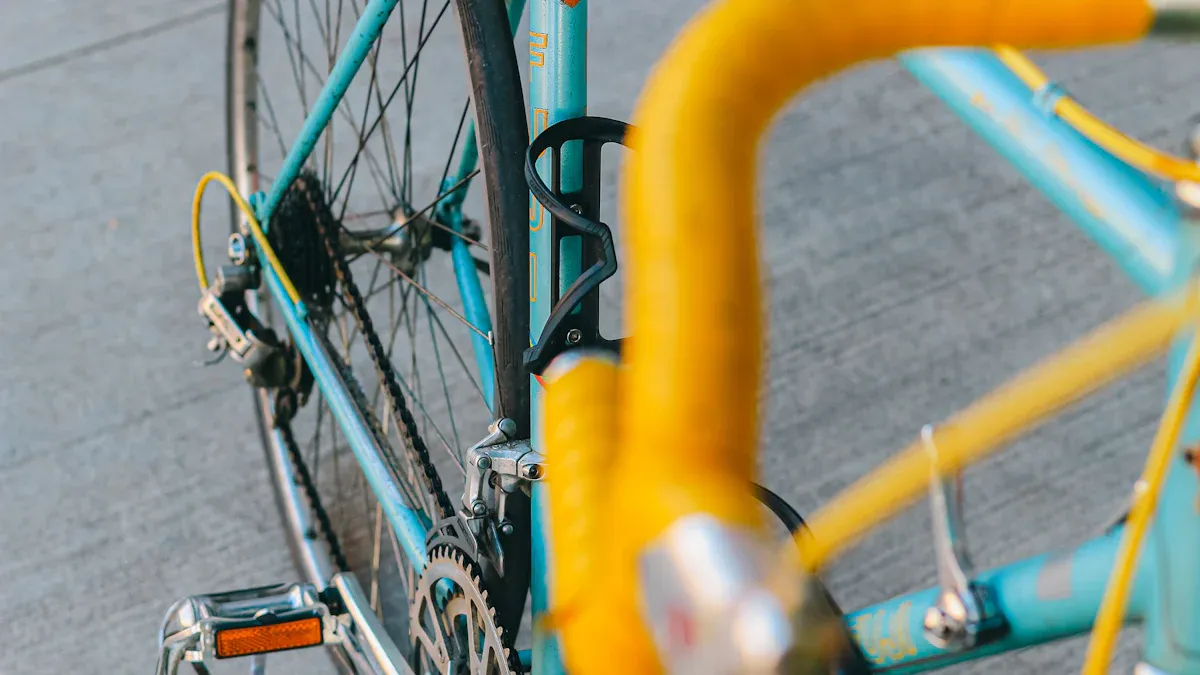
Forks
You can start your custom bike journey by focusing on the fork. This part sits at the front and grabs attention right away. A bright fork color can make your bike stand out in a crowd. You might choose a bold red, a cool blue, or even a neon green. Each color tells a different story. When you pick a color that matches your mood, you show your personality to everyone you pass.
Tip: Try using a color that contrasts with your frame. This makes the fork pop and gives your bike a fresh look.
Some riders love to match the fork with their favorite shoes or helmet. Others pick a color that reminds them of their favorite place. You can even use patterns or stripes for a playful touch. The fork gives you a chance to experiment with new designs without changing the whole bike.
Seat Stays
Seat stays may seem small, but they have a big impact on your bike’s style. The color and design of your seat stays can change the whole vibe of your ride. You can choose between different seat stay designs to match your taste:
Moto seat stays create a modern and smooth look. Many gravel bikes use this style for a bold and fresh feel.
Inline seat stays give a classic and subtle appearance. This design works well if you want something timeless.
The mix of seat stay color and design style decides if your bike looks bold and modern or classic and understated.
You can pick a bright color for a fun twist or stick with a simple shade for a clean finish. When you combine the right color with your favorite design, your bike becomes a true reflection of you. Every ride feels special when you see your own creative touch on the frame.
Custom Decals
Graphics
You can turn your bike into a rolling masterpiece with custom decals. These designs let you show off your personality and make your ride stand out. Many riders choose graphic kits that feature bold logos, bright colors, or even race numbers. You might like ready-made graphic kits with fixed logos, or you may want semi-custom kits that let you pick your own colors and sponsor logos. Some riders go for number plate backgrounds or contour cut numbers to add a sporty touch. If you love official team looks, OEM replica style graphics bring that pro feeling to your bike.
Tip: Mix and match single part decals for your frame, fork, or fender tips. This lets you create a unique design that no one else has.
Custom designs give you endless options. You can choose standard team colors, preset logos, or even dealer decals for a professional finish. Every choice you make adds a new layer to your bike’s story.
Application
Applying decals is easy when you follow the right steps. Start by cleaning your bike frame with soap and water. Dry it with a lint-free cloth so the surface is smooth and ready. Align your decal by tacking down the corners first. This helps you reposition it if needed. For most decals, use a dry application on smooth surfaces. If you have a large or complex design, try a wet method with a soapy water mix. This gives you time to place the decal perfectly.
Use gentle pressure with your fingers or a flat tool to remove air bubbles. Work slowly for the best results. Choose decals made from high-quality vinyl, like those from Fast DTF Transfer or Sticky Brand. These materials resist fading, peeling, and scratching. They stay vibrant through rain, snow, and sunlight. Decals.com offers vinyl options with up to five years of outdoor durability, so your designs last.
Note: Avoid ammonia-based cleaners. They weaken the adhesive and shorten the life of your custom decals.
Spray Paint
Spray paint opens up a world of color and creativity for your custom bike painting journey. You can turn any frame into a work of art with the right paint and a little imagination. Many riders love spray paint because it gives you control over every detail. You can choose from a wide range of paints to match your vision.
Powder coatings give you a tough, long-lasting finish and are good for the environment.
UV-cured coatings dry fast and resist scratches.
High-solid content paints bring out bold colors and shiny metallic looks.
Chameleon paints change color in different light, making your bike stand out.
Automotive base/clear paints and professional-grade spray paints last longer and look better than household spray paints.
Airbrush paints let you create smooth, detailed designs if you have the right tools.
Tip: For the best results, use professional or automotive paints. These paints make your custom-painted bikes look amazing and last longer than regular spray paint.
Ombre
Ombre is a painting style where colors blend smoothly from one shade to another. You can create a soft fade from blue to green or a bold shift from red to yellow. This technique makes your bike look unique and eye-catching. Start by picking two or three colors that go well together. Spray the lightest color first, then add the darker shades. Hold the spray can at different angles to blend the colors. Move your hand in smooth motions for a seamless look.
Callout: Practice on a piece of cardboard before you paint your bike. This helps you get the blending just right.
Ombre works well for custom bike painting because it shows off your creativity. You can match your bike to your favorite outfit or make it pop in a crowd. Every ride feels special when you see your own color blend shining in the sun.
Stencil
Stencils help you add sharp shapes, logos, or patterns to your bike frame. You can use them to create stars, stripes, or even your initials. Many custom bike painting fans use stencils for detailed designs that look professional.
To get the best results, plan your stencil design first. Use strong materials like laminated paper or frisket film so your stencil stays flat. Reinforce delicate parts with wire if needed. Wait at least 20 minutes after painting before adding a stencil. This keeps the paint from peeling. Let the paint dry for two hours before you remove the stencil. For small or tricky spots, you can use thick grease or toothpaste as a barrier.
Use alignment guides for multi-color stencils.
Cut your stencil carefully and secure it with gentle adhesive.
Note: Layering different stencils and colors lets you build up complex patterns. You can create camo, flags, or even your own logo for a truly custom look.
Custom-painted bikes with stencil art always turn heads. You get a frame that tells your story and stands out from the rest.
Stickers
Stickers let you make your bike frame your own. You can use them to add color or share quotes you like. You can also show your love for cycling with stickers. They are simple to put on and take off. This means you can change your bike’s look anytime. Stickers come in many styles, from bright pictures to simple designs. Every sticker you pick shows a part of who you are.
Layering
You can layer stickers to make your bike look cool. Start with one sticker as the base. Then, put smaller stickers on top. This makes your bike look deeper and more interesting. Try using different shapes, colors, and finishes. For example, put a shiny sticker over a dull one to catch the light. You can use clear stickers under bright ones for extra color. Layering lets you change your bike’s style as you grow.
Tip: Lay out your stickers before you stick them down. This helps you see your design and avoid mistakes.
Layering can help you tell a story with your bike. Use stickers that show places you love or races you finished. Each layer adds something special and makes your bike unique.
Unique Designs
Special sticker designs help your bike stand out. Many riders like holographic name stickers that shine in the sun. These stickers use special finishes and raised letters to show your name. They make your bike look fun and cool. They last through rain and rough rides, so your design stays nice.
You can pick from many creative sticker designs. Some show famous climbs like Alpe d’Huez or Col du Tourmalet. Others have old bikes, funny sayings, or cool drawings. Here are some sticker designs you might like:
Sticker Name | Description / Theme |
|---|---|
Cycling Rainbow Rider Sticker | Vintage bicycle shop ad style |
Bike Chain Heart Sticker | Bike chain shaped into a heart |
Funny Cycling Quote Feeling Cranky | Humorous mountain bike gear design |
Bicycle Heartbeat – cycling lover | Symbolizes the heartbeat of a cycling lover |
BMX rider Sticker | Freestyle BMX rider performing tricks |
Bicycle rider girl watercolor art | Watercolor art of a girl riding a bike |
You can mix these stickers to match your mood or memories. Your bike becomes a place to show your ideas. Every ride feels special when you see your own story on your bike.
Multicolored Spokes
Patterns
You can turn your wheels into a moving piece of art with multicolored spokes. Each spoke gives you a chance to add color and style. Many riders pick spoke patterns that match their favorite look or riding style. You might see these spoke patterns on custom bikes:
3-Cross: Spokes cross three others. This pattern gives your wheels strength and helps them last longer. Most mountain bikes use this style.
2-Cross: Spokes cross two others. This pattern feels lighter and works well for bikes with fewer spokes.
Radial: Spokes go straight from the hub to the rim without crossing. This pattern looks fast and clean. Many riders use it on the front wheel for a cool, modern look.
1-Cross: Spokes cross just one other spoke. This pattern is rare and mostly for special designs.
You can see how these patterns compare in the table below:
Spoke Pattern | Description | Typical Use in Custom Bikes | Reason for Frequency |
|---|---|---|---|
Radial (0-cross) | Spokes run directly from hub to rim without crossing others | Non-drive side of road racing wheels, front wheels for aero and weight savings | Used for lightness and aero advantage but less strong |
1-Cross | Each spoke crosses one other spoke | Handmade bikes, aesthetic builds not for heavy riding | Less common, chosen mainly for looks |
2-Cross | Each spoke crosses two others | 24-hole mountain bike and cyclocross wheels | Balance of stiffness and weight, moderately common |
3-Cross | Each spoke crosses three others | Most mountain bike wheels, 28 and 32 hole wheels | Most frequently used due to strength and durability |
Tip: Try mixing spoke colors in a repeating pattern. You can create stripes, spirals, or even a rainbow effect. Your wheels will catch every eye as you ride by.
Coordination
You can make your bike look even better by matching your spoke colors with other parts of your bike. Pick colors that go with your frame, bar tape, or even your helmet. This makes your whole bike feel like one complete design. Some riders use two colors for a bold look. Others use many colors for a fun, playful style.
When you plan your spoke colors, think about the mood you want to show. Bright colors bring energy and excitement. Dark colors feel strong and classic. You can even match your spokes to your favorite team or event. Every time you ride, you show off your creativity and your love for unique designs.
Callout: Your bike becomes a rolling work of art when you coordinate your spoke colors with your favorite gear. Let your imagination lead the way!
Custom Bike Frames
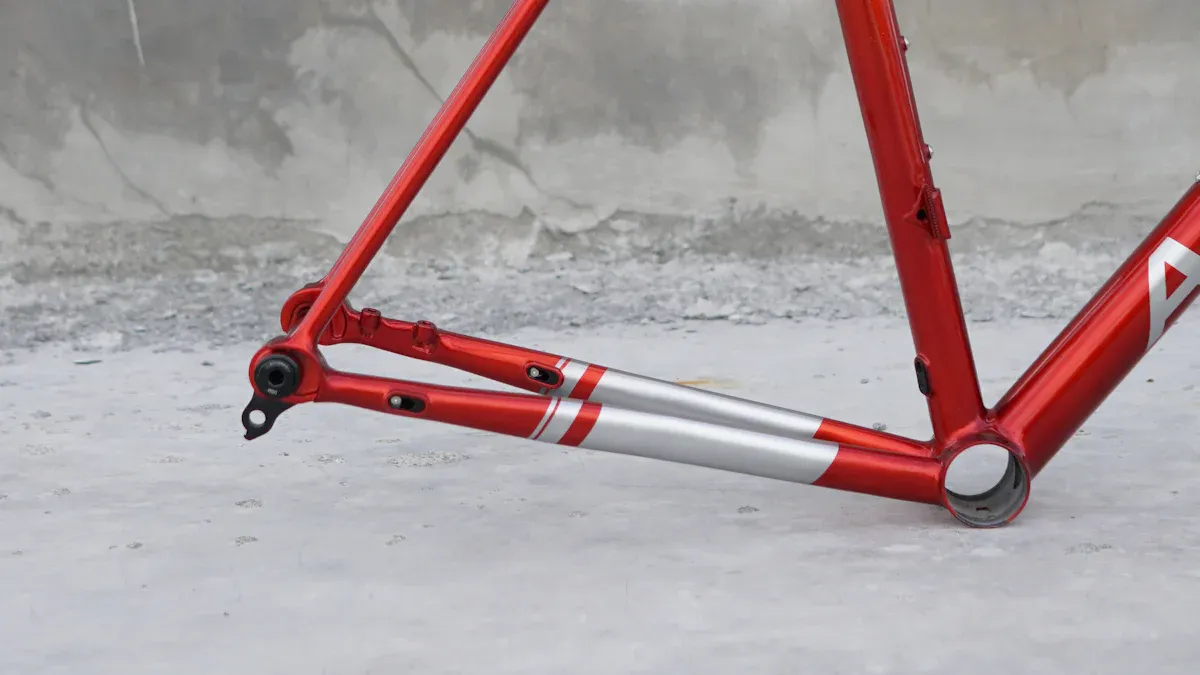
Geometry
Custom bike frames help you ride better and feel more comfortable. When you pick custom geometry, the frame fits your body and how you ride. You do not have to use a regular bike shape. You can talk to builders and fitters to make a frame just for you. Many people think normal frames do not fit right. Custom geometry fixes this problem.
Your bike fits your body size perfectly.
You feel more comfortable and less tired on long rides.
You can pedal harder and steer better.
You can fix back pain or reach the handlebars easier.
You can make the frame work for your favorite rides.
Home builders change things like the seat tube angle and top tube length. They also change the head tube angle. You can set your saddle in the best spot. You can reach the handlebars without trouble. Some builders use shorter cranks or move the bottom bracket. These changes help you feel balanced and safe. You can use old frames and mix parts from different bikes. This lets you make a bike that shows who you are.
Tip: Draw your dream bike frame before you build it. You can mix your favorite ideas and make something special.
Suspension
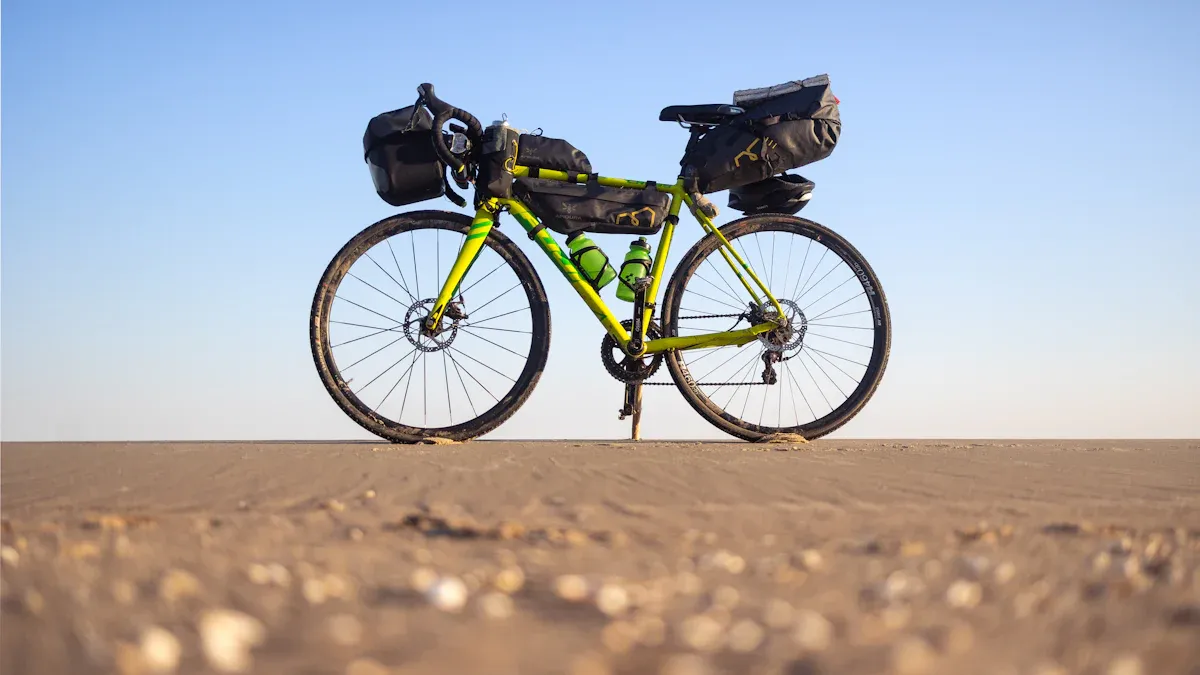
Custom suspension makes your ride smoother and more fun. Many custom frames let you pick rear and fork travel. You can also choose the wheel size and tire space you want. Builders use strong steel like Chromoly 4130 and Reynolds for tough bikes.
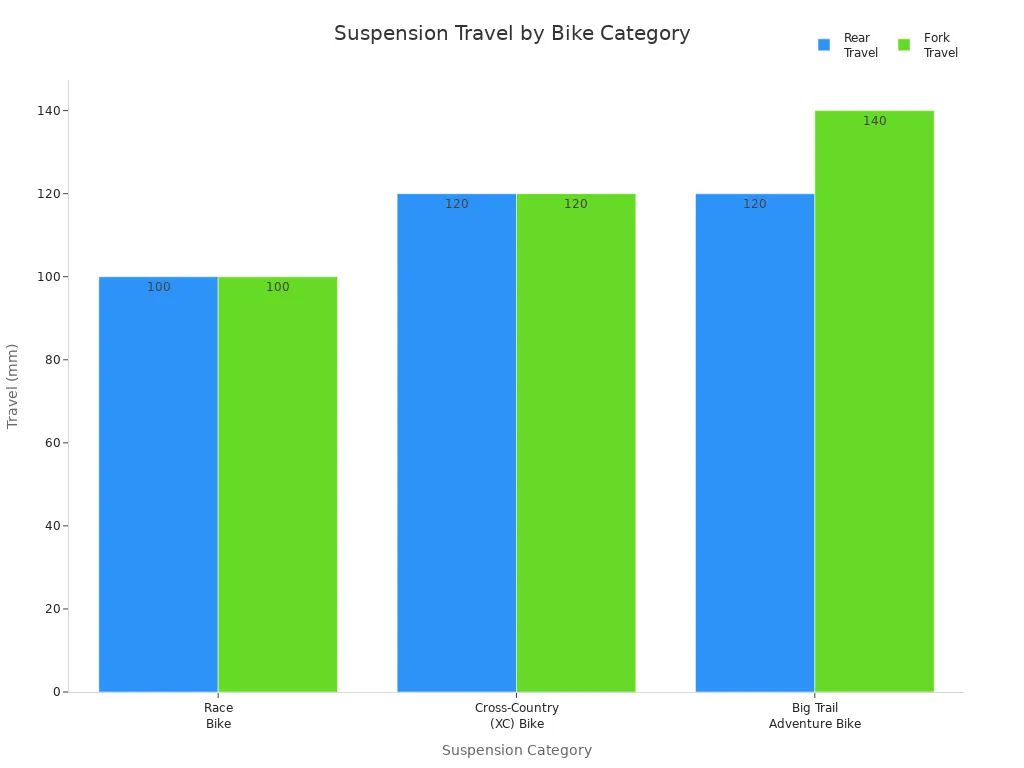
Here is a table with popular custom bike suspension setups:
Suspension Category | Rear Travel | Fork Travel | Wheel Size | Description |
|---|---|---|---|---|
Race Bike | 100 mm | 100 mm | 27.5″ or 29″ | Light and fast, made for racing |
Cross-Country (XC) Bike | 120 mm | 120 mm | 27.5″ or 29″ | Good for many types of riding |
Big Trail Adventure Bike | 120 mm | 140 mm | 29″ | More travel for bumpy trails and long rides |
You can pick the setup that fits your goals. If you want a race bike or an adventure bike, you get to decide. Custom frames help you make cool bike designs that everyone will notice. Your ideas make every part of your bike special.
Fun Stem Caps
Personalization
You can turn a small part of your bike into a big statement with a custom stem cap. This little piece sits right at the center of your handlebars. It is the perfect spot to show off your personality. You have many choices for colors, finishes, and shapes. Pick a bold red cap to match your frame or a sleek black one for a classic look. Some riders choose bright colors to stand out, while others go for shiny metallic finishes.
You can also find stem caps made from high-quality aluminum. These feel strong and look premium compared to regular plastic caps. Some caps even feature hand-laid 23K gold leaf, like the ones used on championship bikes. If you want something truly unique, you can add your own text or pick a design that means something special to you. Many companies let you engrave your name, a favorite quote, or even a fun phrase.
Tip: A custom stem cap is an affordable upgrade that adds both style and protection to your bike.
Here are some creative stem cap collections you might like:
Collection/Series | Description/Features |
|---|---|
Team Series | Artist designs by riders like Brook Macdonald and Samara Sheppard |
Charity Series | Caps that support good causes |
Kids Collection | Fun designs made just for young riders |
23K Gold Series | Hand-laid gold leaf covers for a luxury touch |
Custom Stem Cover | Personalized caps for stores, brands, or your own message |
Details
The details on your stem cap can make your bike feel truly yours. You can choose from laser-etched text, bold graphics, or even themed designs. Some caps feature motivational phrases like “Pain is Temporary” or “Go Fast Don’t Die.” Others show off fun themes, such as sugar skulls, Bigfoot, or even pop culture icons like Batman.
Product Name | Description/Theme | Starting Price |
|---|---|---|
You Say It Best | Custom text headset cap | $19.99 |
Eject Button | Bold statement cap | $19.99 |
Vía de Muertos Sugar Skull | Sugar skull themed cap | $19.99 |
Deep etched, anodized black Batman cap | $23.25 | |
Titanium Sugar Skull | Titanium cap with sugar skull design | $89.07 |
RCC Rapha Cycling Club Cap | Exclusive engraved cap for club members | $102.79 |
You can even find gaming-inspired valve caps, like dice designs, to add a playful touch. These small details spark conversations and show your adventurous side. When you pick the right stem cap, you finish your bike’s look and make every ride feel special. Your bike becomes more than just a ride—it becomes a reflection of your spirit and creativity.
Bar Tape
Colors
Bar tape gives you a simple way to change your bike’s look. You can pick from a huge range of colors. Some riders love classic black or white. Others want bright shades that pop. You can match your tape to your frame or choose a color that stands out. When you wrap your bars in a new color, you give your bike a fresh personality.
Check out these popular bar tape colors from top brands:
Brand | Popular Bar Tape Colors |
|---|---|
Lizard Skins DSP | Jet Black, Diamond White, Cool Grey, Sky Blue, Cobalt Blue, Crimson Red, Mint Green, Neon Pink, Hyper Green, Tangerine Orange, Neon Yellow, Violet Purple, Celeste Green, Viper Yellow, Vegas Gold, Olive Green |
Supacaz Super Sticky Kush | Oil Slick, Platinum, Red, Blue, Neon Pink, Neon Orange, Celeste, Neon Yellow |
Deda Elementi Loop Tape | Celeste Green, Black/Red, Black/Silver, Black/Green, Black/Yellow, White/Black, White/Red, White/Blue, POB Black/Brown |
You see a mix of bold neons, deep blues, and even gold. Deda Elementi’s Loop Tape offers bi-color combos and matching end plugs. This lets you create a look that feels both stylish and coordinated. You can pick a color that matches your mood or your favorite jersey. Every ride becomes a chance to show your style.
Tip: Try a color you have never used before. You might discover a new favorite!
Patterns
Patterns on your bar tape can make your bike unique. Many riders choose leather tapes for a classic touch. You can find shrunken bison leather in black, rust, cognac, or chocolate. Some tapes come in distressed finishes or woven styles. These options add texture and a sense of craftsmanship to your handlebars.
One pattern stands out among custom bikes—the Harlequin Diamond wrap. This design uses two colors to create a diamond effect along your bars. You start at the bottom and wrap upwards, weaving the tapes together. The result looks bold and artistic. You can use tapes like Bontrager gel cork or Planet Bike Comfort Cork for comfort and grip. The Harlequin pattern takes patience, but the final look is worth it.
Leather and woven tapes give a timeless feel.
Harlequin wraps show off your creativity.
Bi-color wraps let you mix and match for a custom vibe.
Callout: Your handlebar tape is more than just a grip. It is a canvas for your imagination. Try a new pattern and let your bike tell your story!
Wrap Patterns
Diagonal
You can give your handlebars a fresh look with a diagonal wrap pattern. This style starts with a long diagonal cut at the tape’s end. You wrap the tape so each layer overlaps neatly, like shingles on a roof. The diagonal method keeps the tape thickness even and the edges tidy. You finish the wrap with an adhesive strip for a clean look. Your bars will feel smooth in your hands, and the pattern stands out every time you ride.
You can choose from many eye-catching wrap styles. Here are some of the most visually striking patterns available as vinyl wraps:
Metallic
Chrome
Holographic Chrome
Neon Fluorescent
Snake Skin
Galaxy
Marble
Animal Print
Art Deco
Camouflage
Checkered
Diamond Plate
Geometric
Lightning
Rust
Sticker Bomb
Stone
Wood Grain
Each pattern brings its own energy to your bike. Neon fluorescent wraps shine bright in the sun. Galaxy and marble patterns add a touch of mystery. You can pick a style that matches your mood or your favorite gear. Your handlebars become a canvas for your creativity.
Tip: Try mixing two patterns for a bold effect. You can wrap one side in chrome and the other in animal print. Your bike will turn heads wherever you go.
Spiral
The spiral wrap pattern creates a smooth, flowing look on your handlebars. You start at the bottom and wind the tape in a continuous helical path up to the brake hood. This style works well around brake levers and curves. You can combine spiral wraps with figure-8 techniques for extra flair. The spiral method gives your bike a sense of movement and energy.
The main difference between diagonal and spiral wraps is the technique. Diagonal wraps focus on neat overlaps and tidy edges. Spiral wraps use a continuous winding that adapts to the shape of your bars. Both styles help you express your personality and make your bike unique.
You can choose a spiral wrap in any pattern you like. Lightning bolts add excitement. Wood grain brings a natural feel. Sticker bomb wraps show off your fun side. Your handlebars will inspire you every time you ride.
Callout: Your wrap pattern tells your story. Pick a style that makes you smile and ride with confidence! 🚴♂️
Freehand Painting
You can unlock a new level of creativity with freehand painting on your bike frame. This technique lets you add personal touches, bold colors, and detailed designs that show your style. You do not need to be a professional artist. You only need a steady hand, some patience, and the right tools.
Illustrations
You can start your custom bike painting journey by preparing your frame. Clean and sand the surface so the paint sticks well. Apply a primer to create a smooth base. Choose your favorite paint type—enamels, acrylics, or lacquers. Test your colors before you begin. Use thin, even layers with brushes or rollers. Let each coat dry before adding another.
Here is a simple step-by-step guide for freehand painting:
Clean and sand your bike frame.
Apply primer for better paint adhesion.
Pick your paint and test colors.
Paint in thin layers with brushes or rollers.
Add your illustrations or designs freehand.
Finish with a clear coat for protection and shine.
You can paint flowers, animals, or abstract shapes. Hand lettering with a fine brush lets you add your name or favorite phrase. You can create stencils for simple shapes if you want more control. Airbrushing over stencils gives you sharp lines and bright colors. Every illustration you add makes your bike unique.
Tip: Practice your design on paper before painting your bike. This helps you feel confident and avoid mistakes.
Paint Pens
Paint pens make it easy to add detailed designs to your bike frame. Many riders love oil-based paint pens, especially Sharpie oil-based markers. These pens offer strong colors and last a long time. Metallic Sharpie pens, like gold or black, give your bike an elegant look. Testors gold paint pens also work well for fine details, though their tips may wear out faster.
You can use paint pens for lug lining, box lining, or small illustrations. Apply several coats for better coverage. Protect your artwork with a clear coat, but test first to make sure the colors do not run or fade. Store your bike indoors to keep your designs looking fresh.
Paint Pen Brand | Features | Best Use |
|---|---|---|
Sharpie Oil-Based | Durable, colorfast, easy to use | Detailed illustrations |
Metallic Sharpie | Elegant, long-lasting | Lug and box lining |
Testors Gold | Bright, fine lines | Small details |
You can turn your bike into a rolling canvas with just a few paint pens. Every ride becomes a celebration of your creativity. 🚲
Metallic Accents
Adding metallic accents to your bike frame can make your ride shine and stand out from the crowd. These details catch the light and show off your creativity. You can use metallic finishes to highlight your favorite parts or create a bold, modern look. Every ride becomes a chance to show your unique style.
Chrome
Chrome finishes bring a classic, mirror-like shine to your bike. You can use chrome on your frame, fork, or even small parts like bolts and spacers. Chrome reflects light and draws attention wherever you go. Many riders love the clean, polished look that chrome gives.
You can also explore other metallic finishes to add even more personality. Popular choices include:
Anodized logos in colors like Matte Blue, Gloss Blue, Rocky Mountain Gold, Rose, and Emerald Mountain Green.
Polished anodization in rose-copper and gold fade for a soft, glowing effect.
Signature finishes such as ‘Ground Swell,’ which mixes matte grey and rose-copper for a unique style.
The ‘Apex’ finish, which uses bright blue and gold fade for a bold statement.
Billet aluminum parts, which are strong and can be shaped into custom pieces like gas caps or fork caps.
CNC machined accessories, such as brake levers and bar end mirrors, for detailed metallic touches.
Tip: Try mixing chrome with anodized or polished parts. This creates a layered look that feels both modern and timeless.
Reflective Tape
Reflective tape gives your bike both style and safety. You can add strips of tape to your frame, rims, or even your helmet. The tape shines brightly when car headlights or street lamps hit it. This makes you much easier to see at night or in low light.
Reflective tape offers many benefits:
Increases your visibility and helps keep you safe on the road.
Comes in many colors and sizes, so you can match your bike’s look.
Made from tough, weather-resistant materials that last through rain, snow, and sun.
Easy to apply and remove, so you can update your design anytime.
Works on frames, wheels, helmets, and even clothing.
Callout: Reflective tape does more than just look cool—it helps drivers see you from far away. You ride with confidence, knowing you stand out day or night.
You can make your bike special in your own way. Pick new colors or patterns to try out. Use custom bike frames to show your style. Let your creative ideas stand out. Share what you make with friends or post it online. You might help others start making their own cool bikes.
Remember: Making your bike your own is simple and fun. Every time you ride, you get to enjoy your own creative work.
FAQ
How do I start customizing my bike frame?
Begin with one small change. Pick a color or add a sticker. You do not need special tools. Every step you take shows your creativity. Your bike becomes your canvas. You inspire others with your unique style.
Tip: Start simple. Grow your ideas as you gain confidence!
Can I customize my bike if I have no art skills?
Absolutely! You do not need to be an artist. Use decals, stickers, or colored tape. These options let you express yourself. Your bike will look amazing because it reflects you. Every creative choice matters.
What materials work best for custom bike designs?
You can use vinyl decals, spray paint, reflective tape, or paint pens. High-quality materials last longer and look better. Choose what fits your vision. Your bike deserves the best you can give.
Material | Best For |
|---|---|
Vinyl Decals | Easy graphics |
Spray Paint | Bold colors |
Reflective Tape | Night visibility |
Paint Pens | Fine details |
Will custom designs affect my bike’s performance?
Most customizations do not change how your bike rides. Lightweight materials keep your bike fast. If you add heavy parts, you might feel a small difference. Focus on what makes you happy and confident.
How do I protect my custom bike art?
Apply a clear coat over paint or decals. Store your bike indoors when possible. Clean it gently with mild soap. Your care keeps your design bright and fresh.
Note: Regular cleaning helps your bike shine every day!
See Also
Top Tips For Selecting The Perfect Lowrider Frame
A Guide To Finding The Ideal Bike Frame Fit
Key Factors That Determine Your Best Bike Frame