
Are you ready to make your bike frame look new? Sand blasting your bike frame is a great way to refresh your ride. This process takes off old paint, stops rust, and prepares the surface for a new coat. You will see a big change in how it looks and lasts. Get excited about turning your bike frame into a beautiful work of art!
Key Takeaways
Clean your bike frame well before sand blasting. Use warm, soapy water and a soft brush to get rid of dirt. This helps make a smooth finish.
Cover sensitive parts of your bike frame with vinyl and electrical tape. This stops damage during sand blasting.
Pick the right abrasive for your bike frame material. Use sand for steel, walnut shells for aluminum, and glass beads for fragile surfaces.
Keep a steady distance of 12 to 18 inches from the frame while sand blasting. This helps prevent damage and gives an even finish.
Check the frame after sand blasting for cracks and flaws. Clean it well and think about adding a protective finish like powder coating.
Preparing the Bike Frame
Before you start the sand blasting process, you need to prepare your bike frame properly. This step is crucial for achieving a smooth and even finish. Let’s dive into how to clean your frame and protect its sensitive areas.
Cleaning the Frame
Start by giving your bike frame a thorough cleaning. Here’s a simple step-by-step guide to help you:
Use warm water mixed with mild soap to wash the frame. Grab a soft brush to scrub away any grime, and dry it off with a microfiber cloth.
If you encounter stubborn grease, a citrus-based degreaser works wonders. It’s effective and safe for metal surfaces.
For those tough spots, bike-specific wipes can be handy. Make sure to use both the scrubby and soft sides for the best results.
Rinse the frame thoroughly to remove any soap or cleaner residue.
Finally, inspect the frame for rust, cracks, or dents. Repair any issues before moving on.
Industry experts say that prepping a bike frame with careful cleaning and inspection is the key to a strong, even finish.
Protecting Key Areas
While cleaning is essential, protecting sensitive areas of your bike frame during sand blasting is just as important. You don’t want to accidentally damage parts that shouldn’t be blasted. Here are some effective materials to use:
Use vinyl with adhesive on one side to cover the areas you want to protect.
Apply electrical tape over the vinyl. This absorbs energy and prevents it from being sandblasted away.
The vinyl helps keep the adhesive from embedding into the metal, making removal easier later.
By taking these steps, you ensure that your bike frame is ready for the sand blasting process. Proper preparation not only protects your bike but also enhances the final result.
Selecting Sandblasting Equipment
Choosing the right equipment for sand blasting your bike frame is very important. The kind of abrasive you pick can change how well it works. Also, the pressure you use is key to avoiding damage. Let’s look at these two important parts.
Recommended Abrasives
Different materials need different abrasives. Here are some common choices for sand blasting bike frames:
Sand: This is the usual abrasive. It works well for cleaning steel frames. But, it can be too rough for softer materials.
Walnut Shells: This choice is great for aluminum or titanium frames. It is gentler and helps prevent scratches or damage.
Glass Beads: If you have delicate materials, glass beads are a softer option. They clean surfaces without hurting them.
Remember, using the right abrasive protects your bike frame and gives a smooth finish. For aluminum parts, always choose softer media like walnut shells to avoid work-hardening and cracking.
Operating Pressure
Operating pressure is another key part of sand blasting. You need to find a balance between being effective and safe. Here’s what to know:
The best pressure for sand blasting bike frames is usually between 90 to 100 PSI. This range has enough force to remove unwanted stuff without harming the frame.
Using too much pressure can cause surface damage, especially on softer materials like aluminum.
Experts say to stick to this pressure range for the best results. It helps you clean or etch surfaces well while reducing risks.
By picking the right abrasives and keeping the right operating pressure, you prepare yourself for success in the sand blasting process. This preparation helps you get a beautifully restored bike frame that looks and feels brand new.
Setting Up the Workspace
Making a safe and tidy workspace is very important for sand blasting your bike frame. It keeps you safe and helps everything go well. Let’s see what you need to do.
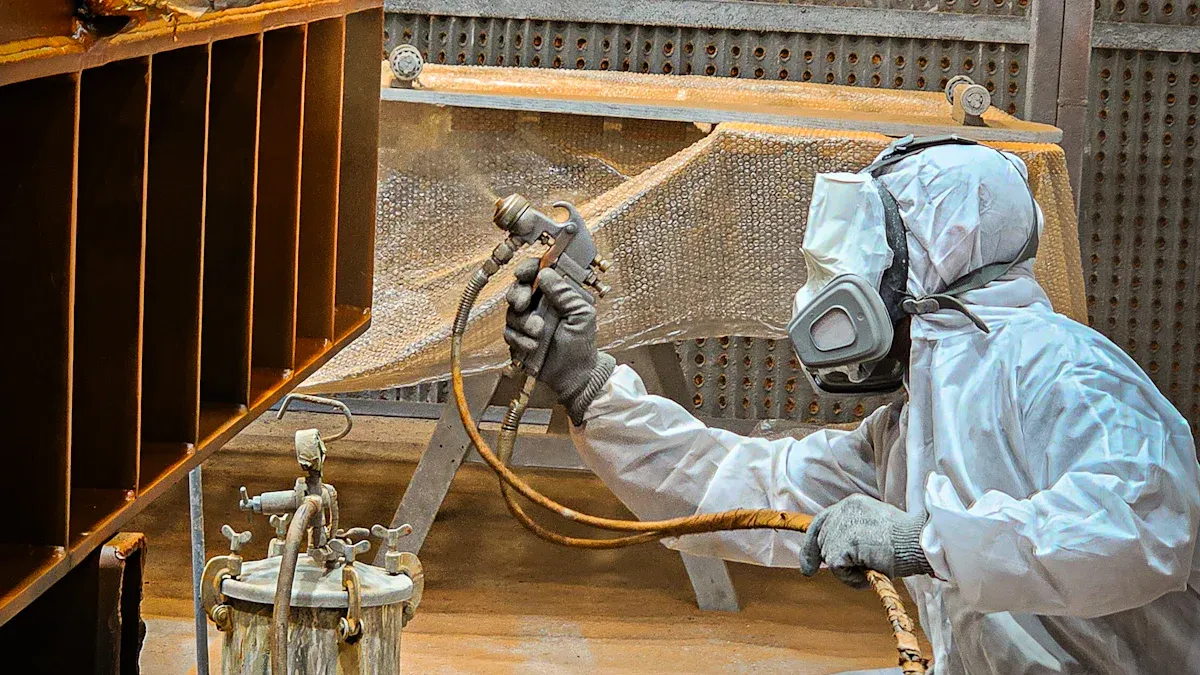
Safety Gear
Before you begin, check that you have the right safety gear. This gear keeps you safe from harmful dust and debris. Here’s a list of important items:
Safety Gear Item | Description |
|---|---|
Long-sleeved shirts | Protects your skin from abrasives and possible hose explosions. |
Long pants | Gives extra protection against flying debris and abrasives. |
Professional sandblasting suits | Best for maximum protection during sandblasting work. |
Dust mask | At least, a dust mask is needed to stop harmful dust from being inhaled. |
Dual respirator filter mask | Better for protecting your lungs from harmful dust. |
Protective goggles/glasses | Important to keep your eyes safe from flying debris and harmful dust. |
Air-supplied helmets | Good for extra safety, especially in small spaces. |
Remember, a suit that doesn’t fit well can be uncomfortable and may cause safety problems during sandblasting.
According to OSHA, employers must use controls to lower silica dust exposure and teach about silica dangers. This means you should always work in places with good airflow to reduce harmful dust particles.
Workspace Organization
A neat workspace can really help your speed and safety. Here are some tips to keep your area clean:
Advanced Dust Control: Use systems that catch and filter dangerous particles. This makes the air better and keeps you safe.
Enhanced Worker Safety: Set up ventilation systems and protective barriers to keep a safe working area.
Strategic Layout: Organize your tools and materials in a smart way. This cuts down on tiredness and helps you work better.
By following these tips, you’ll make a safe and effective space for sand blasting your bike frame. A well-organized workspace not only keeps you safe but also improves the quality of your work.
Executing the Sand Blast Bike Frame Process
Now that you have cleaned your bike frame and set up your workspace, it’s time to start sand blasting. This step can really change how your bike frame looks. Let’s look at some good sandblasting methods and how to check your work to avoid damage.
Sandblasting Techniques
To get the best results when sand blasting your bike frame, use these techniques:
Keep a Steady Distance: Hold the nozzle about 12 to 18 inches away from the surface. This distance helps you avoid focusing the abrasive in one spot, which can cause damage.
Move Steadily: Move the nozzle in a smooth, sweeping motion. Don’t stay too long in one spot. This method helps create an even finish and stops unwanted patterns.
Change the Angle: Adjust the nozzle angle as you work. This change helps you reach all parts of the frame and makes sure you’re not blasting directly into corners or crevices, which can cause uneven wear.
Practice on Scrap Metal: Before you start on your bike frame, practice on a scrap piece of metal. This practice helps you understand the pressure and distance needed for good blasting.
Choose the Right Abrasive: As mentioned before, pick an abrasive that fits your bike frame material. For example, walnut shells are good for aluminum, while sand works well for steel. Using the wrong abrasive can cause serious damage.
Remember, using the wrong abrasive can cause problems like weakening the frame or leaving ugly marks.
Monitoring Progress
While you sand blast your bike frame, it’s important to watch your progress closely. Here are some signs to check:
Indicator | Description |
|---|---|
Mean Roughness Depth Rz | Measures how rough the surface is after blasting. |
Waviness | Shows the larger bumps on the surface. |
Structure | Refers to the overall pattern or texture of the surface. |
Defects | Finds any flaws or irregularities on the surface. |
Stresses | Looks at the internal stresses in the material. |
You should also do regular checks during the process. Here’s a suggested schedule:
Interval | Description |
|---|---|
Daily | Quick visual check for wear, tears, and proper working of lights and ventilation. |
Weekly | Detailed check of hoses, nozzles, filters, and PPE condition. |
Monthly | In-depth checks for wear, structural strength, and how well the ventilation system works. |
Quarterly | Full review of high wear areas and preventive maintenance steps. |
By watching these signs, you can catch problems early. This carefulness helps you avoid common mistakes, like using the wrong abrasive or wrong pressure settings.
Common mistakes to avoid include:
Using the wrong abrasive, which can harm the surface.
Wrong pressure settings that lead to bad results.
Unsteady technique, which can create uneven surfaces.
Skipping surface preparation, which is key for good sandblasting.
By following these methods and checking your progress, you’ll make sure that your sand blast bike frame process goes well and results in a nicely restored frame.
Finishing and Cleaning the Frame
After you finish sand blasting your bike frame, check it carefully. This step helps you find any problems before you add the final touches. Here’s how to do it.
Inspecting the Frame
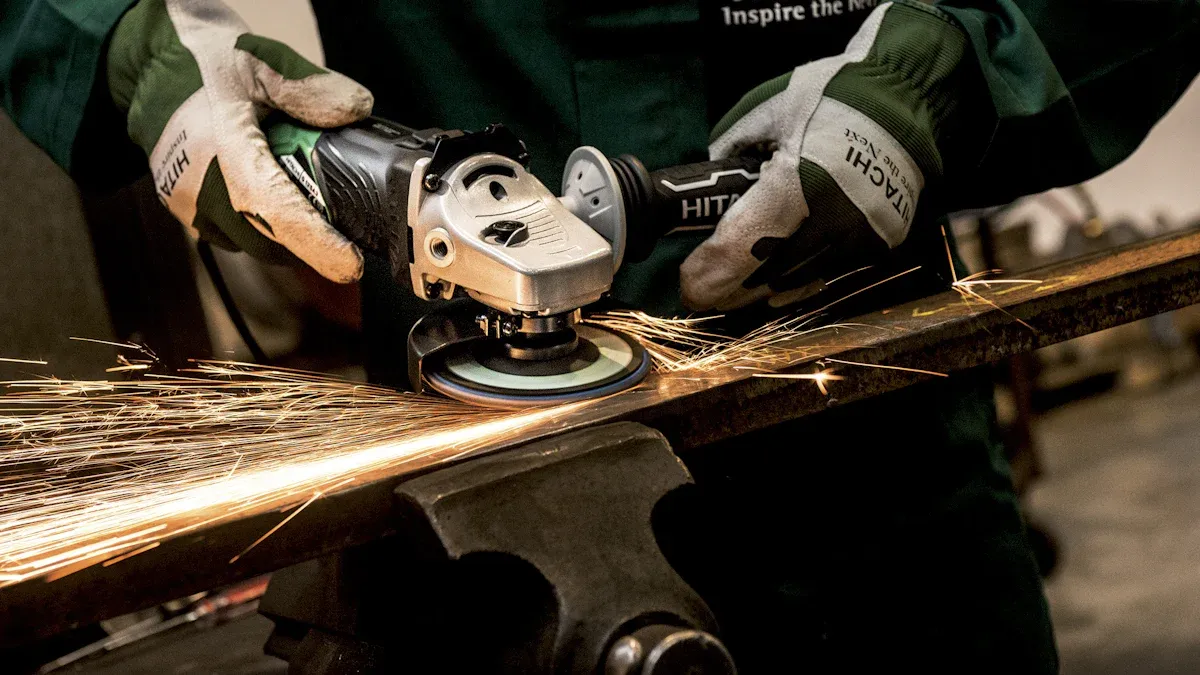
Start by looking for cracks. Check every part of the tubing and each weld closely. If you see any cracks, fix them right away. Next, get rid of any weld splatter. You can sand, file, or chisel it off to make a clean surface. Try to make it look good without hurting the frame’s strength.
Here’s a quick inspection checklist:
Inspection Step | Description |
|---|---|
Check for cracks | Look at every part of the tubing and each weld for any cracks. |
Remove weld splatter | Sand, file, or chisel off any weld splatter to keep the surface clean. |
Visual appeal | Make the raw steel and welds look nice without hurting the frame’s strength. |
Grind or sand welds | Carefully grind or sand down any high spots in a weld, but don’t make them smooth. |
Inspect bolt holes | Use a tap to clean any rusty or poorly tapped bolt holes in the frame. |
Feel for imperfections | Use your hands to feel the metal for any problems that you can’t see. |
Post-Sandblasting Cleaning
After you check the frame, it’s time to clean it well. This step gets rid of any dust or debris from the sand blasting. Use a soft cloth and a mild cleaner to wipe down the whole frame. Be sure to clean all the small spaces.
After cleaning, think about applying a finishing process to improve both strength and look. Here are some popular choices:
Durability: Powder coating makes a thick layer that protects against scratches and hits.
Rust and Corrosion Resistance: It seals the metal, stopping moisture from causing rust, which is important for bikes in wet weather.
Chemical and UV Resistance: The coating stays strong and doesn’t fade quickly, keeping the bike looking good over time.
Customization Options: Powder coating comes in many colors and finishes, letting you personalize your bike frame.
By following these steps, you’ll make sure your bike frame looks great and lasts a long time.
In short, sandblasting your bike frame can really help with restoration. Here are some important benefits:
Speed and Efficiency: Sandblasting cleans big areas fast.
Precision: You can control how much material is removed, keeping the metal safe.
Uniform Finish: It makes a smooth surface for new paint.
Corrosion Prevention: It gets the frame ready for protective layers.
Don’t forget to think about the environment, like waste and dust control, when you sandblast. With the right steps, you can have a beautifully restored bike frame that lasts for years! 🚴♂️
Environmental Consideration | Description |
|---|---|
Waste Management | Good practices help reduce environmental harm. |
Dust Control Measures | Important to lower airborne dust. |
Regulatory Compliance | Follow local rules for air quality. |
FAQ
What safety gear do I need for sandblasting my bike frame?
You need to wear long-sleeved shirts, long pants, a dust mask, protective goggles, and a special sandblasting suit. This gear keeps you safe from harmful dust and debris while you work.
How do I choose the right abrasive for my bike frame?
Pick an abrasive based on what your frame is made of. Use sand for steel, walnut shells for aluminum, and glass beads for delicate surfaces. Choosing the right one helps avoid damage and gives a smooth finish.
Can I sandblast my bike frame at home?
Yes, you can sandblast at home if you have the right tools and a safe place to work. Make sure there is good airflow and follow safety rules to keep yourself and your area safe.
How long does the sandblasting process take?
The time it takes depends on how your frame looks and its size. Usually, plan for 1 to 3 hours for a good sandblasting. Always check your progress to avoid going too far.
What should I do after sandblasting my bike frame?
After sandblasting, check the frame for cracks and clean it well. Think about putting on a protective finish, like powder coating, to make it stronger and look better.
See Also
Achieve Bike Frame Powder Coating Success in Three Steps
Proven Methods to Eliminate Rust From Your Bike Frame
Essential Advice for Safely Painting Carbon Bike Frames