
Have you ever thought about transforming your old MTB frame into a gravel bike? It’s a fun project that breathes new life into your gear. Converting your bike into something new saves money and provides you with a unique ride tailored just for you. Imagine cruising the trails on a custom gravel bike from an MTB frame. You’ll be prepared for any adventure. So, clean off that old frame and get ready to create something amazing!
Key Takeaways
Changing an old MTB frame into a gravel bike is a fun and cheap project. It lets you create a bike just for you.
Check your frame’s material and size carefully. This helps keep you safe and comfortable. Aluminum frames are cheap and strong. Carbon frames are light and perform well.
Upgrade to hydraulic disc brakes. They give you better stopping power and control on bumpy paths. Think about a wide gear range in your drivetrain. This helps you ride on different surfaces.
Change your handlebars and seatpost for more comfort. Wider handlebars help you steer better. Suspension seatposts soak up bumps for a smoother ride.
Pick the right tires for your gravel bike. Wider tires give you better grip and comfort. You might want tubeless tires to lower the chance of flats.
Frame Assessment
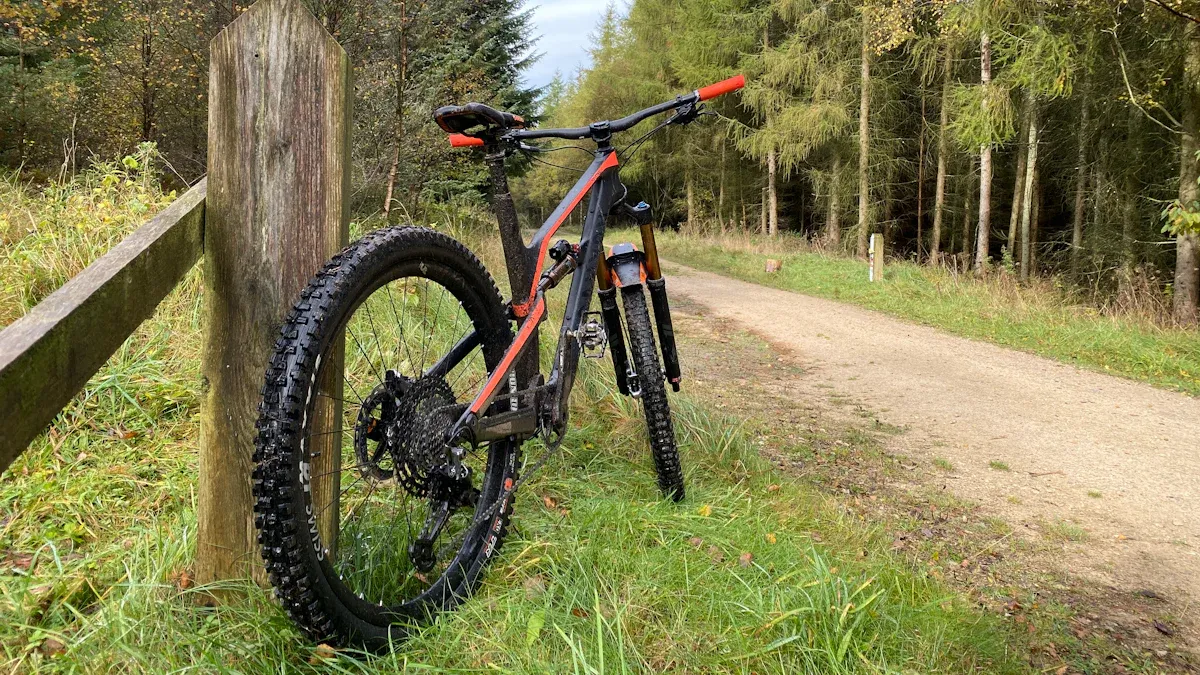
Before you start changing your MTB frame into a gravel bike, check the frame carefully. This step is very important to make sure your new bike is safe, comfy, and good for gravel riding.
Material and Size
First, clean your frame well. A clean frame helps you see any damage or wear that might affect your ride. Here’s how to clean your MTB frame properly:
Pre-Rinse: Lightly rinse the frame to get rid of loose dirt.
Soap Application: Use soap made for bikes and let it sit for a few minutes.
Scrubbing: Use a soft brush to scrub hard-to-reach spots.
Rinse Again: Make sure all soap and dirt are gone.
Inspect: Look for cracks or rust that could weaken the frame.
After cleaning, check the material and size. Different materials have their own pros and cons:
Frame Material | Advantages | Disadvantages |
|---|---|---|
Aluminum | Strong, affordable, good for long rides, can carry bags | Heavier than carbon, fewer part choices |
Carbon | Light, stiff, very customizable, good power transfer | More costly, less tough in crashes |
Aluminum frames are usually cheaper, making them a smart choice if you want to save money. They can handle long trips and carry extra gear, which is great for gravel rides. Carbon frames are lighter and give better power transfer, but they cost more.
When it comes to size, having the right bike fit is key for comfort and performance on gravel. Here are some important points to think about:
The head tube angle affects how quickly you steer. A steeper angle helps with quick turns, while a slacker angle gives stability on bumpy ground.
The seat tube angle affects your position over the pedals, which impacts power and comfort.
A longer wheelbase makes for a steadier ride, which is helpful on gravel.
Choosing the right size helps you avoid discomfort on long rides. A bike that is too big can cause overextension, while a smaller bike can lead to cramping. Both situations can ruin your ride and raise the chance of injury.
Geometry Considerations
Next, think about the geometry of your frame. Gravel bikes usually have a more relaxed shape than regular mountain bikes. This design makes them more stable and comfy on rough surfaces. Here’s how gravel bike geometry is different from MTB frames:
Feature | Gravel Bike | Mountain Bike |
|---|---|---|
Rider Position | More upright for comfort | Forward-leaning for control |
Frame Design | Less aggressive, made for endurance | Aggressive, made for tricky handling |
Stability | Longer chainstays and wheelbases for stability | Focuses on maneuverability over stability |
Tire Accommodation | Wider tires up to 45mm for mixed terrain | Made for wider tires, often with suspension |
These geometry features make gravel bikes better for gravel riding. They provide a more comfortable and stable ride, especially on uneven ground.
Components for Gravel Bike from MTB Frame
When you change your MTB frame into a gravel bike, it’s important to upgrade some parts. This helps with performance and safety. Two main areas to focus on are the brakes and the drivetrain. Let’s look at what you need to know!
Braking System Upgrades
Switching to disc brakes is one of the best changes you can make. They give you better stopping power and control, especially on rough ground. You have two main choices: hydraulic disc brakes and mechanical disc brakes.
Hydraulic Disc Brakes:
They are more powerful and give better control.
They are lighter and transfer force better.
They work well in all weather.
They adjust themselves for pad wear, so they perform well.
Mechanical Disc Brakes:
They are easier to fix and maintain.
They have less stopping power than hydraulic brakes.
They may not work as well if the hydraulic brakes fail.
For gravel riding, hydraulic disc brakes are usually the best choice because they perform better. But if you need to save money, mechanical brakes can still work.
Drivetrain Options
Next is the drivetrain. A wide gear range is important for different types of terrain. You want to climb steep hills while still going fast on flat areas. Here’s what to think about:
A wide gear range helps you stay seated when climbing. This is important for keeping traction on loose surfaces.
Common setups include wide-range cassettes, like 11-42 or 11-50 teeth, with 1x drivetrains or compact chainrings. This setup gives you the climbing gears you need without losing speed.
Modern parts can really boost your gravel bike’s performance. For example, think about getting a lightweight wheelset like the Logos Epoché 700c. It’s made for gravel riding and fits wider tires, improving your ride. Also, a strong bottle cage like the Wolf Tooth Morse Cage Ti can add convenience without much extra weight.
By focusing on these upgrades, you’ll make sure your gravel bike from an MTB frame is safe and ready for any adventure!
Comfort Adjustments
When you ride on gravel, being comfortable is very important. Changing your bike’s shape can really help how you feel on long rides. You want to make sure it is stable, fits well, and handles nicely. Here are some tips to adjust your handlebars and seatpost for a better ride.
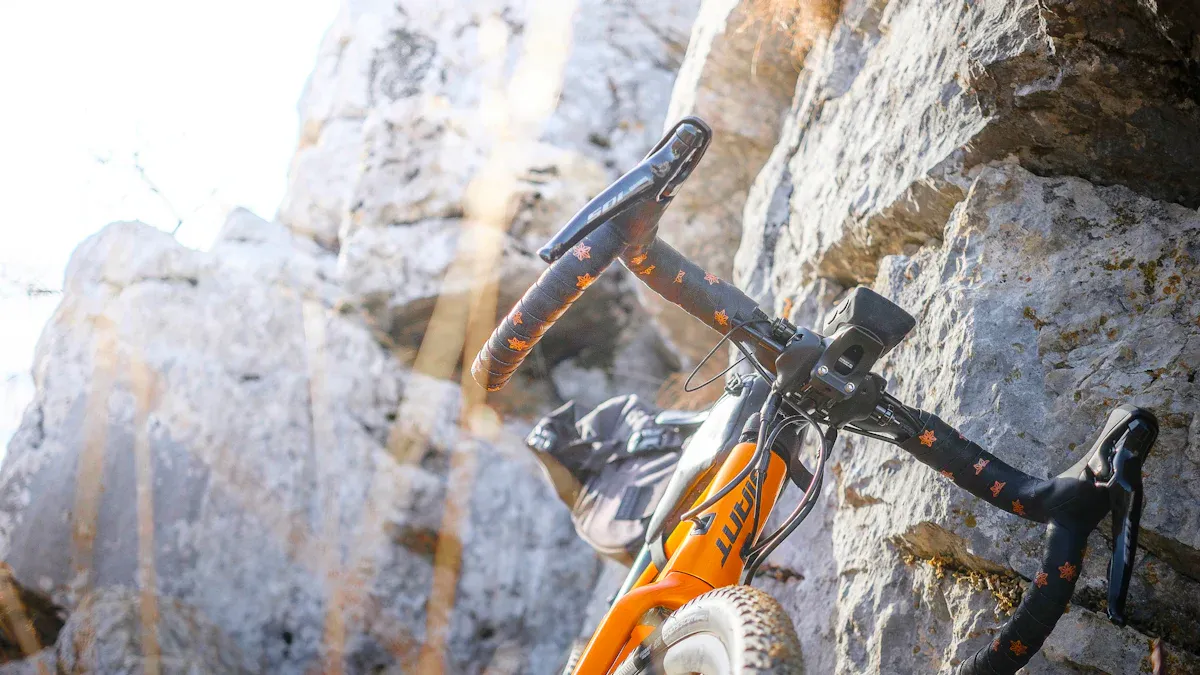
Handlebar Changes
Changing your handlebars can really help with comfort and control. Different styles have their own benefits. Here’s a quick look at some popular handlebar types for gravel riding:
Handlebar Style | Key Features | Preferred Use Case |
|---|---|---|
Drop Bars | Multiple hand positions, aerodynamic benefits | When you want different hand placements and a lower torso position |
Alt Gravel Handlebars | Comfort, stability, control, wider for bags and navigation devices | For comfort and control, especially with a loaded front end |
Wider handlebars can help you control your bike better on rough ground. They give you more stability but may need more strength in your arms. If you keep your elbows out, it will be easier to handle bumps from the ground. Just remember, while wider bars help with control, they can also put more strain on your shoulders.
Seatpost Adjustments
Your seatpost is very important for comfort, especially on bumpy gravel roads. Think about these features when picking a seatpost:
Increased Vertical Deflection – This feature helps absorb big bumps, making rides less tiring on rough surfaces.
Enhanced Damping – It reduces vibrations from the road, giving you a smoother ride.
You might want to look into suspension seatposts. They soak up shocks and vibrations, which is great for gravel riding. They use designs that lessen impacts, allowing for a smoother ride over uneven ground. Here’s a quick comparison:
Feature | Suspension Seatposts | Rigid Seatposts |
|---|---|---|
Ride Comfort | High – absorbs bumps and vibrations | Moderate – less comfort on rough terrain |
Riding Efficiency | Slight energy loss due to absorption | High – more efficient for performance |
Weight | Heavier – adds 300g to 600g or more | Lighter – usually the lightest option |
Cost | Higher initial cost | Lower initial cost |
Maintenance | Needs occasional service | Low maintenance |
By making these changes, you’ll feel more comfortable on gravel rides. A bike that fits well can really make a difference, letting you enjoy your adventures without pain.
Tire Selection for Gravel Bike
Picking the right tires for your gravel bike is very important. The width and tread of your tires can change how well you ride on rough ground.
Tire Width and Tread
For tire width, wider tires are usually better. They fit the gravel surfaces well, which helps with grip and makes you feel more confident while riding. Here are some good things about wider tires:
Grip: They give better traction on loose gravel.
Speed: They don’t slow you down much, so you can keep speed on rough ground.
Comfort: Lower pressure in wider tires helps absorb bumps, making your ride smoother.
Now, let’s look at tread patterns. The right tread can change how your bike rides. Here’s what to remember:
Aggressive tread patterns with deep grooves help with traction on loose ground.
But, these patterns can make it harder to roll due to more friction.
Smoother tread patterns make it easier to roll, which helps on harder surfaces.
Interestingly, on gravel, the tread’s effect is not as big as you might think. The rocks underneath often affect grip more than the tread itself. Some racers even use slick tires and do well, showing that tread design may not matter as much as we thought.
Tubeless vs. Tubed
Now, let’s look at the choice between tubeless and tubed tires. Tubeless tires are becoming popular for good reasons. Here’s a quick look at their pros and cons:
Pros | Cons |
|---|---|
Fewer flats because there are no pinch flats | Higher initial cost |
Better ride quality with lower pressure | Longer installation time |
Weight savings since there are no tubes | Need to carry a tube for emergencies |
Improved traction and comfort | Messy sealant application process |
Tubeless tires do not have an inner tube, which lowers the chance of pinch flats. They also seal small holes by themselves because of the liquid sealant inside. This means you can ride longer without worrying about fixing flats. Riders often say they have fewer small flat issues with tubeless tires.
On the other hand, tubed tires are usually easier to put on and take care of. However, they can get more flats, especially on rough gravel roads. If you want a reliable and comfy ride, think about getting tubeless tires for your gravel bike.
Final Testing and Adjustments
After you’ve transformed your MTB frame into a gravel bike, it’s time for some final testing and adjustments. This step is crucial to ensure your bike is safe and ready for your next adventure.
Safety Checks
Before you hit the trails, perform a thorough safety check. Here’s a quick list of what to inspect:
Wheels: Make sure the wheels are tightly fitted and the spokes are secure. Check the tire pressure too.
Saddle: Confirm that the saddle is secure and functioning properly.
Bike Chain: Inspect the chain for cleanliness and lubrication.
Pedals: Check for any sideways movement and ensure they spin freely.
Handlebars: Ensure the handlebars are tight and straight.
Brakes: Test the brakes to ensure they engage properly.
You should perform these checks before each ride. Keeping your bike in top shape helps prevent accidents and ensures a smooth ride. If you notice anything off, fix it before you go out.
Test Ride Feedback
Once you’ve completed your safety checks, it’s time for a test ride. Pay attention to how your bike feels and performs. Collect feedback on the following:
Tire Selection: How do the tires handle on different surfaces? Are they providing the grip you need?
Drivetrain Efficiency: Is the bike shifting smoothly? Any delays or issues?
Braking Performance: Do the brakes engage smoothly? Are they responsive enough for your riding style?
After your test ride, you might want to make some adjustments. Common changes include:
Tire Changes: Switching tires can significantly affect your ride feel.
Wheel Upgrades: New wheels can enhance speed, though they might be a bit pricey.
Geometry Adjustments: While you can’t change the frame geometry, you can tweak other components for better comfort.
Remember, consistent training also plays a big role in performance. Don’t rely solely on equipment upgrades; your skills matter too! By taking the time to test and adjust your bike, you’ll ensure it’s ready for all the gravel adventures ahead.
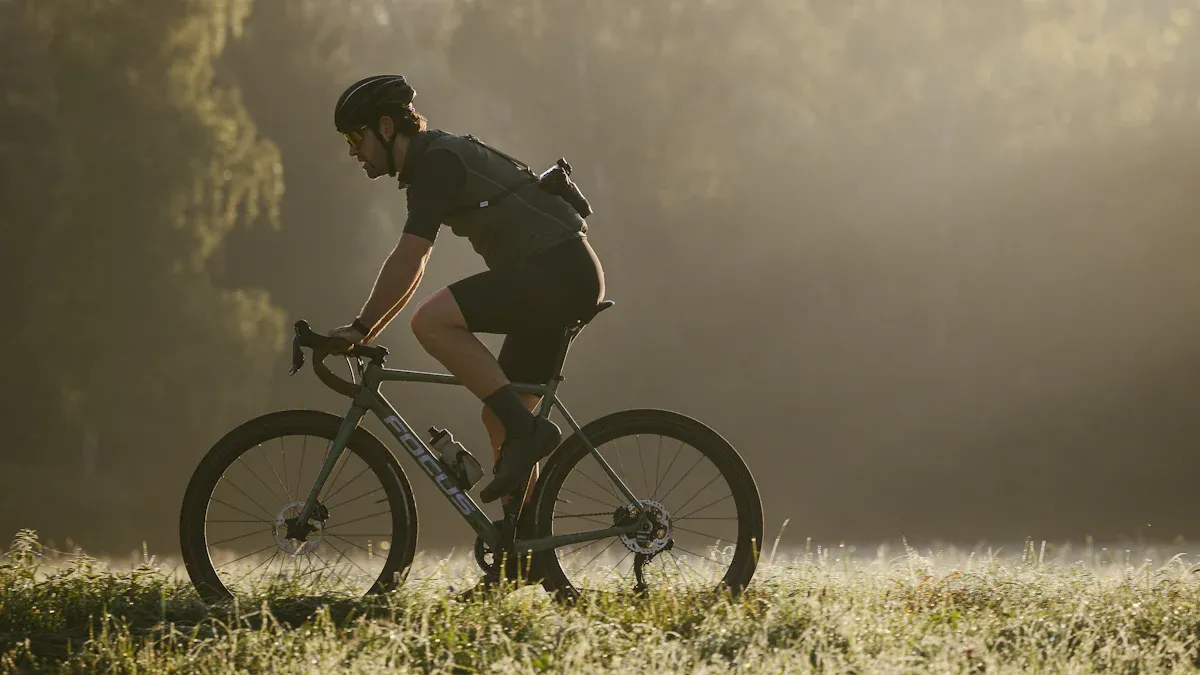
Changing your MTB frame into a gravel bike is a fun project. You’ve learned how to check your frame, improve parts, and make it more comfortable. Now, it’s time to ride on the trails!
If you want to save money, look at trusted Chinese suppliers like Xiamen Hualong or Tianjin Hengtai. They sell good frames for lower prices. Many riders say these frames are dependable and perform well.
So, grab your tools, be creative, and enjoy every ride on your new gravel bike! 🚴♂️
FAQ
What are the benefits of converting my MTB frame to a gravel bike?
Changing your MTB frame into a gravel bike gives you a special ride just for you. You save money and reuse old gear, making it a fun project. Plus, you can ride on different terrains with confidence!
Can I use a hardtail mountain bike for gravel riding?
Yes! A hardtail mountain bike is great for gravel riding. Its light frame and good power transfer make it good for mixed terrains. Just make sure to adjust it for comfort and performance.
How do I choose the right tires for my gravel bike?
For gravel riding, choose wider tires with a tread pattern that fits your terrain. Wider tires give better grip and comfort. Think about tubeless options for fewer flats and a better ride.
What should I check during my final safety inspection?
During your final safety check, look at the wheels, brakes, saddle, chain, and handlebars. Make sure everything is tight and working well. This step is very important for a safe and fun ride.
Where can I find reliable suppliers for gravel bike frames?
You can find trusted Chinese suppliers like Xiamen Hualong and Tianjin Hengtai. They sell good frames at lower prices. Many riders say these frames work well and are dependable, making them a smart choice for budget-friendly cyclists.
See Also
Crucial Tips For Protecting Your Bike Frame Effectively
Key Insights For Building A Gas Bike Frame
Easy Methods To Safeguard Your Bike Frame