
To build up a bike, you need a few essential tools and bike frame building supplies. Start with mitering tools like tube blocks, a pipe cutter, and hand files. Use deburring tools and sandpaper for tube preparation. Simple fixtures help keep tubes in place. A brazing torch lets you join the frame. Choose steel or aluminum for your first bike. When you build up a bike, focus on a basic design and practice each step. Anyone can start building a bike frame with patience and the right tools.
Key Takeaways
Begin your bike frame project with a simple plan. Make sure your measurements are correct. This helps your frame stay strong and safe.
Pick the best materials for your bike. Steel is easy to use and feels smooth. Aluminum is light. Titanium lasts a long time. Choose what fits your needs and budget.
Use important tools like measuring tools, tube cutters, a brazing torch, and a frame jig. These help you build and line up your frame the right way.
Work in a clean place with good light. Always wear safety gear like gloves, glasses, and masks. This keeps you safe while you build.
Start with easy builds to learn new skills. This helps you make fewer mistakes and save money. Try harder bike frames when you are ready.
Bike Building Basics
Frame Design
You start every bike project by planning your frame design. Draw your frame on paper or use free software like BikeCAD. Think about the shape and size of each tube. You need to decide how long the seat tube and top tube should be. Make sure your drawing matches the type of bike you want to build. Good design helps your frame last longer and perform better. Strong joints and smart tube placement keep your bike safe when you ride over bumps or take sharp turns.
Tip: Begin with a simple drawing. Measure twice before you cut any tubes.
Geometry and Intended Use
Geometry shapes how your bike feels and handles. Road bikes have steeper seat tube angles, usually around 73°, which puts you over the pedals for fast riding. Touring bikes use slacker angles for comfort and stability. Mountain bikes need short chainstays and higher bottom brackets for rough trails. Cyclocross bikes have quick handling and extra clearance for mud. The table below shows how geometry changes for different bike types:
Geometry Aspect | Touring Bikes | Road Bikes | Aero/Triathlon Bikes | Cyclocross Bikes |
|---|---|---|---|---|
Seat Tube Angle | 72°-74.5° | ~73° | 76°-78° | Similar to road |
Chainstay Length | 450-460mm | Shorter | Shorter | ~430mm |
Fork Trail | 60-70mm | 45-60mm | Aero stability | Twitchier |
Bottom Bracket Drop | ~75mm | 65-70mm | Similar to road | 55-65mm |
Wheelbase | Longer | Shorter | Shorter | Shorter |
Choose your geometry based on how you plan to use your bike. If you want comfort for long rides, pick a touring frame. For speed, use road bike geometry.
Simple vs. Complex Builds
Simple builds, like singlespeed bikes, need fewer parts and less time. You can finish a basic bike in about two to three hours. You only need basic tools such as Allen keys and a torque wrench. Complex builds, like full suspension mountain bikes, take more time and skill. You need special tools and patience. These builds cost more because you buy extra parts and sometimes pay for shop labor. If you are new to bike building basics, start with a simple frame. Practice your skills before you try a complex project.
Note: Simple builds help you learn faster and avoid frustration. You save money and gain confidence with each step.
Bike Frame Building Supplies
You need the right bike frame building supplies to build a bike at home. Each tool helps you measure, cut, join, and finish your frame. The right tools and parts make your project easier and safer. Here is what you need to begin:
Measuring Tools
Measuring tools are very important for every bike frame project. You must measure tubes and angles very carefully. Most builders try to get within ±1 mm and ±1°. Digital vernier calipers are great for checking tube diameters and lengths. These calipers can measure very small amounts, down to 0.01 mm. This helps you match parts like seatposts and stems. Digital angle finders, like the Wixey WR300, help you check tube angles with 0.1° accuracy. You can set these tools to zero on a flat surface for good readings. Some digital angle finders from hardware stores cost less. Some people use bevel gauges, but digital tools are faster and easier for most people.
Tip: Always check your measurements twice before you cut. Good measuring tools help you avoid big mistakes.
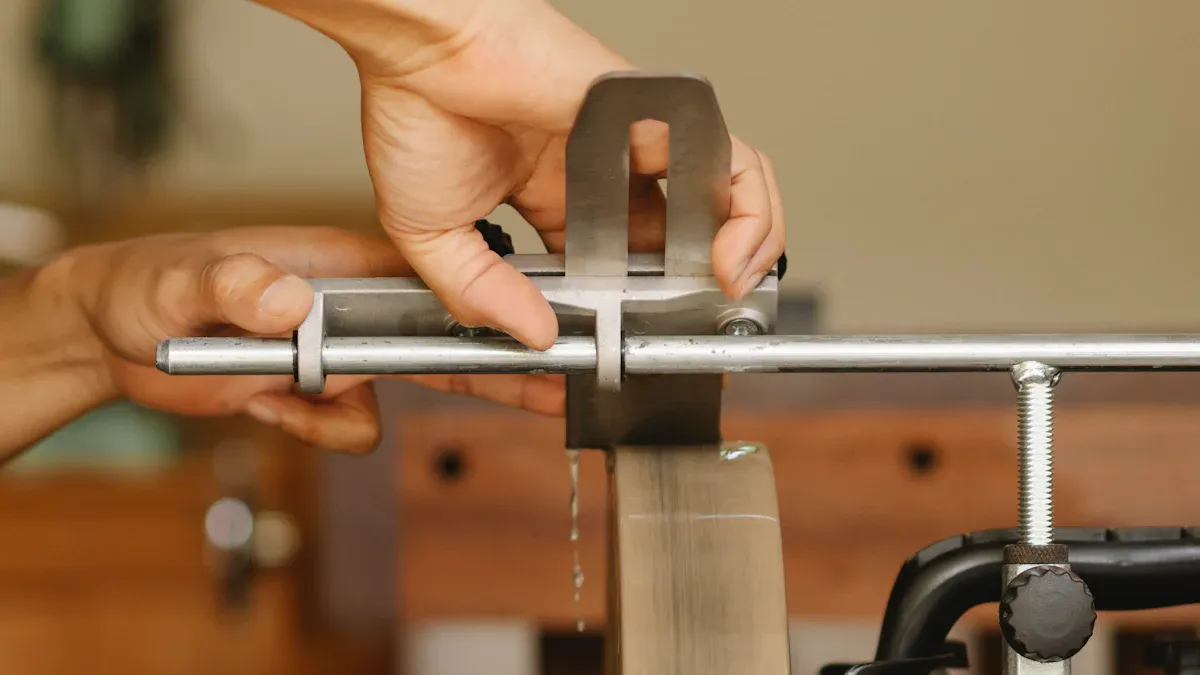
Tube Cutters and Miters
Cutting and shaping tubes is a big part of frame building. You need to shape tube ends so they fit together well. Tube notchers like the Anvil Tube Mitering Jig work for soft steel tubes. These tools hold the tube and help you cut good joints. If you want to save money, you can use hand files and paper templates for small tubes. This takes more time but helps you learn new skills. The Sync180Jr tube notcher is a good choice for beginners. Make sure your tube clamp holds the tube tight but does not crush it. You can use shims or soft jaws to protect thin tubes. For best results, put your notcher on a strong workbench and use a variable speed drill. Professionals use milling machines for perfect cuts, but these cost a lot and take up space.
Note: Try hand mitering on scrap tubes before you work on real parts. This helps you get better and feel more confident.
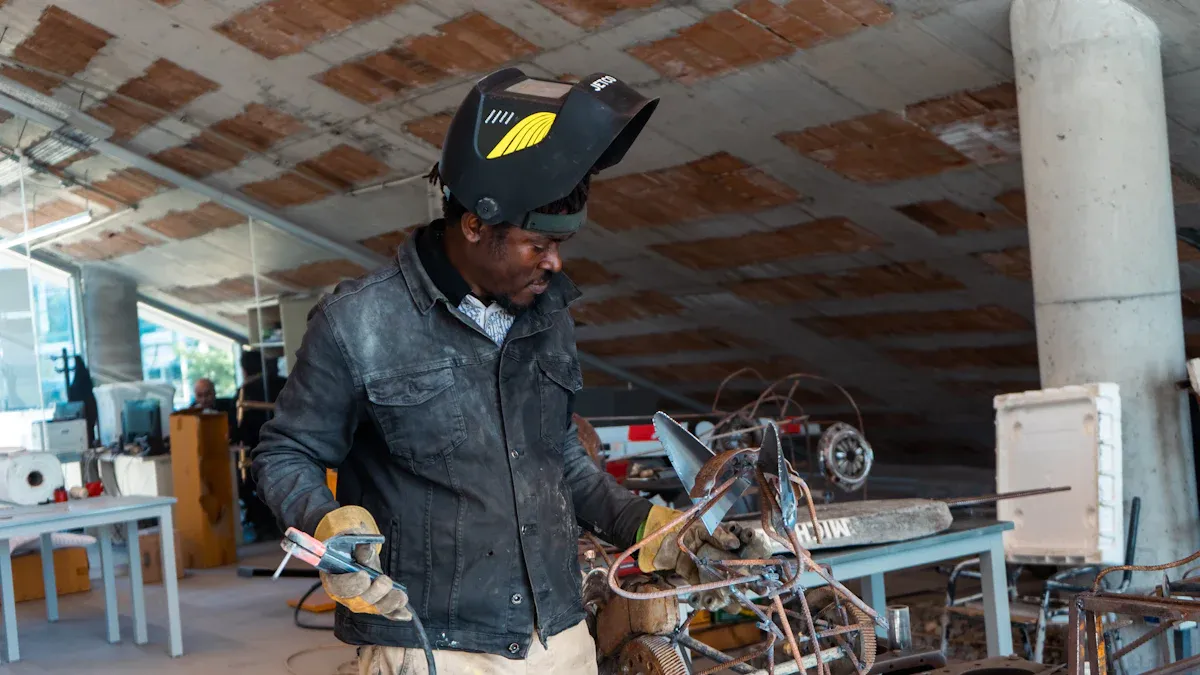
Welding and Brazing Equipment
You need heat to join tubes together. Most people use brazing or welding to connect frame parts. For brazing, you need a torch, regulators, flashback arrestors, check valves, and light hoses. Always use check valves and flashback arrestors to stop dangerous backfires. Light torch handles and hoses make it easier to control the flame. Propane with an oxygen concentrator is safer and easier than oxy-acetylene for home use. Good airflow is important because brazing makes fumes. Use cadmium-free silver alloys for safety, and always follow the instructions on your flux and filler. Learning to braze takes practice, so think about taking a class or finding a mentor.
Safety First: Wear gloves, eye protection, and work where air moves well. Never skip safety steps when using welding or brazing tools.
Frame Jigs and Fixtures
Frame jigs and fixtures hold your tubes in place while you work. These bike frame building supplies keep your geometry right and your parts lined up. Adjustable jigs let you set different tube angles and sizes. The bottom bracket center is a fixed point that helps keep things straight. Good jigs use strong materials and careful machining for repeatable results. Some jigs have digital angle finders and measuring tapes for extra accuracy. If you do not want to spend much, you can build a simple jig from wood or aluminum extrusions. Even a basic jig helps by holding tubes steady during welding or brazing.
Tip: A good jig is one of the most important tools for frame building. It helps you avoid mistakes and makes your frame stronger.
Cleaning and Finishing Supplies
Finishing your bike frame makes it look nice and keeps it from rusting. Start by cleaning the frame with dish soap or a bike shampoo. Do not use harsh wipes that can hurt the paint. After washing, use a light silicone spray to protect matte or satin finishes. For a shiny look, products like Finish Line’s Showroom Polish add shine and keep dirt away. Use biodegradable degreasers and soft brushes to clean hard spots. Before painting, clean the surface with special cleaners and sandpaper. Use a sealer between primer and color coats for better paint sticking. Polyurethane enamel paints, like Dupont Imron, give a tough, long-lasting finish. Always follow the paint maker’s instructions for the best results.
Note: Good cleaning and finishing supplies help your frame last longer and look great.
Frame Materials
Steel
Steel is a classic choice for making bike frames. It is easy to work with and fix. Steel frames give a smooth ride because they absorb bumps. Many touring and cargo bikes use steel for strength and comfort. You can repair steel frames if they crack. This makes steel good for long trips. Steel is heavier than other materials. You need to protect steel from rust, especially near the headset and bottom bracket. Clean your frame often to help it last longer.
Advantages | Disadvantages |
|---|---|
Heavier than other materials | |
Easy to repair | Prone to rust and corrosion |
Comfortable ride quality | Needs regular maintenance |
Affordable | Not ideal for racing |
Tip: Steel is a smart choice if you want a strong frame for everyday use.
Aluminum
Aluminum frames are very popular with many bike builders. Aluminum is lighter than steel and costs less. This material does not rust, so you do not worry about corrosion. Aluminum frames feel stiff and quick to handle. Some people think aluminum rides rough, but new designs make it smoother. You can shape aluminum tubes in many ways. This makes it easy to build custom frames. Most e-bikes and city bikes use aluminum because it is light, cheap, and strong.
Material | Weight | Cost | Fabrication Notes |
|---|---|---|---|
Aluminum | Lighter than steel | Most affordable | Easy to shape, resists rust |
Note: Aluminum frames are great if you want a light and cheap bike for city rides.
Titanium
Titanium frames are strong and light. Titanium does not rust, so your headset and bottom bracket stay safe. This material absorbs road bumps for a smooth ride. Titanium frames last a long time, sometimes over 20 years. They cost more and need special welding skills. If you want comfort, durability, and low care, titanium is a top pick.
Smooth ride quality
Long-lasting and durable
Needs expert welding
Callout: Titanium frames are best for riders who want top performance and do not mind paying extra.
Choosing Materials
Think about your needs and budget when picking a frame material. Light frames help you go faster, but comfort and fit are important too. Steel and titanium give a comfy ride and last many years. Aluminum is light, cheap, and does not rust. Also, think about how easy it is to fix your frame if you travel far. Make sure your headset and bottom bracket work with your chosen material. Each material has its own look. Always choose a frame material that matches your riding style, budget, and skill.
Sourcing and Budget Tips
Local and Online Options
There are many places to get bike frame building supplies. Local bike shops can help you order frames and tools. They give good advice and service. If you do not have a shop nearby, you can buy online. Online stores have more choices and fast shipping. Prices are often lower online. Some good online stores are:
BikeTiresDirect (BTD): Has good prices and helpful staff.
Performance Bike: Sells lots of cycling gear and tools.
Merlin Cycles: Offers many options and happy customers.
Competitive Cyclist: Has support and a big selection.
Some non-profit bike kitchens let you use tools for free. You can also get help from experts there. Before you build, check frame alignment. Use facing and chasing tools to get ready.
Used vs. New Supplies
You can choose new or used supplies for your bike frame. Both choices have good and bad sides. The table below shows how they compare:
Aspect | Buying New Bike Frame Supplies | Buying Used Bike Frame Supplies |
|---|---|---|
Cost | Saves you a lot of money | |
Warranty | Comes with a warranty | May not have a warranty |
Condition | Brand new, no damage | Might have hidden problems |
Technology & Features | Latest parts and materials | Can find old or special parts |
Customization | Pick size, color, and extras | Fewer choices for model and color |
Depreciation | Loses value quickly | Already lost value, better resale |
Availability | Easy to find in stores | May take longer to find what you want |
Building your own bike gives you more control. It feels good to make something yourself. You need time and some skills to find parts. Used supplies cost less, but check them carefully for problems.
Cost-Saving Strategies
You can save money with smart ideas. Lease or buy used machines to spend less at first. Rent a workshop outside the city to pay less. Buy materials like titanium in bulk for discounts. Try a DIY plan for design and testing. Hire part-time or freelance workers to lower labor costs. Use digital marketing to reach people without a store. Check for extra costs before you start. Buy tools like CAD software and 3D modeling slowly to keep costs down.
Tip: Start with a simple project. Use local help to save money and learn new things.
Safety and Workspace
Safety Gear
You must protect yourself when building a bike frame. Always wear safety glasses to keep metal shavings and sparks out of your eyes. Use heavy-duty gloves when handling sharp tubes or hot parts. A dust mask helps you avoid breathing in metal dust or fumes, especially during sanding or brazing. Wear long sleeves and pants to protect your skin from burns and cuts. Closed-toe shoes keep your feet safe from dropped tools or hot metal. Ear protection is important if you use loud tools like grinders or drills. Keep a fire extinguisher nearby in case of emergencies.
Tip: Always check your safety gear before you start. Replace worn-out gloves or broken glasses right away.
Workspace Setup
A good workspace makes your project safer and easier. You need a clean, well-lit area with enough space to move around the bike. Use a soft surface, like a blanket or flattened box, to protect your frame from scratches. Organize your parts and tools before you begin. This keeps your mind clear and helps you focus on each step.
Workspace Setup & Preparation | Description |
|---|---|
Clean, well-lit area with enough space to move around the bike | Ensures safety and ease of assembly |
Use a soft surface (blanket, flattened box) | Protects the bike frame from scratches or damage during assembly |
Organize parts and tools before starting | Keeps workspace tidy and focused on current task |
Lay out only the tools and parts you need for each step. For example, when you install the fork and headset, keep only those parts on your bench. This method reduces clutter and helps you avoid mistakes.
Common Mistakes
Many beginners make the same errors when building a bike frame. You can avoid these problems by paying attention to details:
Set the chain tension correctly. Too tight or too loose causes problems. Adjust the rear wheel for slight but secure play.
Check that all parts fit your frame. Using the wrong bottom bracket or headset can damage your bike.
Align your brake pads so they touch the rim evenly. Misaligned brakes reduce stopping power.
Adjust your saddle and handlebars for comfort. Wrong positions cause pain or injury.
Use enough grease on threads and metal parts. This prevents seizing and rust.
Inspect your bike before every ride. Regular checks keep your bike safe and working well.
Note: Careful setup and regular checks help you build a safe and reliable bike.
Troubleshooting
Tool Issues
You may run into problems with your tools while building a bike frame. Sometimes, tube cutters leave rough edges or do not cut straight. You can fix this by using a hand file or sandpaper to smooth the ends. If your frame jig does not hold the tubes tight, check for loose bolts or worn parts. A wobbly jig can cause your headset and bottom bracket to go out of alignment. Always check your measuring tools for accuracy. Digital calipers and angle finders need fresh batteries and clean surfaces. If your welding torch sputters or does not heat evenly, clean the tip and check the gas flow. Good tools make your work easier and help you avoid mistakes.
Tip: Keep your tools clean and store them in a dry place. Well-maintained tools last longer and work better.
Material Problems
You might face issues with the materials you choose. Steel tubes can rust if you do not keep them dry. Wipe them down after each step and store them away from moisture. Aluminum tubes bend easily if you clamp them too hard. Use soft jaws or shims to protect the tubes. Titanium needs special welding skills. If you see cracks near the headset or bottom bracket, stop and check your welds. Sometimes, tubes do not fit together well. You can use a tube notcher or hand file to adjust the fit. Always check the alignment before you weld or braze. Misaligned tubes can make it hard to install the headset or bottom bracket later.
Beginner Challenges
When you start building your first bike frame, you may face several challenges:
Cutting and fitting tubes takes practice. Hand filing or using a tube notcher helps you get a good fit.
Keeping the frame straight is hard. Use a frame jig and check alignment often.
Making small parts like dropouts or seat tube collars can be tricky. You can buy these parts if you do not want to make them.
Welding can warp the frame. Tack weld tubes in place and weld in short sections to control heat.
Deciding on a frame jig can be tough. You can build one from aluminum extrusions or buy a simple commercial jig.
Understanding frame geometry helps you get the right fit for your headset and bottom bracket.
You can use design software like Bikecad or online tube coping calculators to plan your build. Watch video tutorials to learn tube mitering and welding. Practice on scrap tubes before you work on your real frame. Start with simple projects and build your skills step by step.
Note: Every builder makes mistakes at first. Use each challenge as a chance to learn and improve.
You have a better chance of doing well if you use the right tools, materials, and a good workspace.
You need tough materials like bamboo, metal parts, and epoxy resin to make a frame that will last a long time.
You use tools like calipers, protractors, and jigs to measure and put parts together the right way.
You set up your workspace with clamps and safety gear to keep things safe and neat.
Heating and making joints stronger helps your frame hold up better.
You stop problems by picking the right supplies and getting ready for each step.
Begin with an easy project and work on your skills. You can look for local suppliers, join groups online, or sign up for a framebuilding class. If you are patient and get ready, you can make your own bike frame.
FAQ
What is the easiest frame material for beginners?
Steel is the easiest material for you to start with. You can cut, file, and weld it using basic tools. Steel also allows you to fix mistakes more easily than aluminum or titanium.
Do I need a professional frame jig to build my first bike?
You do not need a professional jig. You can build a simple jig from wood or aluminum. This helps you hold tubes steady and keep your frame straight.
Can I build a bike frame without welding experience?
Yes, you can learn basic brazing or welding skills with practice. Many beginners start with online tutorials or local classes. Always practice on scrap tubes before working on your real frame.
How much does it cost to build a bike frame at home?
You can expect to spend $300 to $800 for basic tools and materials. Costs depend on your material choice and tool quality. Used tools and local suppliers can help you save money.
What safety gear should I use when building a frame?
Always wear safety glasses, gloves, and a dust mask. Use long sleeves and closed-toe shoes. Keep a fire extinguisher nearby. Good safety gear protects you from burns, cuts, and fumes.
See Also
Essential Tips For Building A Gas Bike Frame
Key Bike Frame Components Every Cyclist Must Understand
Important Materials For Track Bike Frames And Their Benefits