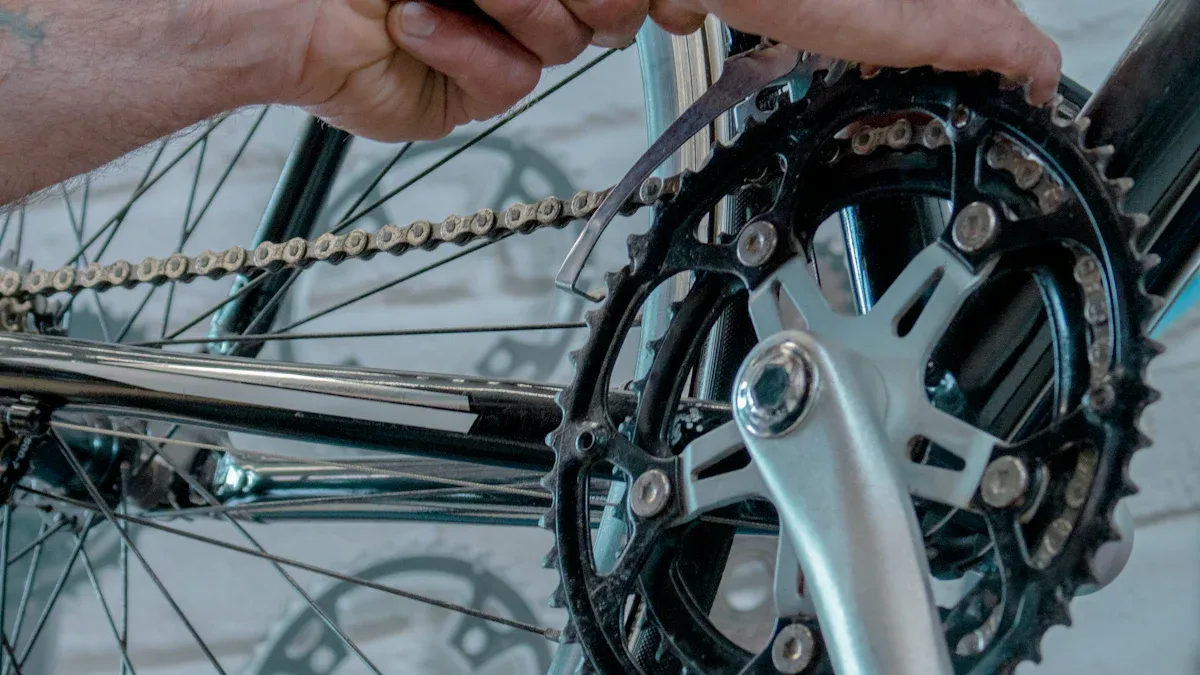
When you start the framed bike assembly, having a checklist is very helpful. It ensures you remember every part, so nothing is missed. This easy tool keeps you safe by guiding you step by step. For example, a good inspection checklist can identify safety problems before you ride. Properly testing your framed bike makes sure it is ready to go. Additionally, finding broken parts early can prevent dangerous issues later. So, grab that checklist and prepare for an easy assembly!
Evidence | Explanation |
|---|---|
Helps find and stop safety problems during framed bike assembly. | |
Proper testing procedures | Ensures checks are done to improve bike safety. |
Identification of faulty components | Prevents unsafe bikes from being shipped, lowering safety issues. |
Key Takeaways
Use a checklist when putting your bike together. This helps you not forget any parts. It also keeps you safe and makes your ride smooth.
Gather important tools like a torque wrench and pedal spanner first. Having the right tools makes it easier and faster to assemble.
Make sure all bike parts fit together before you start. If parts don’t match, it can cause problems and safety issues.
Do a careful final check after you finish assembling. Tighten all bolts and test the brakes and gears. This ensures everything works well.
Regular maintenance is very important for bike safety. Check your bike before every ride and do detailed checks every month.
Preparation for Framed Bike Assembly

Before you start putting together your framed bike, it’s very important to collect the right tools and parts. This preparation helps make the assembly go smoothly. Let’s look at what you need.
Essential Tools
Having the right bike tools ready can really help. Here’s a list of tools you should have:
Torque Wrench: Makes sure you tighten bolts correctly.
Pedal Spanner: Helps you put on and take off pedals easily.
Allen Wrenches: Needed for most bike bolts.
Screwdrivers: Both flathead and Phillips for different parts.
Tire Levers: Good for putting on and taking off tires.
Pump: To fill your tires with air.
Chain Tool: For fixing or changing the bike chain.
Tip: Keep your tools organized so you can find them easily during assembly. This will save you time and stress.
Components Checklist
Next, let’s check the basic checklist of parts you’ll need for your bike assembly. Here’s a complete list:
Frame: The main part of your bike.
Wheels: Make sure they fit your frame.
Brakes: Check that they work with your frame and wheels.
Derailleurs: Ensure they match your gear system.
Handlebars and Stem: Confirm they fit your frame and can be adjusted.
Seatpost and Saddle: Make sure they fit your frame size.
Pedals: Check they work with your crank arms.
Cables and Housing: Needed for brakes and shifting.
It’s very important to check that these parts fit together. Using parts that don’t match can cause problems and safety risks. For example, brakes that don’t fit can fail to stop well, while wheels that don’t match may not fit right, which can cause damage when riding.
Here’s a quick look at how compatibility affects performance and safety:
Property | Impact on Performance | Importance for Safety and Performance |
|---|---|---|
Weight | Lighter materials help you go faster and climb better. | Important for racing and climbing, helping the rider stay in control and safe. |
Stiffness | Stiffer materials help power transfer, losing less energy. | Key for performance, especially during tough rides, making handling better. |
Durability | Strong materials hold up in rough conditions, keeping the bike strong. | Vital for safety on different terrains, stopping failures while riding. |
Vibration Damping | Materials that absorb bumps make rides more comfortable and reduce tiredness. | Important for long rides, helping keep the rider safe by reducing discomfort. |
Aerodynamics | Shapes that cut through air help you go faster. | Improves performance in races, allowing for safer high-speed riding. |
By making sure all parts fit together, you can avoid common assembly problems. Reports often mention issues like bad brakes or mismatched wheels as top reasons for bike assembly failures.
Before you begin, take a moment to look at each part. This helps you find any problems or damage early. Following a clear assembly checklist will help you through the process, making sure you don’t skip any important steps.
Steps for Bike Assembly

As you dive into the exciting world of building a bike, following a clear set of steps will make the process smoother and more enjoyable. Let’s break down the essential steps for assembling your framed bike.
Frame and Wheel Installation
Start with the frame. It’s the backbone of your bike. First, check for any damage or misalignment. A misaligned frame can lead to serious handling issues. Here’s how to ensure everything is in order:
Check frame alignment: Measure the width of the hub over the locknuts. Compare this measurement to the inside width of the frame dropouts. They should be within 1-2mm.
Check frame and fork dropouts for alignment: Ensure they are straight and not bent. Misalignment can lead to energy loss and premature axle failure.
When you install the wheels, make sure they fit snugly into the dropouts. You want to check both front and rear wheels for proper alignment. If they’re not centered, it can affect your ride quality.
Mistake | Solution |
|---|---|
Always clamp from the outside to prevent damage to alloy wheels. | |
Incorrect lubrication | Use a vegetable oil-based paste and avoid excess lubrication. |
Failure to center the wheel | Use the back side of the wheel for centering and validate with a check. |
Not using appropriate equipment | Utilize collets and flange plates to ensure proper clamping. |
Installing Handlebars and Stem
Next, let’s move on to the handlebars and stem. Proper installation is crucial for your control and comfort. Here’s what you need to do:
Attach the stem to the fork steerer: Use the recommended torque settings. For most stems, you’ll want to tighten to 3.6 – 4.5 Nm (32 – 40 inch/lbs).
Install the handlebars: Make sure they are level and aligned with the front wheel. Tighten the stem clamp to 3.8 – 5.1 Nm (34 – 45 inch/lbs).
Tip: Always double-check the alignment of your handlebars. Misalignment can lead to discomfort and steering issues.
Setting Up Brakes and Derailleurs
Now, let’s set up the brakes and derailleurs. This step is vital for your safety and performance. Follow these steps to ensure everything works smoothly:
Auto Trim: Shift the rear derailleur into the largest cog to set the front derailleur’s trim position.
Adjust Limit Screws: Fine-tune the high and low limit screws for optimal shifting.
Check Chain Length: Measure and adjust the chain length for proper rear derailleur function.
Brake Pad Advancement: If the brake pads feel spongy, advance them to ensure they engage properly.
Common issues during this setup include:
Check gear hanger tightness and alignment: A loose or misaligned hanger can cause shifting problems.
Verify through-axle torque: Ensure it’s secure to prevent wheel play.
Fitting Pedals and Seatpost
Finally, let’s fit the pedals and seatpost. Proper adjustments here can prevent injuries and enhance your riding experience.
Install pedals: Make sure you install them correctly—right pedal clockwise and left pedal counterclockwise.
Adjust saddle height: Ensure your knee is slightly bent when the pedal is at the 6 o’clock position. This helps prevent strain.
Lock in the height: Mark the seat post to prevent slipping.
A proper bike fit is crucial. It aligns your bike setup with your body geometry, optimizing comfort and power output while cycling.
Note: Research shows that even a slight change in saddle height can significantly affect knee joint kinematics, which is critical for injury prevention.
By following these steps, you’ll ensure that your bike is assembled correctly and ready for a safe ride. Remember to check for missing parts and double-check your work as you go along. Happy building!
Final Inspection
After assembling your bike, a thorough final inspection is crucial. This step ensures that everything is secure and functioning properly before you hit the road. Let’s break down the key areas to focus on during your inspection.
Tightening Bolts
Start by tightening all critical bolts. This step is essential for safety and performance. Use the recommended torque values for each component to avoid over-tightening or under-tightening. Here’s a handy table for reference:
Component | Material | Torque Range |
|---|---|---|
Chainring bolts | Steel | 106-124 lb/in (12-14 Nm) |
Front derailleur | Band clamp bolt | 25-35 lb/in (2.8-4 Nm) |
Rear derailleur mounting bolt | 70-85 lb/in (7.9-9.6 Nm) | |
Pedal axle | 350-380 lb/in (40.2-42.9 Nm) | |
Saddle clamp bolts | Bontrager seatpost | 120-130 lb/in (13.6-14.7 Nm) |
Tip: Always double-check the torque settings. Loose bolts can lead to accidents, while overtightened bolts can damage components.
Testing Brakes and Gears
Next, you need to test your brakes and gears. Proper functioning is vital for your safety. Here are some standard procedures to follow:
Footbrake Performance Test: Ensure the stopping distance is less than 4.57 m (15 ft) from a speed of 16 km/h (10 mph).
Handbrake Loading Test: Apply a force of at least 445 N (100 lbf) to the hand levers ten times without visible damage.
Rocking Test: Place a weight of at least 68.1 kg (150 lb) on the seat and rock the bike forward and backward to check for looseness.
These tests help confirm that your bike is ready for a safe ride.
Safety Checks
Finally, conduct essential safety checks. Inspecting your bike before riding can prevent accidents. Here’s a checklist to guide you:
Check tires for debris and proper inflation.
Ensure wheels are true and securely fastened.
Test brakes for effectiveness and alignment.
Inspect the drivetrain for smooth operation.
Also, don’t forget to wear a properly fitting helmet and equip your bike with reflectors and lights. A bike repair kit and a first aid kit are also good ideas for emergencies.
By following these final inspection steps, you can confidently take your bike for a test ride. Remember, a little diligence now can save you from potential issues later!
In summary, following a checklist for your bike assembly is key to success. It helps you ensure every part is in place and functioning well. When you take the time to check your work, you boost your safety and confidence on the road.
Remember, a well-assembled bike means a smoother ride! 🚴♂️
So, gear up, double-check your assembly, and enjoy your cycling adventures. Ride safe and have fun out there!
FAQ
What tools do I need for bike assembly?
You will need a torque wrench, pedal spanner, Allen wrenches, screwdrivers, tire levers, a pump, and a chain tool. Having these tools ready helps your assembly go smoothly.
How do I know if my bike parts are compatible?
Check the details for each part. Look at size, threading, and if they fit your frame. If you are not sure, ask the manufacturer or a local bike shop.
How tight should I make the bolts?
Always use the recommended torque settings for each part. Tightening too much can break parts, while not tightening enough can cause safety problems. Use a torque wrench to be accurate.
What should I do if I find a damaged part?
Replace any broken parts before you ride. Riding with damaged parts can cause accidents. Always check your bike carefully during assembly and before every ride.
How often should I perform maintenance on my bike?
Regular maintenance is very important! Check your bike before each ride. Do a more detailed check every month, including brake adjustments, tire pressure checks, and cleaning the drivetrain.
See Also
Key Supplies Needed To Construct Your Custom Bike Frame
Effective Strategies For Safeguarding Your Bike Frame
Crucial Bike Frame Components Every Cyclist Must Understand
