
When you start bike frame brazing, you need the right tools and materials. You will use a torch, brazing rods, flux, frame tubing, lugs, clamps, and safety gear. Bike frame brazing joins metal tubes together to create a strong frame. This process helps you build a bicycle frame that lasts. Always use safety glasses and gloves. Good equipment keeps your frame straight and safe. Try simple steps first and check your frame often.
Key Takeaways
Brazing connects metal tubes with heat and filler metal. This makes bike frames strong and light. It is safer than welding and causes less damage.
Use the right tools like oxy-acetylene torches and clamps. Measuring devices help keep your frame straight. Safety gear protects you while you work.
Pick good materials like chromoly steel tubing and tight lugs. Use brazing rods and flux that match for strong joints.
Begin with easy projects and practice on extra tubes. This helps you learn before using advanced tools like drill presses and lathes.
Read books and watch online videos to learn more. Take community classes and get help from skilled framebuilders.
Bike Frame Brazing Basics
What Is Brazing
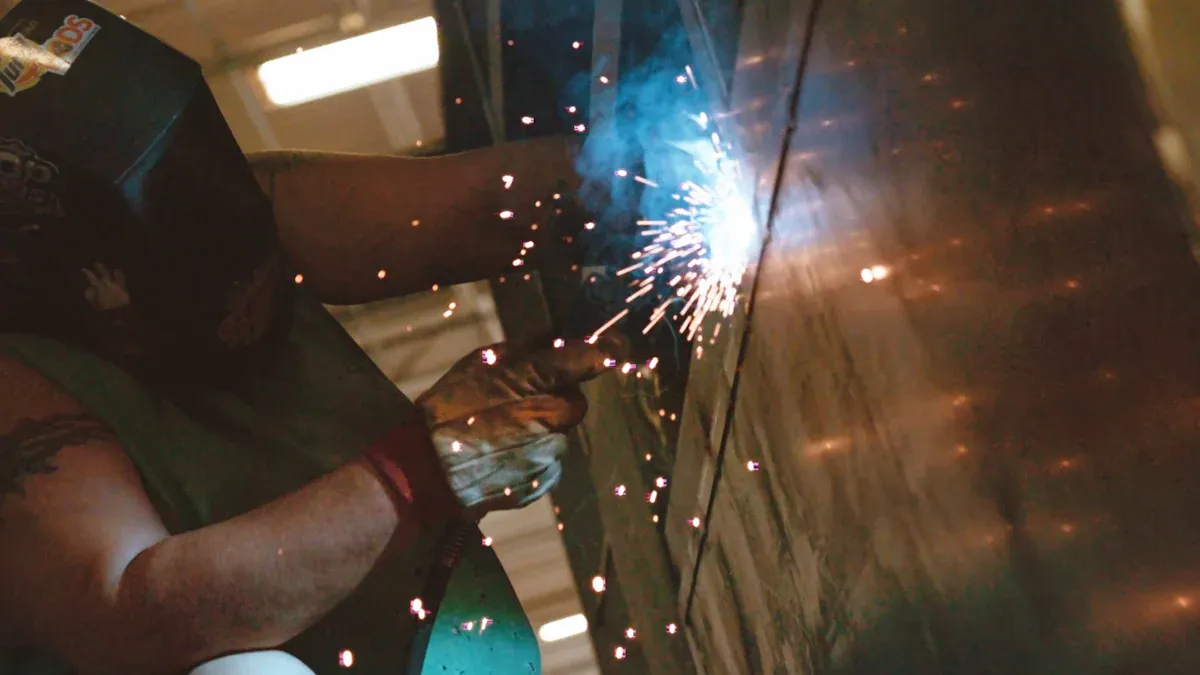
Brazing is a way to join metal tubes. You use it when you build a bike frame. You heat the steel tubing until it turns red. The tubing does not melt. You melt a filler metal like brass or silver alloy. The melted filler metal flows into the joint. It moves by capillary action. The filler metal works like glue. It holds the tubes together. Brazing lets you use thinner steel tubing. The process does not weaken the frame as much as welding.
There are two main brazing methods for bike frames. One is lugged brazing. The other is fillet brazing. Lugged brazing uses hollow sleeves called lugs. These lugs join the tubes together. Fillet brazing does not use lugs. You cut the tube ends to fit together. Then you build up a smooth fillet of filler metal around the joint. Both methods make strong and light frames. Fillet brazing gives you more freedom in design. Lugged brazing adds strength and a classic look.
Tip: Clean the surfaces around the joints before brazing. Use sandpaper and isopropyl alcohol. This removes oil and dirt. Cleaning helps the filler metal flow well. It also makes your frame stronger.
Why Choose Brazing
Many builders like brazing for bike frames. Brazing has many good points:
You use lower heat than welding. This protects thin tubing and keeps the frame strong.
Bronze filler metals are less brittle than steel welds. Your frame resists fatigue and lasts longer.
Brazing equipment is easy to set up and costs less. It is good for hobbyists and custom builders.
You can feather out the joint. This spreads stress and lowers the chance of cracks.
Lugged brazing adds strength and style. Fillet brazing lets you make custom shapes and smooth joints.
When you braze, you clean the joints first. You get your equipment ready. Practice on spare tubes. Put on flux paste. Heat the joint. Add the filler metal. Tack braze each joint to hold the frame. Finish with smooth, even fillets. This careful work helps you avoid warping. It keeps your frame straight.
Bike frame brazing is still popular. It makes strong frames that carry heavy loads. You can join different metals and reinforce joints. Many custom builders pick brazing for its flexibility and beautiful results.
Design Tools for Building a Bicycle Frame
Software and Templates
You can start your frame project with the right design software. BikeCAD Pro is a popular choice among professional builders. It lets you design every part of your frame, including lugs and tube angles. rattleCAD is another tool made just for bicycle frame design. It uses parametric 2D drawings, so you can change measurements and see updates right away. Tubemiter.exe helps you create templates for cutting tubes to fit your frame joints. If you want free options, Inkscape and Fusion360 offer basic design features. Affinity Designer is a paid tool that works well for graphics and templates.
Tip: Print your frame templates at full scale. This helps you check tube lengths and angles before you cut any metal.
Measuring Tools
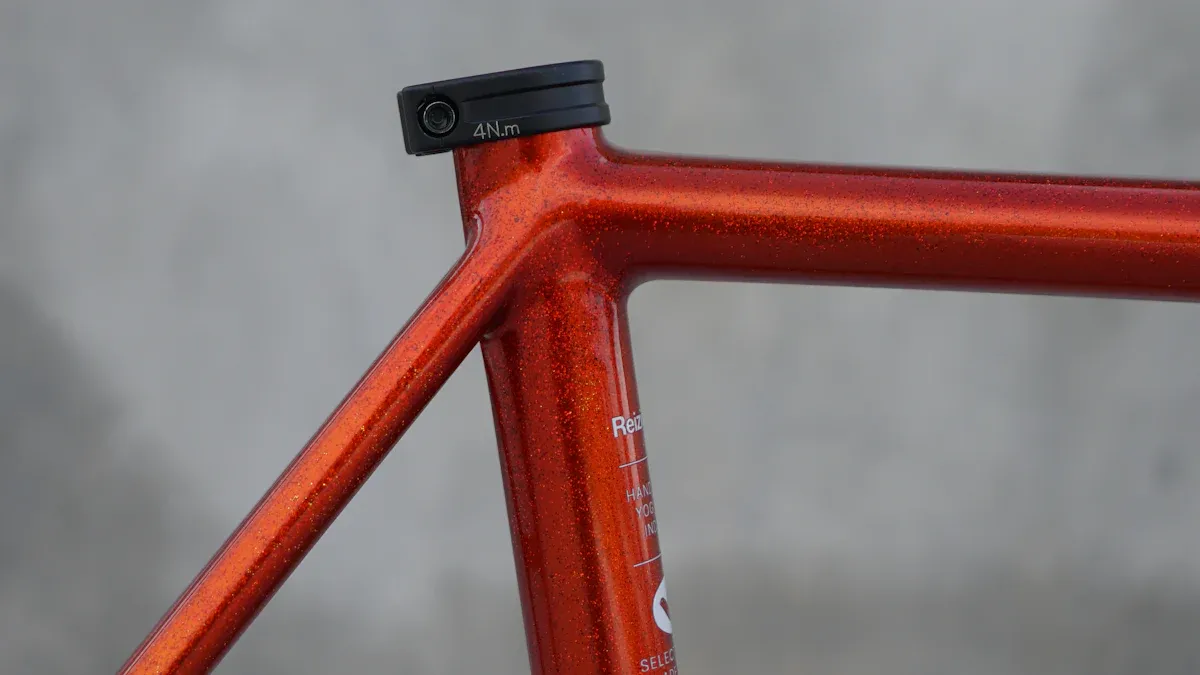
Accurate measuring tools keep your frame straight and safe to ride. The Park Tool FAI-2 Frame Alignment Indicator checks three points on your frame: the head tube, seat tube, and rear dropout. This tool helps you spot any twist or bend in your frame. A digital caliper measures tube diameters and frame widths. You need a repair stand or bench vise to hold your frame steady while you measure. Some builders use a frame table, which is a flat surface for checking the whole frame at once. Dropout alignment tools and angle finders help you fine-tune your frame for perfect tracking.
Essential measuring tools for your frame:
Park Tool FAI-2 Frame Alignment Indicator
Digital caliper
Frame table or surface plate
Dropout alignment tool
Angle finder
Marking Tools
Marking tools guide your cuts and help you line up each part of your frame. Use a fine-tip marker or scribe to draw cut lines on your tubes. A center punch makes a small dent where you want to drill holes. This keeps your drill bit from slipping. A steel ruler and straight edge help you mark long lines and check tube alignment. Masking tape can also mark tube ends and protect your frame from scratches.
Note: Always double-check your marks before you cut. Careful marking saves time and keeps your frame parts fitting together.
Brazing Equipment
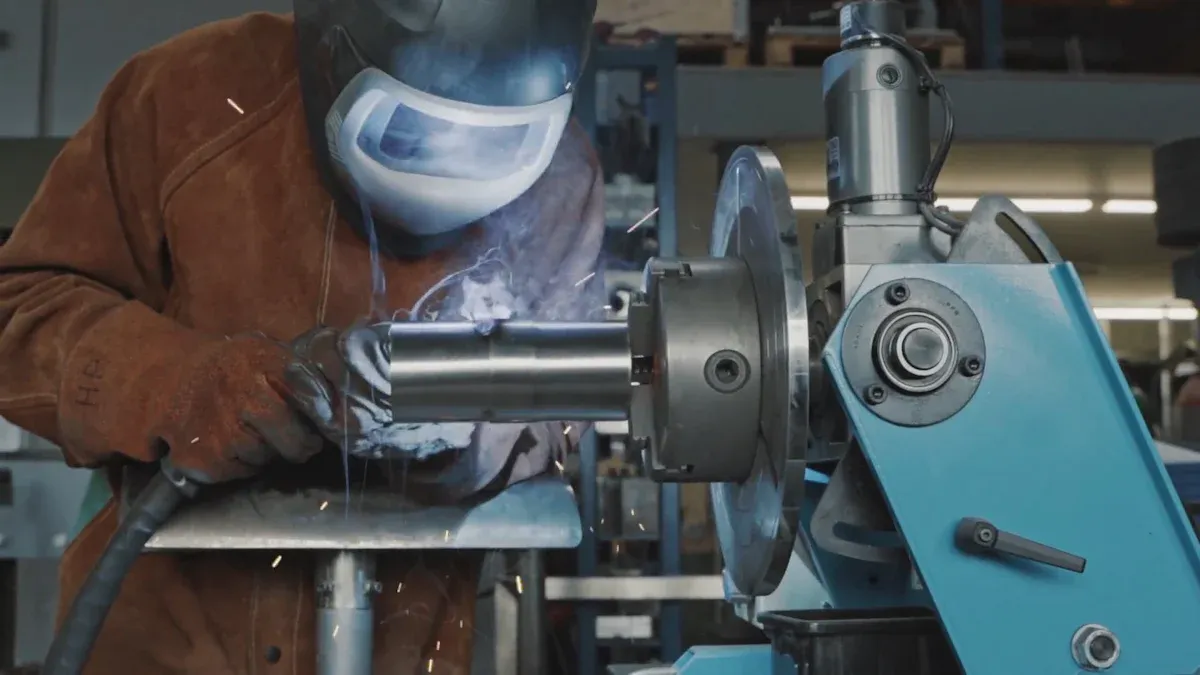
Torches and Heat Sources
You need a reliable brazing torch to join your bike frame tubes. The two main choices are oxy-acetylene and MAPP gas torches. Oxy-acetylene produces a hotter flame. This makes it easier to braze brass and silver alloys. You can work faster and get strong joints. You must control the heat carefully. Too much heat can distort or char the tubing. MAPP gas torches create a lower temperature flame. You may find it harder to braze thick joints or large areas. Some builders use a steel hearth to reflect heat and help with brazing. MAPP torches work best for silver alloys and small parts. Oxy-acetylene is the preferred choice for most bike frame brazing because it gives you more control and efficiency.
Tip: Always check your torch for leaks before you start. A safe workspace helps you focus on building your frame.
Comparison Table: Oxy-Acetylene vs. MAPP Gas Torches
Feature | Oxy-Acetylene | MAPP Gas |
|---|---|---|
Flame Temperature | Higher | Lower |
Best For | Brass, Silver alloys | Silver alloys, small parts |
Control | Requires skill | Easier, less heat |
Safety | Reliable, regulated | More restrictions |
Frame Size | All sizes | Small frames, details |
Regulators and Hoses
You need regulators to control the flow of gas to your brazing torch. Regulators attach to your gas tanks. They let you set the right pressure for brazing. Use hoses rated for your torch and gas type. Always check for cracks or wear before each use. Flashback arrestors are important safety devices. They stop flames from traveling back into the hoses or tanks. You should install flashback arrestors on both the torch and the regulator ends. This protects you and your workspace.
Essential items for your brazing equipment:
Oxygen regulator
Acetylene or MAPP regulator
High-quality hoses
Flashback arrestors
Safety Gear
You must protect yourself when you braze a bike frame. Safety gear keeps you safe from heat, sparks, and fumes. Wear ANSI-rated safety glasses to shield your eyes. Use a respirator to avoid breathing in metal fumes. Heavy-duty gloves protect your hands from burns. Keep a fire extinguisher nearby in case of emergencies. You should also wear long sleeves and pants made from natural fibers. Synthetic fabrics can melt and cause injuries.
Note: Never braze in a closed room. Good ventilation helps you stay healthy and alert.
Safety Gear Checklist
ANSI safety glasses
Respirator
Welding gloves
Fire extinguisher
Long-sleeve shirt and pants
Workbench and Vise
A sturdy workbench gives you a solid base for brazing. You need a flat surface to keep your frame straight. A heavy-duty vise holds tubes and parts while you work. The vise should open wide enough for your largest frame tubes. You can add soft jaws to the vise to prevent scratches. Some builders use a frame jig on the workbench. The jig holds all the tubes in place and keeps them aligned during brazing. You can build a simple jig from steel bars or buy a ready-made one.
Tip: Keep your workbench clean. Remove metal shavings and dust before you start brazing.
Clamps and Tube Blocks
Clamps and tube blocks help you keep your frame aligned in the jig. U-bolt strap clamps and vise grips hold the tubes steady. You can adjust them as you heat the joints. The tubing may slide a little when hot. This lets you bend it into the right position. Tube blocks, often made from square steel tubing, act as stops. They set the final position for each tube. The blocks prevent over-bending and keep the frame straight as it cools. You should let the frame cool naturally in the jig. Rapid cooling can pull the frame out of alignment.
Alert: Do not use water or compressed air to cool your frame. Let it cool slowly in the jig for best results.
Common Clamps and Tube Blocks for Frame Alignment
U-bolt strap clamps
Vise grips
Flat steel bars
Square tube blocks
Adjustable stop blocks
You need to use clamps and tube blocks every time you braze a frame. They keep your work precise and help you build a strong, straight bike frame.
Brazing Materials
Tubing and Lugs
You need strong tubing and lugs to build a safe bike frame. Most custom frames use cylindrical steel tubing. Chromoly steel is a popular choice because it is easy to shape and braze. You can find tubing in different thicknesses and diameters. Thinner tubes make your bike lighter, but you must handle them with care.
Lugs are socket-like sleeves that fit over the ends of the tubes. You use lugs to join the tubes together. The main types of lugs include seat lugs, bottom bracket shells, head lugs, and dropouts. Seat lugs connect the top tube and seat tube. Bottom bracket shells join the chain stays, seat tube, and down tube. Head lugs attach the head tube to the top and down tubes. Dropouts hold the rear wheel axle.
You can choose stamped lugs or investment cast lugs. Stamped lugs are pressed from steel sheets. They work well for basic frames. Investment cast lugs use the lost wax process. These lugs have finer details and tighter fits. Many builders prefer investment cast lugs for custom frames. Stainless steel investment cast lugs are a new trend. You need silver brazing for these lugs.
Tip: Always check that your tubing and lugs fit together tightly. Loose joints can make your frame weak.
Brazing Rods and Alloys
You need the right brazing rods and alloys to join your bike frame tubes. Brazing uses a filler metal that melts at a lower temperature than steel. You heat the steel tubing until it glows red, then add the filler metal. The filler metal flows into the joint and bonds the tubes.
Common brazing rods include brass, nickel silver, and silver alloys. Brass rods work well for most steel frames. Nickel silver rods, such as No. 11, give you strong and flexible joints. Silver alloys melt at lower temperatures and work best with stainless steel lugs. Some builders use SIF bronze rods for classic British frames. These rods are made for gas welding and work at higher temperatures than normal brazing rods.
Types of brazing rods and alloys:
Brass rods: Good for steel frames, strong and easy to use.
Nickel silver rods (No. 11): Flexible, strong, and good for custom joints.
Silver alloys: Best for stainless steel lugs, melt at lower temperatures.
SIF bronze rods: Used for special frames, work at higher temperatures.
Note: Always match your brazing rod to your tubing and lugs. This helps you get strong, clean joints.
Flux Types
You need flux powder to protect your joints during brazing. Flux powder stops oxidation and helps the filler metal flow. You must choose the right flux for your tubing and lugs.
Here is a table showing the main types of flux powder and their uses:
Flux Type | Base Metals / Application | Effect on Joint Quality / Notes |
|---|---|---|
White Flux | Copper, Brass, Nickel, Steel, Mild Steel | Protects from oxidation, helps wetting, good for lower temperature brazing. Ideal for most bike frame metals. |
Black Flux | Stainless Steel | Contains boron, resists high temperatures, protects during long heating cycles. Best for stainless steel. |
Anti-Borax No.2 | Bronze (Low Fuming Bronze) | Special for bronze brazing, controls oxidation and wetting. |
No. 20 | Aluminum | Designed for aluminum brazing, works with aluminum filler alloys. |
White flux powder works well for steel, copper, and brass. You can use it for most bike frames. Black flux powder contains boron and helps when you braze stainless steel. It protects the joint during longer heating and higher temperatures. Anti-Borax No.2 is best for bronze brazing. No. 20 is for aluminum frames.
Tip: Apply enough flux powder to last the whole heating cycle. This keeps your joint clean and strong.
Sourcing Quality Materials
You must pick high-quality materials for your bike frame. Look for tubing that is easy to shape and braze. Chromoly steel is a good choice because it is strong and resists rust. Stainless steel and titanium last longer but cost more and are harder to work with. Choose lugs that fit your tubes tightly. Investment cast lugs give you better detail and strength.
Select brazing rods that match your tubing and lugs. Brass and nickel silver rods work well for most steel frames. Use silver alloys for stainless steel lugs. Always buy flux powder made for your metals. Good flux powder helps you get clean, strong joints.
Alert: Quality materials make your frame safer and easier to build. Do not use cheap tubing or lugs. Poor materials can break or rust quickly.
Optional and Advanced Tools
When you want to take your bike framebuilding to the next level, you can use advanced tools. These tools help you work faster and make your frame more precise. You do not need them to start, but they make many tasks easier.
Drill Press and Milling Machine
A drill press gives you steady, straight holes for things like bottle cage mounts and brake bosses. You can use a tilt table to drill at different angles. This tool helps you avoid crooked holes and keeps your frame strong.
A milling machine offers even more power and control. You can change the spindle speed without stopping to switch belts. The milling machine moves in three directions: side to side, front to back, and up and down. You can hold your workpiece tightly in a mill vice, which keeps it from slipping. The milling machine can also act as a drill press. You can use it to drill fork crown holes or bottle cage holes. With special tools like end mills and slitting saws, you can remove metal with great accuracy. This is important when you want to try different brazing methods or make custom frame parts.
Tip: If you want to notch tubes or create special shapes, a milling machine gives you more options than a drill press.
Hole Saw Sets
Hole saw sets help you cut tubes to fit together perfectly. You use fine-tooth bi-metal hole saws for rough cuts that match the shape you need. This means you spend less time filing by hand. When you use mitre templates and layout lines, you can line up your cuts and plan tube lengths with care.
Benefits of hole saw sets:
Make precise cuts for tube miters
Reduce hand filing time
Help align tubes with layout lines
Improve repeatability and accuracy
Shape the miter and set tube length in one step
Keep your hole saw blades sharp and use good arbors for best results. You can usually get within half a millimeter of your target, which is close enough for most framebuilding needs.
Lathe
A lathe lets you shape and finish tubes with high accuracy. You can set angles and offsets quickly, which helps you get tight miters. Tight miters mean your tubes fit together well and your frame stays straight. You can use fixtures on the lathe to make your work faster and more repeatable. The lathe also helps you contour and finish tubes, which makes your joints stronger and your frame more durable. If you want to move beyond hand filing, a lathe is a great tool for custom bike frame parts.
Note: You do not need a lathe to start, but it makes advanced framebuilding much easier.
Learning Resources
Books and Guides
You can learn about bike frame brazing from books and manuals. Doug Fattic wrote a manual that teaches brazing and filing. Many students use this manual in his classes. It talks about special tools and advanced ways to braze. You will not find these tips in most other guides. The Paterek Manual is another good book. Some people call it the “framebuilders bible.” It gives clear steps for building and brazing frames. This manual costs more than some books. But it has lots of helpful advice and deep knowledge.
Some beginners read “Lugged Bicycle Frame Construction” by Marc-Andre Chimonas. This book talks about silver brazing. But some builders say not all tips in this book are safe or current. Always check other sources before you try new things from any one book.
Tip: Books and manuals help you learn, but always compare advice from different places.
Online Tutorials
You can watch videos to see how brazing works. Paul Brodie’s YouTube videos show real steps for building frames. These videos explain how to hold the torch and use flux. They also show how to control the heat. Many builders say videos are easier to learn from than reading. You can pause and replay steps while you practice.
Popular online tutorial sources:
YouTube (Paul Brodie’s channel)
Blogs with step-by-step photos
Manufacturer websites with safety tips
Communities and Classes
You can join forums and workshops to get help from other builders. Framebuilding forums let you ask questions and share your work. Members post photos, tips, and answers for beginners. Local classes or workshops give you hands-on practice. You get to use real tools and get feedback from experts. Some framebuilders teach small group classes. You can learn with others and get help right away.
Resource Type | Example | Benefit |
|---|---|---|
Online Forum | Framebuilders Collective | Ask questions, share photos |
Local Workshop | Community Makerspace | Hands-on practice, expert help |
Framebuilding Class | Doug Fattic’s Framebuilding | Learn from a master builder |
Note: Learning with others helps you fix problems faster and keeps you excited.
Picking the right tools and materials for bike frame brazing helps you manage heat and keep the frame from bending. This lets you make a strong bike frame. Begin with simple tools and try easy projects first. This helps you get better at brazing. You can join a class or group to learn from others. They can answer your questions and help you improve. Many new builders have made their own frames with help and patience. Your first bike frame project can be fun and give you a great feeling!
Remember: If you practice carefully and get help, you can finish even hard projects.
FAQ
What is the best torch for beginner bike frame brazing?
You should start with an oxy-acetylene torch. It gives you good heat control and works well for most steel frames. Many beginners find it easier to use than other options.
How do you keep your bike frame straight during brazing?
You need to use a frame jig or alignment table. Clamps and tube blocks help hold the tubes in place. Always check alignment before and after brazing.
Can you braze stainless steel bike frames?
Yes, you can braze stainless steel. You must use silver alloy rods and black flux. Stainless steel needs more care because it heats up quickly.
What safety gear do you need for brazing?
You should wear ANSI safety glasses, a respirator, and welding gloves. Always keep a fire extinguisher nearby. Wear long sleeves and pants made from cotton.
Where can you find bike frame tubing and lugs?
You can buy tubing and lugs from framebuilding suppliers online. Some popular sources include Nova Cycles, Henry James, and Columbus. Always choose high-quality materials for safety.
See Also
Key Supplies Needed To Construct A Custom Bike Frame
Important Advice For Builders Working On Gas Bike Frames
Understanding The Main Parts Of A Bike Frame And Their Functions