
Gun bluing is a fantastic way to give your bike frame a sleek, stylish finish. Not only does it enhance the look, but it also protects against rust and wear. Before diving into this project, make sure you’re ready. Safety is key! Gather your supplies and ensure you have a well-ventilated workspace. Taking these steps will help you enjoy the process and achieve great results with your gun blue bike frame.
Key Takeaways
Always put safety first. Wear goggles, gloves, and a mask. Work in a place with good air flow to avoid bad fumes.
Check and clean your bike frame well before using gun blue. A clean surface helps it stick better and look smoother.
Warm up your bike frame with an oven or heat gun before using gun blue. This helps the finish stick better and last longer.
Pick the right gun blue product for your bike material. Follow the instructions closely for the best results.
Polish and add a protective coat to your bike frame after gun bluing. This keeps your frame looking nice and stops rust.
Safety First
Personal Protective Equipment
Before you start gun bluing your bike frame, you need to gear up! Personal protective equipment (PPE) is crucial for keeping you safe during this process. Here’s what you should wear:
Safety goggles: Protect your eyes from splashes and fumes.
Gloves: Use chemical-resistant gloves to shield your hands from harsh substances.
Mask: A respirator mask will help you avoid inhaling harmful vapors.
Old clothes: Wear something you don’t mind getting stained. Gun blue can be messy!
Remember, safety comes first. You want to enjoy your bike frame’s new look without risking your health.
Ventilation Setup
Next, let’s talk about your workspace. Proper ventilation is key when working with gun blue. Fumes can be harmful, so you need to ensure fresh air circulates. Here are some tips for setting up a safe workspace:
Tip: If possible, work outdoors. If you must work indoors, open windows and doors to create airflow. Use fans to help push out any lingering fumes.
Choose a well-ventilated area: Look for a space that allows air to flow freely. A garage or workshop with windows works well.
Avoid enclosed spaces: Don’t work in small, closed-off areas like basements or closets. You want to minimize your exposure to fumes.
By taking these precautions, you’ll create a safer environment for yourself. Remember, a little preparation goes a long way in ensuring your DIY project is both fun and safe. Now that you’re geared up and your workspace is ready, you can confidently move on to the next steps in gun bluing your bike frame!
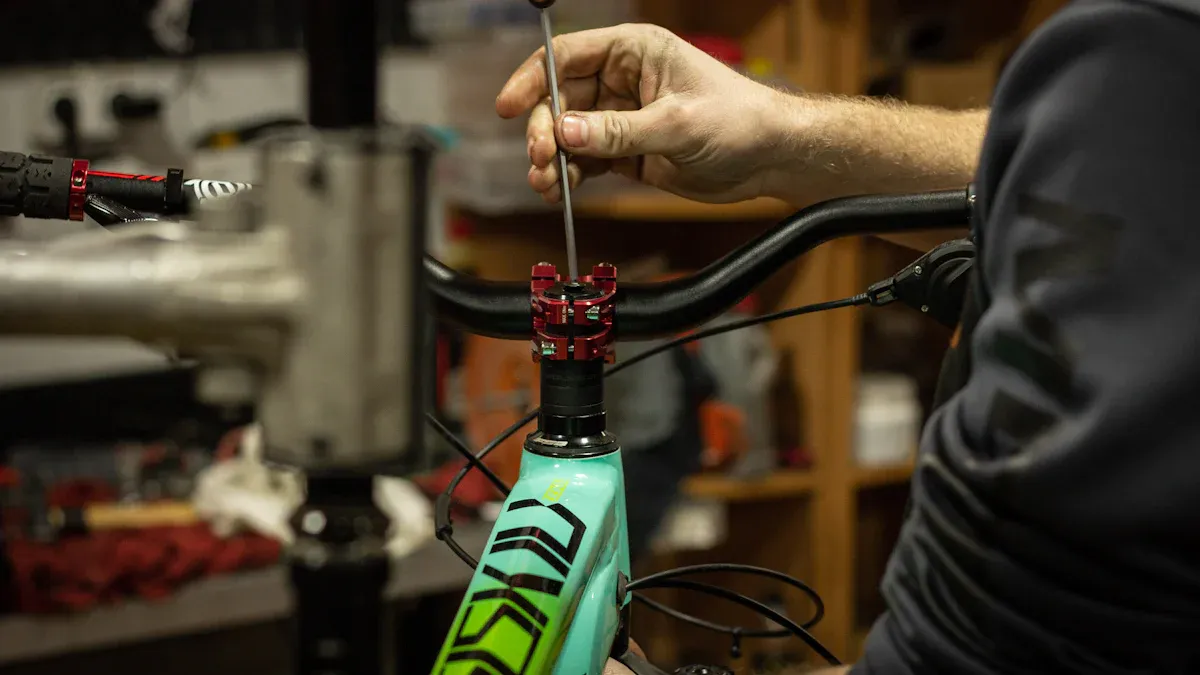
Preparing the Bike Frame
Inspecting the Frame
Before you put gun blue on your bike frame, check it carefully. Look for any damage, rust, or flaws. Here’s what to look for:
Frame Material: Find out what your frame is made of. Common materials are aluminum, steel, and carbon fiber. Each type reacts differently to gun blue, so knowing your frame is important.
Surface Condition: Look for scratches, dents, or rust spots. These issues can change how the final finish looks, so fix them if needed.
Existing Coatings: If your frame has chrome or polish, remove it. Gun blue won’t stick well to these surfaces. This can cause uneven coloring or peeling.
Taking time to check your bike frame helps you start with a good base for applying gun blue.
Cleaning Techniques
After checking your frame, clean it well. A clean surface is very important for a smooth finish. Here are some good cleaning methods:
Stripping the Frame: Use a paint stripper or chemical remover to get rid of old coatings. Follow the instructions carefully. Remember to wear your PPE during this step!
Scrubbing: After stripping, scrub the frame with a non-abrasive pad and degreaser. This removes any leftover residue. Pay close attention to crevices and joints where dirt can hide.
Rinsing: Rinse the frame with water to wash away any cleaning products. Make sure no soap or chemicals are left, as they can mess up the gun blue application.
Drying: Let the frame dry completely. You can use a clean cloth or let it air dry. Moisture can stop the gun blue from sticking well, so ensure it’s completely dry.
Final Inspection: Once the frame is clean and dry, do one last check. Look for any spots you missed or areas needing more work. This step is very important for a successful gun blue bike frame project.
By using these cleaning methods, you’ll get your bike frame ready for the best finish. A clean surface not only looks better but also makes the gun blue last longer. Now that your frame is ready, you can move on to heating it, which is the next step!
Heating the Frame
Heating your bike frame is an important step before applying gun blue. Proper heating helps the gun blue adhere better, giving you a more durable finish. You can choose between two effective methods: oven heating or using a heat gun. Let’s break down both options.
Oven Heating
Using an oven is a straightforward way to heat your bike frame. Here’s how to do it:
Preheat the Oven: Set your oven to around 300°F (150°C). This temperature is hot enough to prepare the frame without damaging it.
Prepare the Frame: Place your bike frame on a baking sheet. Make sure it’s clean and dry. You don’t want any moisture or debris in the oven.
Heat the Frame: Put the baking sheet with the frame in the oven. Leave it for about 15-20 minutes. Keep an eye on it to ensure it doesn’t overheat.
Remove Carefully: Use oven mitts to take the frame out. It will be hot, so handle it with care!
Tip: Always let the frame cool down a bit before applying the gun blue. This helps prevent any thermal shock that could affect the finish.
Using a Heat Gun
If you prefer a more hands-on approach, a heat gun is a great alternative. Here’s how to use it:
Set Up Your Heat Gun: Plug in your heat gun and set it to a medium heat setting.
Heat the Frame: Hold the heat gun about 6-12 inches away from the frame. Move it back and forth to evenly distribute the heat. Focus on one area at a time, but don’t stay too long in one spot to avoid overheating.
Check the Temperature: You want the frame to feel warm to the touch but not too hot. A good rule of thumb is to aim for a temperature similar to the oven method.
Let It Cool: Just like with the oven method, allow the frame to cool slightly before applying the gun blue.
By heating your bike frame using either of these methods, you’ll set yourself up for a successful gun blue application. A well-heated frame ensures that the finish adheres properly, giving your bike a sleek and stylish look that lasts.
Gun Blue Application
Choosing Gun Blue
When it comes to selecting the right gun blue for your bike frame, you have a few options. Different products offer various finishes and levels of protection. Here are some popular choices:
Birchwood Casey Super Blue: This is a favorite among DIY enthusiasts. It provides a deep, rich color and is easy to apply. Plus, it offers good rust protection.
Brownells Oxpho Blue: Known for its durability, this product gives a beautiful finish. It’s a bit thicker, so it might take a little more effort to apply, but the results are worth it.
Cold Blue Solutions: If you’re looking for something more eco-friendly, consider cold blue solutions. These products often have fewer harsh chemicals and are safer for your health.
Tip: Always read the label and follow the manufacturer’s instructions. This ensures you get the best results and stay safe while working.
Application Steps
Now that you’ve chosen your gun blue, it’s time to apply it to your bike frame. Follow these steps for a successful application:
Prepare Your Workspace: Make sure your area is clean and well-ventilated. Lay down some old newspapers or a drop cloth to catch any spills.
Gather Your Supplies: You’ll need:
Gun blue of your choice
Clean rags or paper towels
A small brush or applicator
A container for the gun blue
Gloves and goggles (you already have these from the safety section!)
Apply the Gun Blue:
Dampen the Applicator: Soak your brush or cloth in the gun blue. You want it wet but not dripping.
Start at One End: Begin applying the gun blue at one end of the frame. Use even strokes to cover the surface. Work your way around the frame, ensuring you don’t miss any spots.
Layering: Depending on the product, you may need to apply multiple coats. Allow each coat to dry according to the instructions before adding the next one. This helps achieve a deeper color and better protection.
Final Touches:
After the last coat dries, inspect your work. If you see any uneven areas, you can touch them up with a little more gun blue.
Once you’re satisfied with the finish, wipe down the frame with a clean rag to remove any excess product.
Curing: Let the frame cure for at least 24 hours before handling it. This allows the gun blue to fully bond with the metal, ensuring a long-lasting finish.
Note: Gun blueing is not just about aesthetics; it also protects your bike frame from rust and wear. Taking the time to apply it correctly will pay off in the long run.
By following these steps, you’ll transform your bike frame into a stunning piece that stands out on the road. Plus, you’ll enjoy the satisfaction of having done it yourself! Now that your frame is beautifully blued, you can move on to the finishing touches to really make it shine.
Finishing Touches
Polishing Techniques
Now that your bike frame looks stunning with its new gun blue finish, it’s time to add some shine! Polishing your frame not only enhances its appearance but also helps protect the surface. Here’s how you can do it:
Choose the Right Polish: Look for a metal polish that’s safe for your frame material. Brands like Mothers Mag & Aluminum Polish or Flitz Metal Polish work well.
Apply the Polish: Use a soft cloth or a microfiber towel. Apply a small amount of polish to the cloth and rub it onto the frame in circular motions. This technique helps to avoid scratches.
Buff It Out: After applying the polish, take a clean section of your cloth and buff the frame. You want to bring out that shine without leaving any residue behind.
Regular Maintenance: Make polishing a part of your bike maintenance routine. A quick polish every few rides keeps your frame looking fresh and protects it from dirt and grime.
Protective Coatings
To keep your bike frame looking great for years, consider adding a protective coating. One popular option is boiled linseed oil. It’s easy to apply and offers excellent protection against moisture and rust. Here’s how to use it:
Application: Use a clean cloth to apply a thin layer of boiled linseed oil to the frame. Make sure to cover all areas evenly.
Let It Soak: Allow the oil to soak in for about 30 minutes. This step helps it penetrate the metal and provides better protection.
Wipe Off Excess: After soaking, wipe off any excess oil with a clean cloth. You don’t want it to be too greasy.
Reapply as Needed: Depending on your riding conditions, you might want to reapply the oil every few months. This keeps your frame protected and looking sharp.
Tip: Always work in a well-ventilated area when using any chemicals, including boiled linseed oil. Your safety is important!
By polishing and applying a protective coating, you’ll ensure your bike frame not only looks fantastic but also stands up to the elements. Enjoy your ride knowing you’ve put in the effort to make your bike truly yours!
You’ve made it through the entire process of gun bluing your bike frame! 🎉 Here’s a quick recap of the key steps:
Safety First: Gear up with PPE and set up a ventilated workspace.
Prepare the Frame: Inspect and clean your bike frame thoroughly.
Heat the Frame: Use an oven or heat gun to warm it up.
Apply Gun Blue: Choose your product and apply it carefully.
Finishing Touches: Polish and protect your frame for lasting beauty.
Now, it’s your turn to dive into this project. Enjoy the satisfaction of transforming your bike into a unique masterpiece that reflects your style! Happy bluing! 🚴♂️✨
FAQ
What safety precautions should I take when gun bluing my bike frame?
Always wear safety goggles, gloves, and a respirator mask. Work in a well-ventilated area to avoid inhaling harmful fumes. Keep flammable materials away from your workspace.
How long does the gun blue finish last?
With proper care, a gun blue finish can last several years. Regular maintenance, like polishing and applying protective coatings, helps extend its life.
Can I gun blue an aluminum bike frame?
Yes, you can gun blue aluminum, but results may vary. Ensure you use a product specifically designed for aluminum surfaces for the best finish.
How do I maintain my gun-blued bike frame?
Regularly clean your frame with a soft cloth. Apply metal polish every few rides and reapply boiled linseed oil every few months for added protection.
What should I do if the gun blue finish looks uneven?
If you notice uneven areas, you can touch them up with more gun blue. Apply a thin layer, let it dry, and buff it out for a consistent look.
See Also
Achieve Bike Frame Perfection in Just Three Simple Steps
Effective Strategies for Safeguarding Your Bike Frame
Applying Bike Frame Decals for a Perfect Look