
You will follow a step by step guide to build a drift trike bike frame with your own hands. The process demands careful attention and preparation. Before you start, remember that safety matters every moment. Many builders feel proud when they complete a custom built frame for their drift trike. This project will give you a chance to learn new skills and enjoy the thrill of building a drift trike. Review all project steps and gather your materials so you can build your drift trike bike frame with confidence.
Tip: Always double-check each measurement during your project to avoid mistakes.
Key Takeaways
Always wear the right safety gear like helmets, gloves, and pads. This will help keep you safe while building.
Use strong and clean steel parts. Measure carefully to make a sturdy and straight drift trike frame.
Begin welding with small tack welds to check if things line up. Then finish the welds slowly to make them strong.
Put together parts like the axle, seat, and wheels tightly. Use PVC sleeves on the back wheels so you can drift easily.
Do careful safety checks and take test rides. Fix any problems to keep your drift trike safe and fun to ride.
Safety Guide
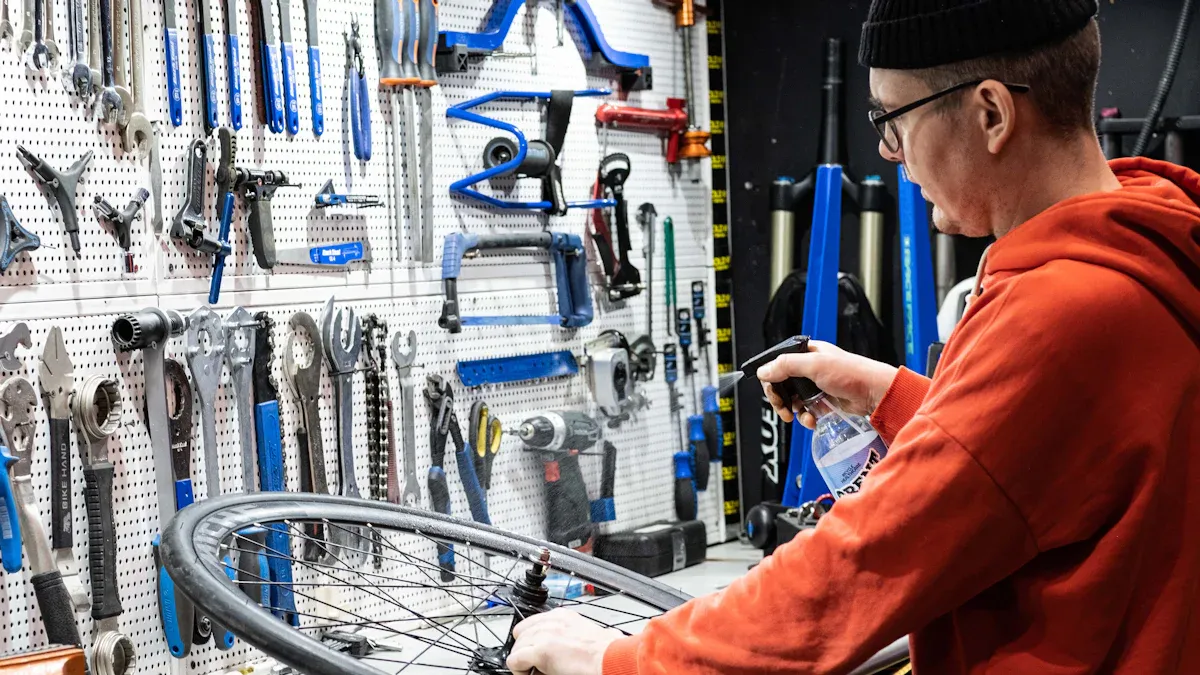
Safety Gear
You need to wear the right gear before you start working on your drift trike bike frame. Good safety gear protects you from burns, cuts, and other injuries. Here is a quick list of what you should use:
Gloves (help you grip tools and shield your hands)
Knee and elbow pads (protect your joints from scrapes and impacts)
Closed-toe shoes (keep your feet safe and give you better control)
Tip: Always check your gear for damage before each use. Replace anything that looks worn out.
Workshop Setup
Set up your workshop in a way that keeps you safe and helps you work better. You should choose a space with good airflow. This helps you avoid breathing in fumes from welding. Keep your area clean and free of clutter. Store tools and materials in places where you can reach them easily. Make sure you have a fire extinguisher nearby. Good lighting helps you see your work and spot any problems.
Note: Never weld near flammable materials. Move anything that could catch fire out of your workspace.
Welding Precautions
Welding can be dangerous if you do not follow the right steps. Always read the instructions for your welding machine. Use a welding mask to protect your eyes and face from sparks and bright light. Keep your hands and arms covered with long sleeves. Work slowly and check your progress often. If you feel tired, take a break. This guide will help you stay safe and build a strong drift trike bike frame.
Safety matters every step of the way. Make it a habit to follow these rules each time you weld.
Materials and Tools
Frame Tubing and Parts
You need strong materials to build a drift trike that lasts. Most builders choose high-quality steel for the frame. Steel handles the stress of drifting and sliding better than other metals. You can use steel tubing, scrap metal, or even sprinkler pipe. Many people add extra supports to the frame to make it sturdy. For the motor mount, 1/4 inch steel works well. Steel is also common for axles and hubs. Aluminum is lighter, but it does not last as long as steel. Always check that your frame parts are straight and free from rust before you start.
Tip: Smooth, even welds and a reinforced design help your frame stay strong for years.
Welding Equipment
You need the right tools to cut, shape, and join your frame parts. Here is a table to help you choose:
Tool Category | Recommended Tools / Tips |
|---|---|
Measuring & Cutting | Straight edge, calipers, hacksaw, angle grinder, drill |
Cleaning & Prep | Belt sander, sandpaper (240 grit), wire brush, alcohol |
Holding & Alignment | Frame jig, clamps, magnets, dummy axle |
Welding Equipment | MIG or TIG welder (TIG gives cleaner welds), safety gear |
Extra Tools | Angle finder, dremel, sharpies, aviation tin snips |
You should clean all metal surfaces before welding. Use sandpaper and a wire brush, then wipe with alcohol. This step helps you get strong welds. If you are new to welding, consider taking a class or practicing at a maker space.
Additional Components
You need more than just the frame and welding tools. Gather these extra parts before you start:
Seat (comfortable and secure)
Rear axle and wheels (steel is best)
Front fork and handlebars (from a donor bike)
Footrests and supports
Bolts, nuts, and washers (for mounting parts)
Fire extinguisher (for safety)
Check that all parts fit your frame design. Good planning makes the welding and assembly process much easier.
Preparing Parts
Donor Bike Disassembly
You need to start your drift trike project by taking apart a donor bike. This step gives you the main parts for your new frame. Follow these steps to make sure you get the best results:
Cut the top tube, seat tube, and chainstay from the BMX frame. Leave only the down tube and the front fork with the wheel.
Plan to weld the BMX bottom bracket to the rear section of your drift trike frame. This part connects the pedals and crank.
Do a mock-up fitting. Place the BMX front assembly with the rear frame before you weld. This helps you check the alignment and fit.
Strip the paint from the BMX frame if you want to repaint your drift trike. Use a paint stripper for a smooth surface. This works better than a polish wheel.
Prepare the frame surface for welding and painting. Clean metal helps you get strong welds and a good finish.
Tip: Take photos during each step. These pictures help you remember how to put parts back together or check your progress.
Cleaning and Inspection
After you take apart the donor bike, you need to clean and inspect every part. Dirt, grease, and old paint can weaken your welds. Use a wire brush and sandpaper to remove rust and grime from the frame. Wipe each piece with alcohol to get rid of oil. Check the frame for cracks or bends. Replace any damaged parts before you build your drift trike. A clean and straight frame makes your build safer and stronger.
Note: Careful cleaning and inspection help you avoid problems later in the build. You save time and effort by starting with good parts.
Cutting and Fitting
Measuring and Marking
You need to measure and mark each tube before you start cutting. Accurate measuring helps your frame fit together perfectly. Start with a precision steel rule and beam trammel points. These tools let you transfer measurements and scratch clear layout lines on your tubing. Mark the spine of each tube to keep the orientation correct. If you want to wrap a line around the tube at a perfect 90°, use a friction-fit ring tool. This step keeps your miters straight.
Many builders use CAD software or BikeCAD to get exact tube lengths and angles for the frame. You can draw your design on the floor with tape first, then use CAD for final numbers. Good lighting and bifocal safety glasses help you see your marks better. Take your time with this step. Careful measuring and marking make the rest of the build much easier.
Cutting Tubing
After you finish marking, you can start cutting. Use a 10-inch miter saw with a large grinder wheel for square tubing. This tool gives you cleaner and more accurate cuts than an angle grinder. For round tubing, a fine-tooth bi-metal hole saw works well. Replace the saw blade if it gets dull. If you need to join square tubing to round tubing, notch the inside of the square tube with an angle grinder. This method helps the pieces fit snugly before you weld them into the frame.
Some builders use a pipe bender with sand inside the tube to prevent kinks. You can also heat the tubing with a torch to make bending easier. Always double-check your cuts against your frame design before moving to the next step.
Frame Jig Setup
A frame jig holds your tubing in place while you weld. You can build a simple jig from wood or metal. The jig keeps your frame straight and helps you keep all the angles correct. Use clamps and magnets to hold each piece steady. Place a dummy axle in the jig to check alignment. Make sure the frame sits flat and square before you start welding. A good jig saves you time and helps you avoid mistakes during assembly.
Tip: Always check your frame in the jig from different angles. Small errors now can cause big problems later.
Frame Layout
Geometry and Alignment
You need to pay close attention to the geometry of your drift trike. The way you set up the frame affects how your trike handles and how safe it feels. Here are some key points to check:
Toe-in and toe-out: Adjust the angle of the front wheels. A slight toe-in helps the wheels roll straight and prevents wandering.
Camber: Look at the tilt of the wheels from the front. Negative camber, where the tops of the wheels tilt inward, can help with cornering but may cause extra tire wear.
Caster: Check the tilt of the steering axis. Positive caster, with the axis tilted backward, helps the wheels return to center after a turn and improves straight-line stability.
Frame symmetry: Make sure the rear triangle lines up with the front triangle. Good symmetry keeps your trike stable and easy to handle.
Measurement tools: Use framing squares, toe-in gauges, and alignment indicators to check your work.
You should also check that the head tube axis matches the seat tube axis. Try to keep any difference within one degree. If you find small misalignments, you can cold-set or gently bend the frame. Always work slowly and check the material type before making adjustments. Most builders accept a tolerance of 1-2 mm for frame alignment.
Tip: Careful alignment now saves you from handling problems and uneven tire wear later.
Mock-Up
Before you weld the frame, you should do a full mock-up. Lay out all the parts in your jig. Place the tubing, fork, axle, and seat where they will go. This step helps you see if everything fits and lines up. Use clamps and magnets to hold the frame pieces in place. Check the alignment from every angle. Make sure the rear triangle sits square with the front triangle.
You can use digital calipers or a frame alignment indicator to measure distances. Look for gaps or twists in the frame. If you spot a problem, adjust the parts before you weld. A good mock-up helps you avoid mistakes and makes the final frame stronger and safer.
Note: Take your time with the mock-up. Small changes now can make a big difference in how your drift trike rides.
Welding Drift Trike Bike Frame
Tack Welds
You start welding the drift trike bike frame by making tack welds. Tack welds are small, temporary welds that hold the frame pieces together. You use them to check the alignment of the frame before you finish welding. Tack welds let you see if the wheels line up and if the frame sits straight in the jig. If you spot a problem, you can break the tack weld and adjust the part. This step helps you avoid big mistakes later.
When you tack weld, place small welds at each joint. Use at least two or three tack welds per joint to keep the frame stable. Always check the frame from different angles. You want the drift trike to roll straight and feel balanced. Tack welds give you the chance to fix any issues before you move on to full welds.
Tip: Use a frame jig and clamps to hold everything in place while you tack weld. This keeps the frame from moving and helps you get perfect alignment.
Full Welds
After you finish tack welding and check the alignment, you can start full welds. Full welds make the frame strong and ready for riding. You need to weld each joint all the way around. Move slowly and keep your hand steady. Try to make each weld smooth and even.
Many builders use TIG welding for drift trike bike frames. TIG welding works well for thin-walled steel. It gives you clean, strong welds that look good and last a long time. MIG welding can work, but it sometimes makes messy welds that need extra grinding. TIG welding helps you avoid this problem. You get a better finish and a stronger frame.
Work in small sections to keep the frame from warping. Let the frame cool between welds. This step helps you keep the shape and alignment you set during tack welding. Always check your progress as you go.
Note: TIG welding takes practice. If you are new, try welding on scrap pieces first. This helps you learn how to control the heat and make smooth welds.
Weld Quality Check
When you finish welding the frame, you need to check your work. Good welds keep your drift trike safe and strong. Look at each weld for cracks, holes, or gaps. The welds should look smooth and even. Use a flashlight to check hard-to-see spots.
You can tap the frame with a small hammer. Listen for solid sounds. Hollow or rattling sounds can mean a weak weld. If you find a problem, grind out the bad weld and redo it. Do not skip this step. A strong drift trike bike frame depends on good welds.
Here is a simple checklist for your weld quality check:
Step | What to Look For | What to Do If You Find a Problem |
|---|---|---|
Visual Inspection | Smooth, even welds | Grind and re-weld rough spots |
Sound Test | Solid, ringing sound | Re-weld any hollow or weak areas |
Alignment Check | Frame sits flat and straight | Adjust and re-weld if needed |
Safety Alert: Never ride your drift trike if you see cracks or weak welds. Always fix problems before you finish the build.
You have now finished welding the frame. You can feel proud of your work. The next steps will help you finish your drift trike and get it ready for the road.
Assembly Step by Step Guide
Building your drift trike moves forward once you finish welding the frame. This step by step guide helps you assemble each part for a safe and fun ride.
Axle and Mounts
You start by installing the rear axle. Most builders use kart-style bearing brackets to mount the live axle. These brackets hold the axle steady and let it spin smoothly. Some people try pillow blocks, but kart parts work best for a drift trike. You may need to make custom mounts for the motor and frame. Many builders use rear rails, brakes, sprocket hubs, and axles from go-karts. Place the axle behind the seat and secure it with the brackets. Always check that the axle sits straight and spins freely.
Tip: Be ready to adapt or make your own mounts. Drift trikes often need creative solutions because few ready-made parts exist.
Seat and Wheels
Next, attach the seat and wheels. Choose a padded seat for comfort. Adjustable seats help you find the best position, especially if you are tall. Secure the seat to the frame so it does not move during rides. For the rear wheels, use hard plastic (PVC) sleeves. These sleeves help your drift trike slide and drift easily. The front wheel should have good grip for steering. Many riders pick 20-inch wheels for better handling. Some prefer larger front wheels for looks and performance.
Feature | Description |
|---|---|
Seat | Adjustable, padded, and comfortable for long rides |
Rear Wheels | PVC sleeves for easy drifting |
Front Wheels | Good grip for steering |
Note: Rear wheels with PVC covers wear out fast on rough roads but are easy to replace.
Footrests and Supports
Install footrests and supports last. Place the footrests close to the steering pivot. This position helps you balance and steer better. Make sure the supports are strong and do not move. Good footrest placement keeps your feet safe and gives you more control. Check that all bolts and nuts are tight before you ride.
This step by step guide gives you the basics for assembling your drift trike. Follow each step in this guide to build a safe and strong trike.
Engine and Electronics
Engine Mounting
You need to choose the right engine for your motorised drift trike. Most builders use pit-bike engines based on the Honda Cub or Monkey bike design. These engines are single-cylinder, 4-stroke, and have sizes from 50cc to 140cc. Many people pick a 90cc, 110cc, or 125cc engine. A 125cc engine gives you more power than you need for most drift trikes. Semi-automatic transmissions make riding easier because you do not need to use a clutch. Electric start is a smart choice since kick-starting can be hard after mounting the engine.
To mount your engine safely and securely, follow these steps:
Clean all welding surfaces to make strong welds.
Cut and weld mounting pipes with care, centering the engine on the frame.
Measure and mark mounting points using the engine’s specs, then drill holes accurately.
Place the engine so the front sits 2 inches from the back of the mounting pipe, with mounting holes 6.38 inches apart.
Align sprockets and clutches so the chain runs straight.
Mount the sprocket and hubs on the axle, measuring 9 inches from the bearings on each side.
Tighten set screws and align keys on the axle with the sprocket and hubs, using a 1/4 inch key.
Weld the sprocket to the axle for extra security if needed.
Weld hubs about a quarter inch from the axle ends.
Check clearances before final welding to make sure the sprocket spins freely.
Tip: Always double-check alignment before you finish welding. This helps your motorised drift trike run smoothly.
Wiring Basics
You need to wire your motorised drift trike for safe and reliable operation. Good wiring keeps your electronics working and prevents problems. Here are some important tips:
Use high-quality motor controllers like Kelly or VESC. Cheap controllers can overheat and fail.
Add cooling for your controller to stop it from getting too hot.
Pick strong connectors, such as bullet terminals, but make sure they do not overheat.
Adjust controller settings to balance torque and speed for drifting.
Separate high and low voltage systems with switches for safety.
Use indicator LEDs to show when power is on.
Bundle and secure wires with zip ties. Keep them away from moving parts.
Organize relays and wiring under the dashboard to avoid damage.
Install a waterproof battery box to protect your electronics.
Connect throttle, battery, and controller carefully. Check all connections.
Inspect wiring and parts often to catch problems early.
Make sure all parts—motor, battery, controller, sprockets, and chain—work well together.
Note: Good wiring and careful checks help your drift trike stay safe and fun to ride.
Finishing Drift Trike
Grinding and Smoothing
You need to make your welds and frame smooth before you paint. Start by using an angle grinder with a flap disc. This tool helps you remove sharp edges and extra weld material. Move the grinder slowly over each weld. Keep your hands steady to avoid making deep scratches. After grinding, switch to a finer grit sandpaper. Sand the frame by hand to get a smooth finish.
Check every joint and corner. Look for rough spots or sharp points. Use a file to reach tight areas. Smooth metal helps paint stick better and keeps you safe from cuts. Wipe the frame with a clean cloth to remove dust and metal shavings.
Tip: Wear safety glasses and gloves when you grind. Metal dust can hurt your eyes and skin.
Here is a simple checklist for this step:
Grind all welds flat
Sand the frame smooth
File sharp corners
Clean off dust
Painting and Coating
You want your drift trike to look great and last a long time. Paint protects the metal from rust and gives your trike a custom look. Start by applying a primer. Primer helps the paint stick and covers small scratches. Spray the primer in thin, even coats. Let each coat dry before you add the next.
After the primer dries, choose a paint color you like. Use spray paint for a smooth finish. Hold the can about 12 inches from the frame. Move your hand back and forth to avoid drips. Apply two or three coats for the best color.
Finish with a clear coat. This layer protects the paint from chips and sunlight. Let the frame dry for at least 24 hours before you touch it.
Step | Purpose | Tip |
|---|---|---|
Primer | Helps paint stick, prevents rust | Use thin, even coats |
Paint | Adds color and style | Spray from 12 inches away |
Clear Coat | Protects paint, adds shine | Let dry fully |
Note: Good paint and careful work make your drift trike stand out and last longer.
Testing and Troubleshooting

Safety Checks
Before you take your drift trike out for a test ride, you need to make sure everything is safe and ready. Start by checking the frame. Look for cracks, bends, or weak spots. Steel frames usually give you more strength and reliability than aluminum. Inspect every weld to see if it looks solid and smooth. Next, check the wheels. Use wheels made from strong materials like high-density polyethylene (HDPE) to avoid cracking. Make sure the tires have no wear and are properly inflated.
You must also test the brake system. Squeeze the brake lever and see if the brakes respond quickly. Check the brake pads for wear and make sure the cables move smoothly. Clean and lubricate moving parts like wheel bearings and brake components. Tighten all screws and bolts so the frame feels sturdy.
Safety Check Area | Key Actions |
|---|---|
Frame Inspection | Check for cracks or bends |
Wheel Inspection | Verify tires for wear and proper inflation |
Brake System | Inspect pads and cables for function and lubrication |
Cleaning & Lubrication | Clean and lubricate moving parts |
General Assembly | Tighten all screws and ensure sturdy construction |
Tip: Never skip safety checks. A careful inspection keeps you safe and helps your trike last longer.
First Ride
Your first ride is an exciting moment. Choose a flat, open area with no traffic. Wear all your safety gear, including a helmet and pads. Start slow and test the brakes before picking up speed. Listen for strange noises and feel for any shaking or wobbling. Try gentle turns to see how the trike handles. If you notice anything unusual, stop and check the frame, wheels, and brakes again.
Note: Always ride with a friend nearby during your first test. They can help if you need assistance.
Common Issues
You may face some problems during your first tests. Front-end instability, like shimmy or wobble, can happen at higher speeds. This often comes from steering geometry issues or loose headset bearings. You can fix this by adjusting the head angle, lengthening the wheelbase, or widening the track. Using forks with more offset or suspension, such as bent springer forks, can also help.
Other common issues include frame flex and headset bearing play. Make sure the headset bearings are hand-tightened—not too loose or too tight. Lowering the center of gravity and using a steel frame can improve handling. If you still feel instability, try changing the fork orientation or using bigger wheels.
Check for front-end wobble and adjust geometry
Tighten headset bearings by hand
Use forks with proper offset or suspension
Lower the center of gravity for better control
Test different wheel sizes or fork setups
Callout: Testing and troubleshooting help you build a safer, smoother, and more reliable drift trike.
You have completed a rewarding project by learning how to build a drift trike from start to finish. Keep your drift trike safe and strong with these routines:
Inspect the frame for cracks or bends, especially at welds.
Check and replace tires if worn.
Tighten the seat and adjustable parts before each ride.
Before riding, always check local laws. Some places require special permits for this project. Share your build with others or ask the DIY community for help.
FAQ
How long does it take to build a drift trike bike frame?
You can finish this project in about one or two weekends. The time depends on your skills and the tools you have. Careful planning helps you work faster and avoid mistakes.
What type of welder should I use for the frame?
You should use a TIG welder for the cleanest and strongest welds. MIG welders also work if you practice first. Always test your welder on scrap metal before you start the main frame.
Can I use parts from an old bike for my drift trike?
Yes, you can use many parts from a donor bike. The front fork, handlebars, and some frame sections work well. Make sure you clean and inspect each part before adding it to your project.
Do I need special skills to complete this project?
You do not need to be an expert, but basic welding and measuring skills help a lot. You can learn by watching videos or asking for help from the DIY community. Practice on scrap metal before you start your main project.
How do I keep my drift trike safe to ride?
You should check all welds, bolts, and moving parts before each ride. Wear safety gear every time. Test the brakes and wheels in a safe area. Regular checks keep your project safe and fun.
See Also
The Evolution Of Single Gear Bike Frames From Iron To Carbon
Exploring The Innovations Powering Carbon Fiber Bike Frames
Best Materials For Electric Bike Frames And Their Benefits
Key Differences Between Fat And Mountain Bike Frames Explained