
Imagine you are getting ready for a weekend ride. Suddenly, you find a broken mountain bike frame. You feel frustrated because this could ruin your plans. It is very important to fix frame problems fast. This helps keep your rides safe and fun. Common reasons for breaks are the thin design of carbon frames. They cannot handle unexpected forces well. Luckily, there are many ways to fix a broken mountain bike frame. We will look at them soon!
Key Takeaways
Fixing a broken mountain bike frame with epoxy works well for small cracks. You need tools like epoxy resin, sandpaper, and materials to make it strong.
Welding is good for steel or aluminum frames that are badly damaged. Always check the damage first. Get professional help if you are not experienced.
Quick fixes like duct tape and cable ties can help you ride again fast. But these fixes are not permanent. You should replace them with real repairs as soon as you can.
Repairing a Broken Mountain Bike Frame with Epoxy
Tools Needed
Before you start, gather these tools and materials:
Sandpaper (different grits)
Clean cloth
Masking tape
A small brush or applicator
Reinforcement materials (like fiberglass cloth or carbon fiber patches)
Step-by-Step Instructions
Prepare the Area: First, take your bike apart. Remove any parts near the damaged area. This makes it easier to fix the broken bike frame. Use masking tape to cover areas around the break. This keeps your bike safe from epoxy drips.
Clean the Surface: Use a clean cloth to wipe the damaged area. Make sure it’s free of dirt, grease, and moisture. A clean surface helps the epoxy stick better.
Sand the Area: Take your sandpaper and gently sand the area around the crack. This roughens the surface, helping the epoxy stick more effectively. Be careful not to sand too hard; you just want to create a good surface for bonding.
Mix the Epoxy: Follow the instructions on your epoxy resin kit. Mix the resin and hardener in a clean container. Make sure to mix well to ensure a strong bond.
Apply the Epoxy: Use a small brush or applicator to put the mixed epoxy on the damaged area. If you have reinforcement materials, lay them over the epoxy while it’s still wet. This adds strength to your repair.
Let it Cure: Allow the epoxy to cure as the manufacturer says. This usually takes several hours. Avoid moving the bike during this time to ensure a solid bond.
Finish Up: Once cured, sand the area lightly to smooth it out. You can repaint it if needed to match the rest of your bike.
Repairing a broken mountain bike frame with epoxy can cost between $400 and $700. This depends on the type of frame and how bad the damage is. This method works well for small surface cracks, giving you a chance to ride again without losing your bike’s strength.
Remember, safety is important. If you feel unsure about your skills, don’t hesitate to ask a professional for help.
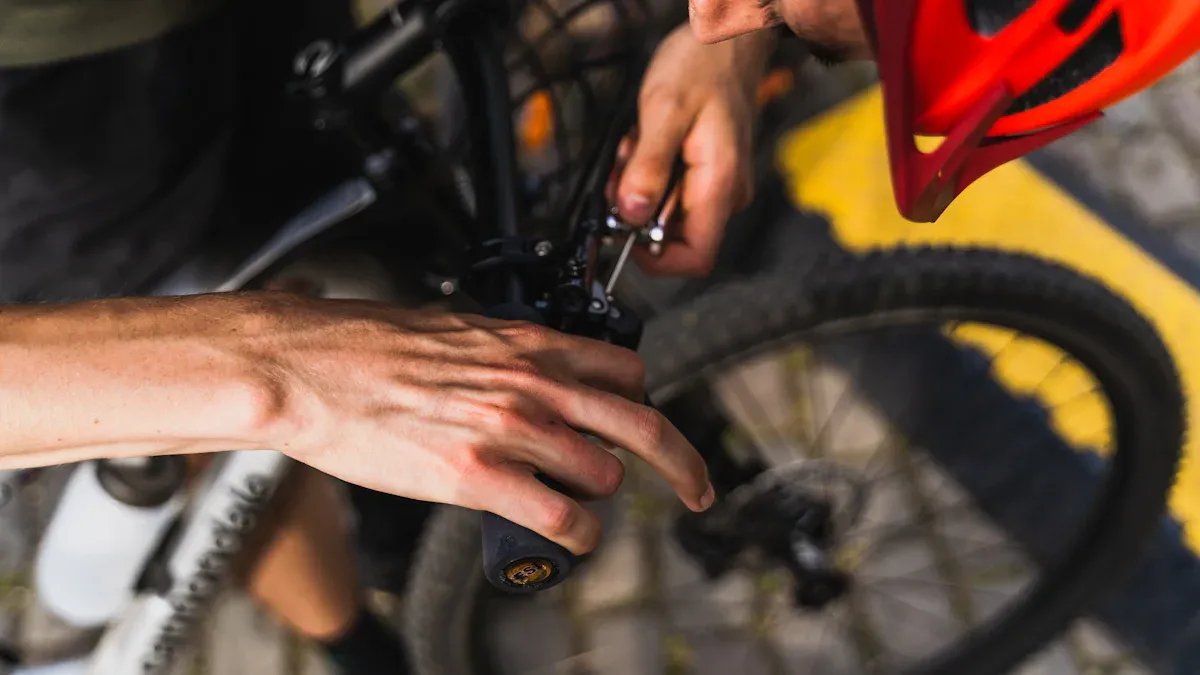
Welding a Broken Bike Frame

Welding is a good way to fix a broken mountain bike frame. This is especially true for big damage. It works best on steel or aluminum frames. But if your bike has a carbon frame, welding won’t work. Carbon can’t handle heat well. Trying to weld it can cause more damage.
Tools Needed
Before you start, gather these tools:
Welding machine (MIG or TIG)
Protective gear (gloves, helmet, and apron)
Grinder or wire brush
Clamps
Measuring tools
Step-by-Step Instructions
Assess the Damage: First, look closely at the broken bike frame. Check for cracks or breaks that need welding. If you’re not sure how bad it is, ask a professional for help.
Prepare the Area: Clean the damaged area well. Use a grinder or wire brush to take off any paint or rust. This helps the weld stick better.
Clamp the Frame: Use clamps to hold the broken pieces together. This keeps everything steady while you weld.
Weld the Frame: With your welding machine, carefully apply the weld along the crack. Follow proper welding techniques to avoid overheating the metal. Remember, welding aluminum can create a Heat Affected Zone (HAZ) that weakens it.
Finish Up: After the weld cools, grind down any rough spots. You can repaint the area to match the rest of your bike.
Welding can make your bike work again. But remember, a welded repair might not be as strong as the original frame. For example, welding on a 6061-T6 aluminum frame can make it much weaker. To get back the original strength, the whole frame often needs a complete T6 heat treatment. This can be hard and expensive.
If you don’t have welding experience, it’s best to ask a professional welder. They can make sure the repair is done right, keeping your bike safe for future rides.
Repairing a Broken Carbon Frame
Fixing a broken carbon frame might look hard, but it’s possible. With the right tools and some patience, you can ride again. You need a carbon repair kit for this job. This kit usually has epoxy resin, hardener, and materials like carbon fiber patches.
Tools Needed
Get these tools ready before you start:
Carbon repair kit
Sandpaper (different grits)
Clean cloth
Masking tape
A small brush or applicator
Safety goggles and gloves
Step-by-Step Instructions
Assess the Damage: First, look at your bike for cracks or breaks. Carbon fiber can easily get damaged from hits that aren’t from its support direction. If you see any damage, stop riding right away. Riding more can make it worse.
Prepare the Area: Use masking tape to cover the areas around the crack. This keeps your bike safe from extra epoxy. Clean the damaged area with a cloth to get rid of dirt and moisture.
Sand the Surface: Lightly sand the area around the crack. This makes the surface rough, helping the epoxy stick better. Be careful not to sand too hard; you want to make a good surface without hurting the frame more.
Mix the Epoxy: Follow the directions in your carbon repair kit. Mix the resin and hardener in a clean container. Make sure to mix well for a strong bond.
Apply the Epoxy: Use a small brush to put the mixed epoxy over the crack. If your kit has reinforcement materials, lay them over the epoxy while it’s still wet. This makes your repair stronger.
Let it Cure: Let the epoxy cure according to the manufacturer’s instructions. This usually takes several hours. Don’t move the bike during this time to make sure it bonds well.
Finish Up: Once cured, sand the area lightly to smooth it out. You can repaint it if needed to match the rest of your bike.
Fixing a broken carbon fiber bike can cost less than getting a new one. For example, small repairs may cost under $350, while bigger tube repairs can be about $500. This makes fixing your carbon bike a smart choice if the damage isn’t too bad.
Always keep safety first when fixing your bike. If you feel unsure about your skills, ask a professional for help. They can make sure your bike is safe and ready for your next ride.
Temporary Fixes for a Broken Bike Frame
When you find yourself with a broken mountain bike frame, quick fixes can help you get back on the trail temporarily. While these solutions won’t last forever, they can keep you rolling until you can make a proper repair. Here are some tools and methods you can use:
Tools Needed
Cable ties
Duct tape
Sheet metal (like a beer can)
Hose clamps
Wrenches or other tools
Step-by-Step Instructions
Assess the Damage: Look closely at the break. If it’s a small crack, you can often bandage a broken bike frame with simple materials.
Use Cable Ties and Duct Tape: Wrap the damaged area with duct tape and secure it with cable ties. This can hold the frame together temporarily.
Create a Splint: If you have bamboo or a sturdy bar, place it alongside the break. Use hose clamps or duct tape to secure it tightly. This adds extra support.
Wrap with Sheet Metal: If you have a beer can or similar metal, cut it open and wrap it around the break. Secure it with duct tape for added strength.
Utilize Tools as Splints: If you have wrenches or other tools handy, you can use them to brace the broken area. Just make sure they’re secured tightly.
Note: These fixes are not permanent solutions. Riding with a temporarily fixed frame can be risky. For example, aluminum frames can shatter under stress, leading to catastrophic failure. Temporary fixes like epoxy or fiberglass only mask the problem, creating a false sense of security. Continued metal fatigue can lead to further cracks, especially in high-tension areas.
Always prioritize safety. If you’re unsure about your temporary fix, it’s best to avoid riding until you can get a proper repair done.
When to Seek Professional Help
Sometimes, your bike might have damage that is too serious for you to fix. Knowing when to get help from a pro can save you time and keep you safe. Here are some signs that mean it’s time to call an expert:
Signs of Severe Damage
Large Cracks: If you see cracks bigger than a quarter-inch, it’s best to ask a professional.
Deformed Frame: A bent or twisted frame can change how your bike rides and can be unsafe.
Multiple Breaks: If there are several cracks or breaks, you need a professional to check it out.
Carbon Damage: Carbon frames can be hard to fix. If you think there’s damage, don’t ride until a pro looks at it.
Tip: Always put your safety first. Riding a bike with serious damage can cause accidents.
What to Expect from Professionals
When you bring your bike to a repair shop, expect a careful check-up. Professionals will look at the damage and suggest the best way to fix it. Here’s what you might find:
Cost Estimates: Repair prices can change. Here’s a quick look at common costs:
Service Description | Cost |
|---|---|
Replace fork | $40.00 |
Suspension fork seal and oil replacement | $100.00 |
Rear shock seal replacement | $85.00 |
Pivot bearing service | $100.00 |
Frame preparation for assembly (thread chase & face) | $75.00 |
Derailleur hanger (frame) repair/replacement | $15.00 |
Turnaround Time: Most repairs take about 2 to 4 business days, depending on the damage and parts needed.
Qualifications: Look for certified workers. They should have finished programs like the Certified Bicycle Technician Program, showing they know how to do different repairs.
By getting professional help, you can ride again without risking the strength of your bike or your peace of mind.
You now know five ways to fix a broken mountain bike frame. Each method works for different types of damage. Check your skills and the damage before picking a repair option. Keep in mind, DIY repairs can help, but getting professional help usually lasts longer. Always put safety and good maintenance first for your bike!
FAQ
What should you do with a broken carbon bike?
If you suspect damage, stop riding immediately. Assess the damage and consider a DIY patch or consult a carbon bike repair specialist.
How can you tell if a carbon frame is broken?
Look for visible cracks, dents, or unusual sounds while riding. A thorough diagnosis can help determine the extent of the damage.
What is the cost to repair a carbon frame?
The cost to repair a carbon frame varies. Small repairs may cost under $350, while larger damages can reach around $500.
See Also
Practical Tips for Safeguarding Your Bicycle Frame
The Role of Science in Fixing Carbon Bike Frames
Proven Methods to Eliminate Rust from Your Bike Frame