
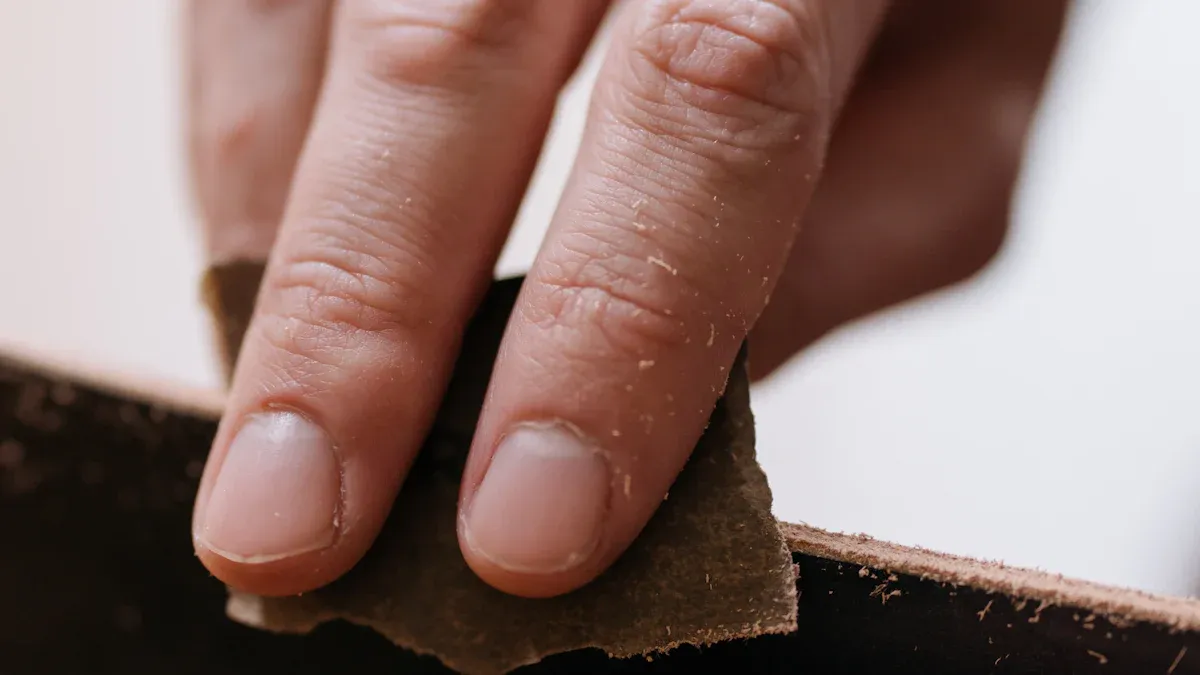
Sanding a bike frame is very important for getting it ready for paint. The right sandpaper grit can change how the finish looks and how well the paint sticks. For example, good surface preparation is key, especially for aluminum frames. Here’s what you need to know:
Coarse sandpaper (like 80 grit) removes old paint well when you sand a bike frame.
Finer grits (around 220 grit) make the surface smooth before you add primer and paint.
Not preparing properly can cause paint to peel in weeks. This shows why choosing the right grit is important for lasting results.
By knowing these things, you can get a professional-looking finish on your bike frame.
Key Takeaways
Pick the right sandpaper grit for your bike frame. This helps make a smooth finish and good paint stick.
Start with rough sandpaper (80-120 grit) to take off old paint and bumps. Then, use smoother grits (180-220) for a nice surface.
For aluminum frames, use medium grit (80-120) first. Then, use fine grit (180-220) to keep it safe.
Wet sanding with 600 grit is very important for carbon fiber frames. This stops damage and helps get a smooth finish.
Always wear safety gear, like safety glasses and a dust mask, to stay safe while sanding.
Overview of Sandpaper Grits
Grit Numbers Explained
When picking sandpaper, it’s important to know grit numbers. Grit numbers show the size of the rough particles on the sandpaper. Lower grit numbers, like 40 or 60, mean coarser sandpaper. You can use these for tough sanding and removing material. Higher grit numbers, such as 220 or 320, mean finer sandpaper. These are best for finishing and polishing.
Groups like CAMI and FEPA set the standards for sandpaper grit sizes. They make sure there is consistency among different brands. This means you can expect similar performance from various sandpaper products. Here’s a quick look at grit ranges and what they do:
Grit Range | Application Description |
|---|---|
Coarse Grits (40 to 60) | Used for heavy material removal and shaping wood or metal. Ideal for initial sanding. |
Medium Grits (80 to 120) | Good for general sanding tasks, smoothing surfaces after coarse grit. |
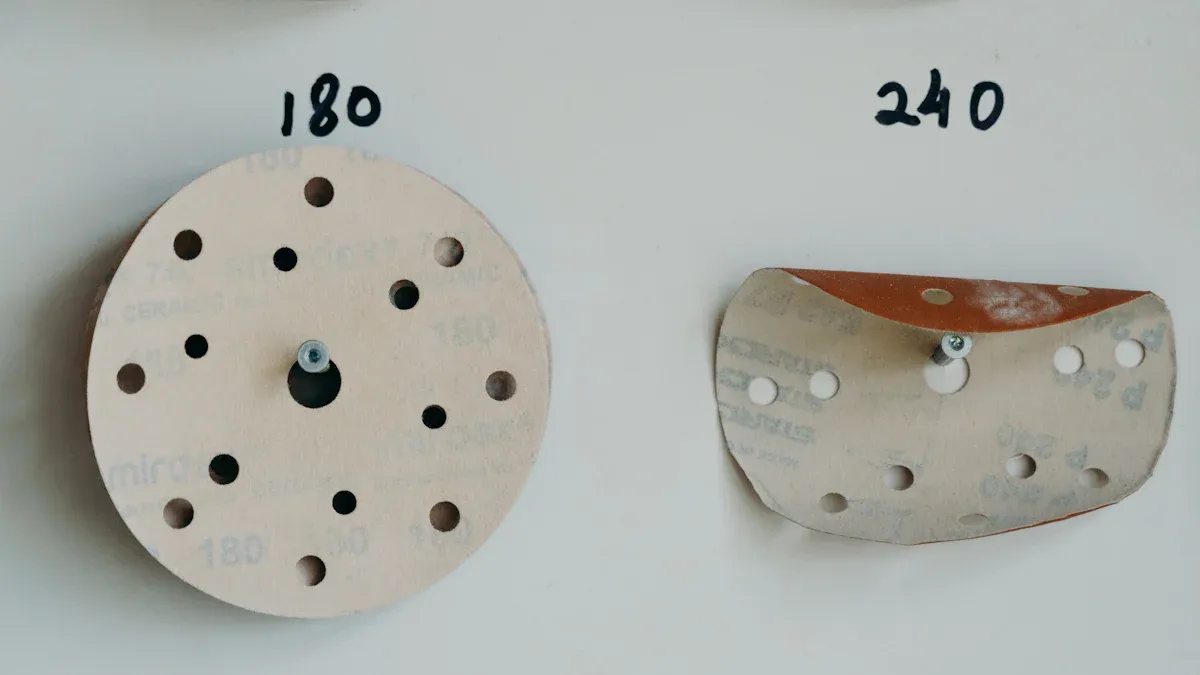
Fine Grits (150 to 180) | Final sanding before finishing, prepares surfaces for painting or staining. |
Very Fine Grits (220 to 240) | Great for polishing and fine finishing work, used between coats of paint. |
Coarse vs. Fine Grits
Coarse and fine grits have different uses when sanding a bike frame. Coarse grits, like 80 or 120, are great for heavy material removal. They help take off old paint and smooth rough areas. But using sandpaper that is too coarse can harm delicate materials, like carbon fiber. This can cause structural problems.
Fine grits, such as 220 or higher, are for finishing touches. They prepare the surface for painting or adding a finish. Fine grits help create a smooth surface, which is important for a professional look. Using sandpaper that is too fine might not remove scratches or flaws well. So, it’s important to pick the right grit for each sanding step.
By knowing grit numbers and the differences between coarse and fine grits, you can make smart choices when sanding a bike frame. This knowledge will help you get the best results in preparing your bike frame.
Grit for Different Materials
Sanding Aluminum Frames
When sanding an aluminum bike frame, you want a smooth surface. Start with medium grit sandpaper, usually between 80 and 120 grit. This grit removes old paint and imperfections. It prepares the surface for more sanding. After this step, switch to finer grits, around 180 to 220 grit, for finishing.
Use maroon sandpaper (medium grit of about 180) to take off paint.
Follow up with yellow sandpaper (fine grit of 220) for a smooth finish.
This two-step method helps avoid scratches and ensures good paint sticking. Aluminum is softer than steel. So, be careful not to sand too much, as it can cause damage.
Sanding Steel Frames
Sanding steel frames needs a different method because steel is harder. For light rust, use 0 or 00 steel wool. If you need to remove paint, use an 80-grit pad on a high-RPM grinder. But this might not work as well as chemical paint strippers.
For light rust, use 0 or 00 steel wool.
For removing paint, an 80-grit pad works well.
Always remember that using sandpaper that is too coarse can scratch the steel. After removing rust or paint, finish with a finer grit, like 220, to prepare for painting. This way, you get a clean and smooth finish, which looks professional.
Sanding Carbon Fiber Frames
Sanding carbon fiber frames needs extra care to avoid damage. Start with wet sanding using 600 grit sandpaper. This grit helps create a rough surface for better paint sticking without showing raw carbon fibers.
Wet sand with 600 grit sandpaper to prepare painted carbon bike frames.
Clean the frame with rubbing alcohol before painting.
Avoid sanding too much, as this can harm the resin and fibers. After sanding, apply a new clear coat or paint to protect against UV rays and keep the frame strong. Always wear protective gear, like a respirator and safety glasses, when working with carbon fiber to stay safe.
By following these grit tips for aluminum, steel, and carbon fiber frames, you can sand a bike frame well while reducing the risk of damage.
Recommended Grits for Specific Tasks
Initial Sanding
When you start to sand a bike frame, you need to focus on removing old paint and surface imperfections. For this initial sanding, choose the right grit based on the frame material. Here’s a quick reference:
Frame Type | |
|---|---|
Metal | 220 |
Metal | 300 |
Carbon | 600 |
Using these grits helps you effectively prepare the surface for further sanding. For metal frames, start with 220 grit to remove old coatings. If the surface is particularly rough, you might want to use 300 grit. For carbon frames, begin with 600 grit to avoid damaging the delicate fibers.
Smoothing Surfaces
After the initial sanding, you need to smooth the surface before applying primer or paint. This step is crucial for achieving a professional finish. Here are the recommended grits for smoothing:
For metal bike frames, use 220 to 300 grit.
For carbon bike frames, stick with 600 grit.
Using these grits ensures that you eliminate any scratches left from the initial sanding. Good surface prep slightly roughens the surface, allowing any coating to have a better “bite.” This prevents flaking or scraping off later.
Final Polishing
The final polishing stage is where you achieve a smooth, paint-ready surface. Follow these steps for the best results:
Start with 180 grit paper to remove anodizing.
Move to 220 grit.
Progress to 400 grit.
Continue with 600 grit.
Use 800 grit.
Finish with 1000 grit.
Sand by hand with 1000 grit wet and dry paper in one direction.
Move on to 1500 grit.
Use 2000 grit.
Final finish sanding with 3000 grit trizak pads.
Wet sanding plays a significant role in this process. It enhances the surface area for polishing, leading to a better shine. Spend a significant amount of time—around 6 hours—on wet sanding to achieve a high gloss finish. The quality of your final polish depends heavily on the wet sanding done prior.
By following these grit recommendations for initial sanding, smoothing, and final polishing, you can effectively sand a bike frame and achieve a professional look.
Tips to Sand a Bike Frame Effectively
Proper Sanding Motion
To get the best results when sanding a bike frame, use a steady and careful motion. Here are some tips to follow:
Use Long, Even Strokes: Sand using long, straight strokes. Avoid circular motions. This helps keep the surface even.
Apply Light Pressure: Let the sandpaper do its job. Pressing too hard can scratch or hurt the frame.
Keep the Sandpaper Flat: Make sure the sandpaper stays flat against the surface. This helps keep the finish even.
Safety Precautions
Sanding can create dust and debris that may be bad for your health. Follow these safety tips to stay safe:
Face and Eye Protection: Always wear safety glasses or goggles. They protect your eyes from flying bits.
Respiratory Protection: Use a dust mask or N95 mask. This helps you avoid breathing in harmful dust, especially when sanding carbon fiber.
Hand and Arm Protection: Lightweight gloves are good for wood sanding. Heavy-duty gloves are better for metal work.
Foot Protection: Wear strong steel-toed shoes. They help protect your feet from falling objects.
Hearing Protection: Use earplugs or earmuffs. They protect your ears from loud tools.
Tools and Accessories
Using the right tools can make sanding easier and better. Think about these tools and accessories:
Dremel Rotary Tools: Great for hard-to-reach spots.
Sanding Discs and Drums: Useful for different sanding jobs.
Specialized Files: Help refine details and edges.
Flap Disk Sanders: Good for delicate frames to prevent damage.
By following these tips, you can sand a bike frame well while keeping safe and getting a professional finish.
Choosing the right sandpaper grit is very important for a great finish on your bike frame. Picking the right grit affects how well the paint sticks and how it looks. Keep these points in mind:
Use 320 grit sandpaper to make the frame smooth before adding the top coat.
Wet sand with 1000 grit to fix scratches in the clear coat for a shinier look.
Sanding the frame helps get rid of any visible marks, scratches, or rust. Use sandpaper with grit between 240-360 and sand the whole frame. Don’t forget to get into the corners and hard-to-reach spots. Clean off the dust and debris with a clean rag to make sure the paint looks perfect.
Follow these tips to improve the strength and appearance of your bike frame. Happy sanding!
FAQ
What grit should I start with for my bike frame?
Begin with 80 to 120 grit for initial sanding. This grit effectively removes old paint and imperfections. Adjust based on your frame material for the best results.
Can I use the same grit for all bike frames?
No, different materials require specific grits. Use medium grit (80-120) for aluminum, coarse grit (80) for steel, and fine grit (600) for carbon fiber to avoid damage.
How do I know when to switch grits?
Switch grits when you achieve a smooth surface. After initial sanding, move to finer grits for smoothing and polishing. This ensures proper paint adhesion and a professional finish.
Is wet sanding necessary for carbon fiber frames?
Yes, wet sanding is crucial for carbon fiber. It prevents damage to the fibers and resin while providing a smooth surface for paint. Always clean the frame before painting.
How can I protect myself while sanding?
Wear safety glasses, a dust mask, and gloves. These protect against dust and debris. Use ear protection if you’re using loud tools. Safety is essential during any sanding project.
See Also
Selecting the Perfect Bike Frame for Your Requirements
A Comprehensive Guide to Choosing Your Ideal Surly Frame
Applying Bike Frame Decals for a Perfect Look