
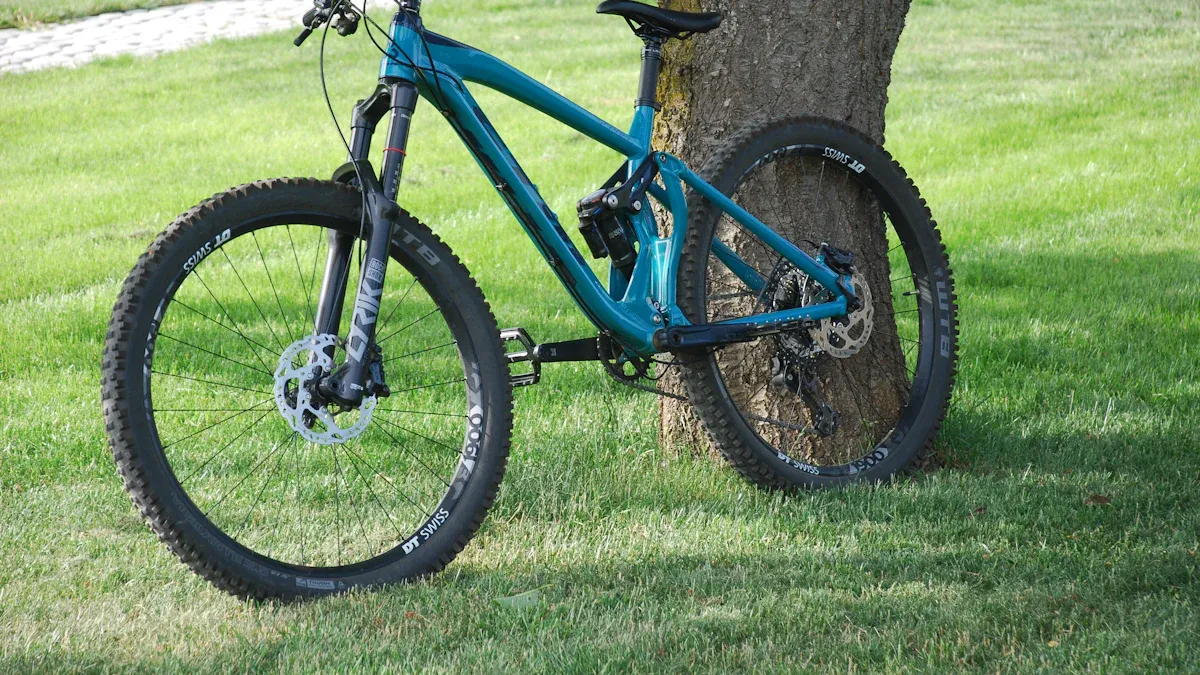
You want to keep your mountain bike looking new. The first scratch on your bike can feel disappointing. You can stop damage before it starts by using bicycle frame protection. Riders at every level need frame protection to avoid chips, scuffs, and dirt. The best solution is a frame wrap mountain bike kit. You can protect your mtb frame with wraps designed for mountain bike frame protection. If you want to learn how to choose bicycle frame protection and install it, you will find tips here.
Protecting your bike’s frame means you ride with confidence and keep your bike’s value high.
Key Takeaways
Frame protection helps your mountain bike avoid scratches and chips. It keeps your bike looking new and helps it last longer.
You can pick full or partial coverage kits. This depends on how much protection you want. It also depends on how much time you have to install them.
Choose the best material for your riding style. Thicker films protect better but can make your bike a bit heavier.
Clean your bike well before you install the frame wrap. Follow each step carefully to get a smooth and strong wrap. This helps it stick well and look nice.
Clean your frame protection often. Replace it when it gets worn out. This keeps your bike safe and helps it keep its value.
Why Frame Protection?
Common Damage
Mountain biking is hard on your bike. You ride over rocks and roots. Trails can be rough. These things can hurt your bike frame in many ways. Here are some problems you might notice:
Cracks and dents can happen if you crash or hit something hard.
Scratches and chips come from small rocks or when you fall.
Carbon frames can start to peel after lots of stress.
Steel frames can rust from water and mud.
Some parts like the head tube, bottom bracket, and chainstays can get weak from too much use.
Bicycle frame protection helps stop these problems. When you use mtb frame protection, it makes a shield for your bike. This shield takes the hit and keeps your bike safe from scratches and chips. Your bike stays looking new and strong.
Tip: If you protect your bike frame early, you can avoid expensive repairs later.
Benefits
Frame protection gives every rider many good things. It does more than keep your bike clean. Here is how frame wraps help different parts of your bike:
Frame Area | Common Sources of Damage | How Frame Wraps Protect |
|---|---|---|
Down Tube | Rocks and flying debris | Strong film stops chips and scratches from hits |
Chainstay | Chain slap and rear wheel debris | Wraps stop rubbing and keep paint safe |
Seat Stay | Trail debris and brake rotors | Protection blocks scratches and rotor hits |
Top Tube | Ground or other bikes touching | Film stops scratches and rub marks |
Using mountain bike frame protection keeps your paint looking good. It also helps your bike keep its value. You get less damage from chain slap and trail junk. With bicycle frame protection, you spend less time fixing your bike and cleaning it is easier. When you protect your mtb frame, you feel sure and do not worry about scratches or dents.
Frame protection for mountain bikes helps your bike last longer. It saves you money on repairs. You can sell your bike for more later. The benefits of bicycle frame protection make it a smart pick for anyone who wants their bike to stay in great shape.
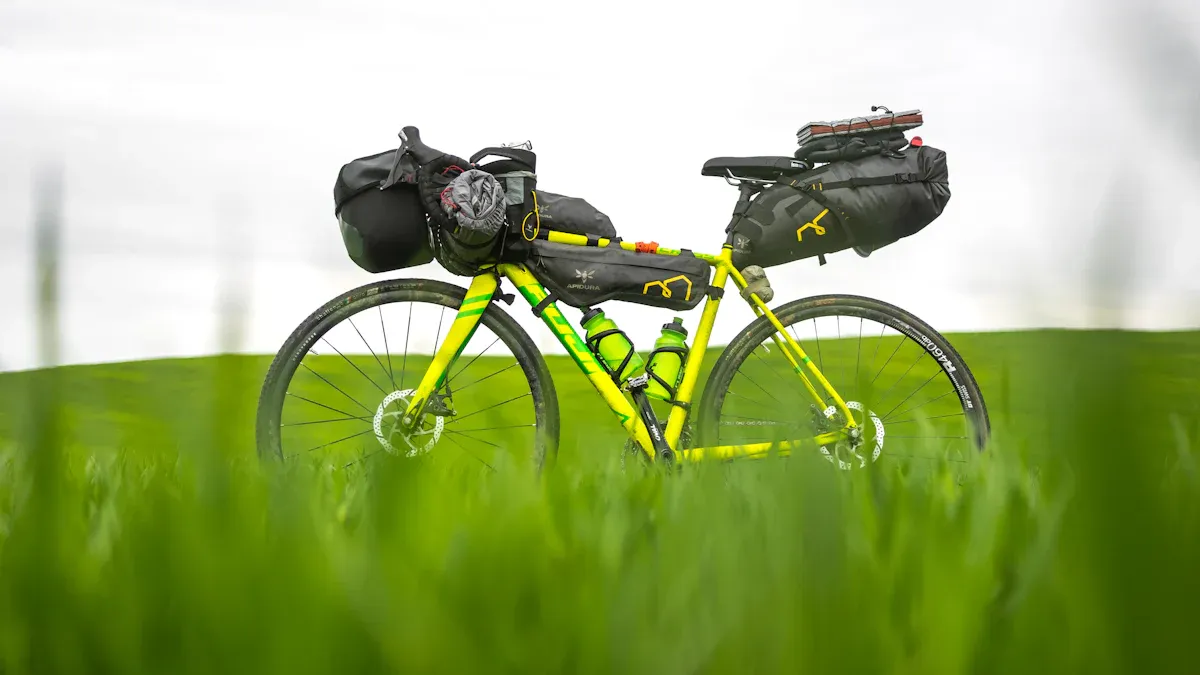
Types of Frame Protection for Mountain Bikes
Full vs. Partial Coverage
When you pick frame protection, you have two main choices. One is full coverage. The other is partial coverage. Full coverage kits, like RideWrap’s Tailored Protection, cover almost your whole bike frame and fork. These kits protect your bike from scrapes and scratches. They also help stop wear. Your bike stays looking new. Cleaning your bike gets easier. Full frame kits protect every part. This can help your bike sell for more money later.
Partial coverage kits protect only the risky spots. These spots include the chainstay, down tube, and cable rub points. You get protection where you need it most. These kits use less material. Many riders choose partial kits. They are easier to put on. They also cost less money. Some people like that partial coverage is harder to see. You do not need to take apart your bike for these kits.
Here is a quick comparison:
Protection Level | Coverage Percentage | Protection Focus | Benefits |
|---|---|---|---|
Full Coverage | Nearly entire bike frame and fork | Highest protection, easier cleaning, better resale value | |
Partial Coverage | 30-65% | Key areas (chainstay, down tube, etc.) | Easier install, less visible, protects high-wear spots |
Essential Coverage | Key areas only | Cable rub and wear points | Minimal coverage, protects against specific wear |
Note: Pick what fits your needs. Think about how much protection you want. Your riding style matters too. Also, think about how much time you want to spend putting it on.
Precut vs. Custom Kits
You can pick precut frame protection kits or custom kits. Precut kits are ready to stick on your bike. They fit most frames. They cover common damage spots. These kits do not cost much. They are easy to put on. Precut kits work well for casual riders. They are good for anyone who wants to save money.
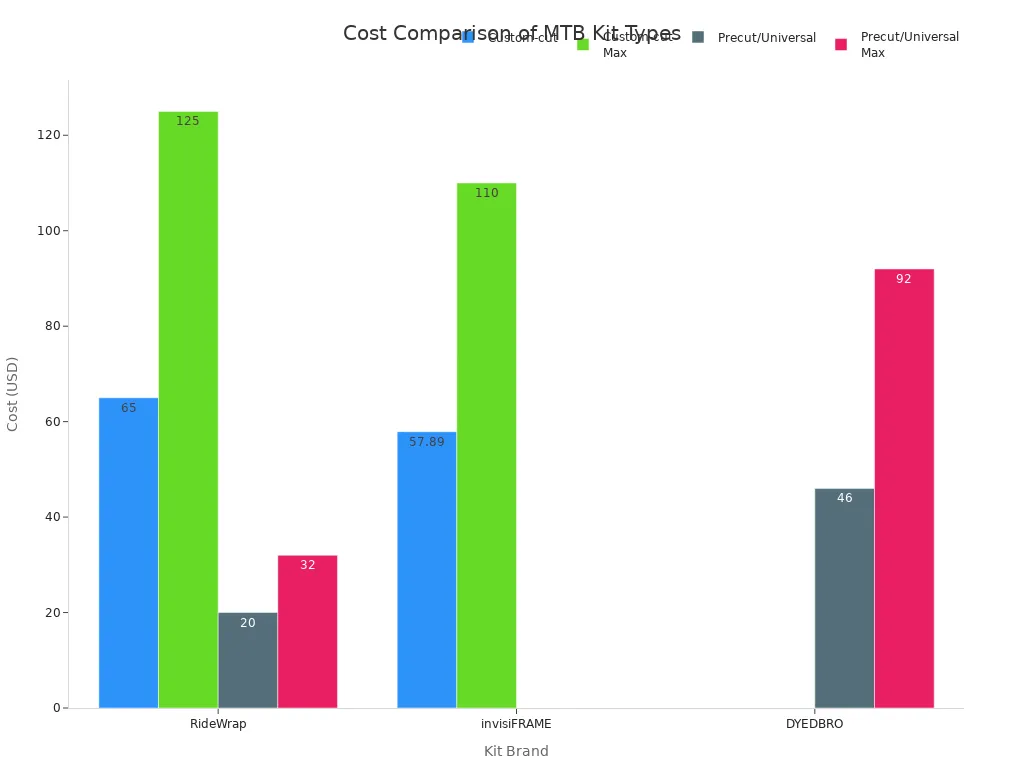
Custom kits, like RideWrap or InvisiFRAME, are made for your bike model. They fit your bike perfectly. Custom kits give better coverage. They cost more money. They can be harder to put on. Sometimes you need help from a pro. Here is a chart showing the cost range for popular kits:
Tip: If you want the best fit and full coverage, pick a custom kit. If you want easy setup, pick a precut kit.
Materials
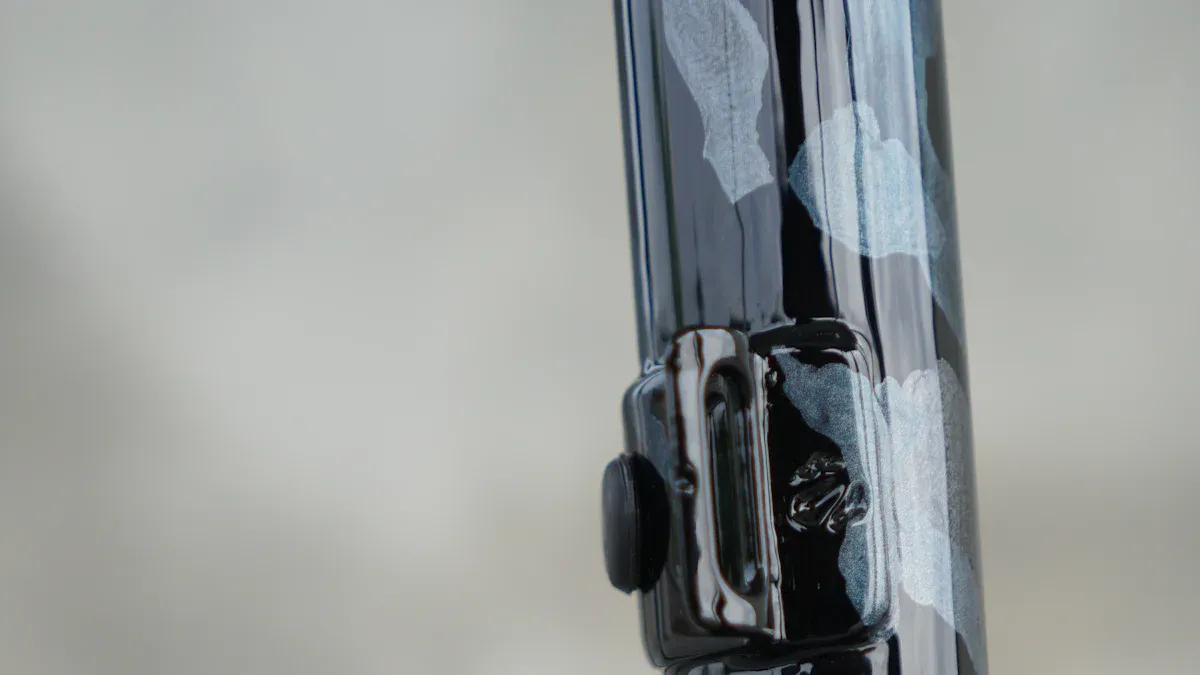
Frame protection kits use different materials. The most common are adhesive vinyl, clear frame protection film, and honeycomb polymer. Vinyl wraps are thin. They mostly protect against small scratches. They can peel or bubble. Dirt can get trapped under them. These wraps look nice but do not protect much.
Honeycomb polymer, like AMS Frame Guard, gives strong protection. This material absorbs hits. It does not peel easily. It stands up to UV rays and rough trails. Frame protection film, like the 9 mil RideWrap, is thicker. It gives better impact resistance. Thicker materials protect your bike more. They may add a little weight.
Feature | Vinyl Wraps | |
|---|---|---|
Material | Thick, impact-absorbing polymer | Thin printed vinyl film |
Protection Level | High (impacts, scratches, UV) | Low (minor scratches, cosmetic) |
Durability | Very durable, resists peeling | Prone to peeling and fading |
Install Time | Quick DIY (2–5 min) | Longer, needs skill (2–3 hrs) |
When you pick a mountain bike frame protection kit, look at the materials. Match them to your riding style. Think about how much protection you need. Thicker tape protects more but adds a little weight.
Frame Wrap Mountain Bike Brands
RideWrap
RideWrap is a popular brand for frame wrap mountain bike protection. The film is light and can fix small scratches by itself. It keeps your bike looking new. Mud and dirt do not stick to the surface, so cleaning is simple. RideWrap has three main kits: Essential, Covered, and Tailored. The Essential kit covers about 30% of your bike and protects the spots that wear out first. The Covered kit protects around 60% of your bike, including the parts that get used the most. The Tailored kit covers almost the whole bike and is cut to fit your bike model. Each kit has everything you need to put it on at home. The film does not turn yellow or crack for up to 10 years. RideWrap costs more than some other brands, but it lasts a long time. You can pick a matte or shiny finish.
Protection Kit | Coverage | Main Features | Price Range |
|---|---|---|---|
Essential | ~30% | Basic wear points, universal fit | ~$35 |
Covered | ~60% | High-wear areas, universal fit | ~$65 |
Tailored | ~95% | Custom fit, nearly full frame, matte/gloss | ~$92–$135 |
RideWrap gives you different ways to protect your bike, but putting it on takes a while.
InvisiFRAME
InvisiFRAME makes high-quality frame protection kits that fit your bike exactly. The film can heal itself, so small marks go away over time. It does not make your bike heavy and does not change color. InvisiFRAME kits cover almost the whole frame, so your bike gets lots of protection. The film is hard to see once you put it on. You need to be careful and patient to install it. You have to use water to help put it on and wait for it to dry. The kit has a guide to help you place each piece, but the steps are not as clear as RideWrap. InvisiFRAME costs more than simple kits, but it protects your bike for a long time.
If you want a frame protection kit that is hard to see and lasts a long time, InvisiFRAME is a good pick.
Helicopter Tape
Helicopter tape is a clear film that was first used on helicopter blades. Many riders use it because it is cheap and works well for frame wrap mountain bike protection. You buy it in rolls and cut it to fit your bike. The tape is made from the same material as expensive brands, so it protects your bike from scratches and bumps. It is good for people who want to do it themselves and save money. You can put it on with water or without, but you need to be careful when cutting and sticking it. Helicopter tape does not come in special shapes and cannot fix itself if scratched. It costs much less than other kits, usually under $25 for enough tape to cover more than one bike.
Feature | RideWrap/InvisiFRAME | Helicopter Tape |
|---|---|---|
Coverage | Custom, full or partial | Flexible, user-defined |
Durability | High, self-healing | High, but no self-healing |
Cost | $35–$135+ | Under $25 (multiple bikes) |
Installation | Detailed kits, longer time | DIY, faster but less precise |
Helicopter tape is cheap and protects your bike, but brand kits are easier to put on and look nicer.
Installation
Installing frame protection on your mountain bike keeps your ride looking new and strong. You can do this at home with patience and the right steps. This section will show you how to install frame protection kits, avoid common mistakes, and get the best results.
Preparation
Good preparation makes the installation easier and helps the frame protection tape stick well. Follow these steps before you start:
Wash your mountain bike frame with soap and water. Use a brush or sponge to scrub every part, including under the seat, fork arch, and tight spots.
Rinse the frame with clean water to remove all soap and dirt.
Dry the frame completely with a clean rag or towel. Make sure there are no water marks or streaks.
Remove the wheels, cable clamps, and any old frame guards. This gives you better access to the frame.
Use pre-install cleaning wipes or isopropyl alcohol to wipe down the frame. This removes any leftover oil, grease, or dirt.
Check that the frame is spotless, dry, and free from lint or pet hair.
A clean, dry, and grime-free frame is key for the protection film to bond well. Dirt or grease can cause bubbles and make the wrap peel off early.
Application Steps
You can install frame protection tape by yourself if you take your time and follow each step. Here is a simple guide:
Read the instructions from your frame protection kit. Each brand may have special tips.
Set up your bike in a stand or secure it so it does not move.
Wear lint-free clothing and keep pets away from your work area.
Lay out all the pieces of the frame protection tape. Check where each piece goes before you start.
Spray the frame and the sticky side of the tape with the installation solution (usually soapy water). Do not use isopropyl alcohol in the solution, as it can cause bubbles.
Place the first piece of tape on the frame. Align it carefully.
Use a squeegee or plastic applicator to press the tape onto the frame. Start in the center and push outwards to remove air bubbles and water.
Keep a 3mm gap between each piece of protection. Do not overlap the pieces.
Trim any extra tape with a sharp razor blade for a neat finish.
Repeat for all pieces, working slowly and carefully.
Let the wrap cure for at least 24 hours before riding. This helps the adhesive set and prevents peeling.
Take your time. Rushing can lead to bubbles, dirt under the tape, or misaligned pieces. Beginners may need up to three hours for a full kit, while professionals work faster.
Pro Tips
You can get a smooth and durable finish by following these expert tips:
Always clean the frame before you start. Any dirt or oil will stop the tape from sticking.
Use a hairdryer or heat gun on low to help the tape bend around corners and curves. Do not overheat, or the tape may warp.
Ask a friend to help you hold the bike or line up tricky pieces.
Use a clean spray bottle for your installation solution to avoid contamination.
Press each piece firmly and hold for a few seconds to help the adhesive bond.
If you see edges lifting, gently heat and press them back down.
Avoid fuzzy clothes and keep pets out of the room to prevent lint or hair from sticking to the tape.
Allow the wrap to cure for a full day before riding for best results.
If you want a perfect finish or feel unsure, you can pay a professional for installation. This ensures correct placement, smooth edges, and no bubbles.
Most riders can install frame protection at home with patience and care. Professional installation offers the best ease of installation and a flawless look, but DIY works well if you follow these steps.
Maintenance & Replacement
Cleaning
You want your frame protection to last as long as possible. Clean your bike regularly to keep the protection working well. Use a soft sponge or cloth with mild soap and water. Wipe down the frame protection after every muddy ride. Avoid harsh chemicals because they can damage the film. Rinse off any dirt or grit before you scrub. This prevents scratches on the protection. Dry the frame protection with a clean towel. If you see dirt building up along the edges, use a soft brush to remove it. Keeping your frame protection clean helps it stick better and look clear.
Tip: Clean your frame protection after every few rides. This keeps your bike looking sharp and your protection strong.
When to Replace
Frame protection does not last forever. You need to check it often for signs of wear. Look for these signs that tell you it is time to replace your frame protection:
Deep scratches or torn pieces from crashes or hitting rocks.
Worn spots from your shoes or heels rubbing on the chainstays and downtube.
Dirt building up along the edges of the frame protection.
The film looks cloudy, faded, or damaged.
You cannot clean off scratches or dirt, and the edges keep collecting grime.
When you see these problems, your frame protection cannot protect your bike well. Replace it to keep your frame safe and your paint looking new. Good frame protection keeps your bike in top shape and helps it hold its value.
Removal
You can remove old frame protection at home with a few simple tools. Follow these steps for safe and easy removal:
Warm the frame protection with a hairdryer or heat gun. This softens the adhesive.
Use a plastic scraper or squeegee to lift the edges gently. Do not scratch the paint.
Peel the frame protection slowly at a 30 to 90-degree angle. Pull with steady force.
Avoid using too much heat. Too much heat can weaken the film and make removal harder.
If sticky residue remains, use a mild adhesive remover like Goo Gone.
Wipe the frame with isopropyl alcohol to remove any leftover glue.
Wash the area with soap and water to finish cleaning.
Note: Take your time when removing frame protection. Careful removal keeps your bike’s paint safe and ready for new protection kits.
You want your bike to last and look great. Using mtb frame protection gives you strong coverage against scratches and chips. You protect your investment and keep your bike’s value high. Good protection means less worry on the trail. Choose the wrap that fits your needs. Careful installation and regular cleaning help your protection work best. Start today and ride with confidence!
FAQ
How long does frame protection last?
Most frame wraps last between 3 and 10 years. You can make them last longer by cleaning your bike often and checking for damage. High-quality kits usually protect your bike for more years.
Can you install frame protection by yourself?
Yes, you can install frame protection at home. You need patience and clean hands. Follow the instructions in your kit. Use a bike stand for better results. Ask a friend for help if you want.
Does frame protection affect bike weight or looks?
Frame wraps add very little weight, usually less than 100 grams. Most protection films look clear or match your bike’s color. You keep your bike looking sharp and do not notice extra weight.
What areas should you protect first?
You should protect the down tube, chainstay, and top tube first. These spots get the most scratches and chips. Use this table for quick reference:
Tip: Start with high-wear areas if you use a partial kit.
See Also
Innovative MTB Frame Designs That Transform Your Riding Experience
How To Select The Perfect Carbon MTB Frame For Riders
Simple Frame Fitting Chart Tips To Enhance Bike Comfort