
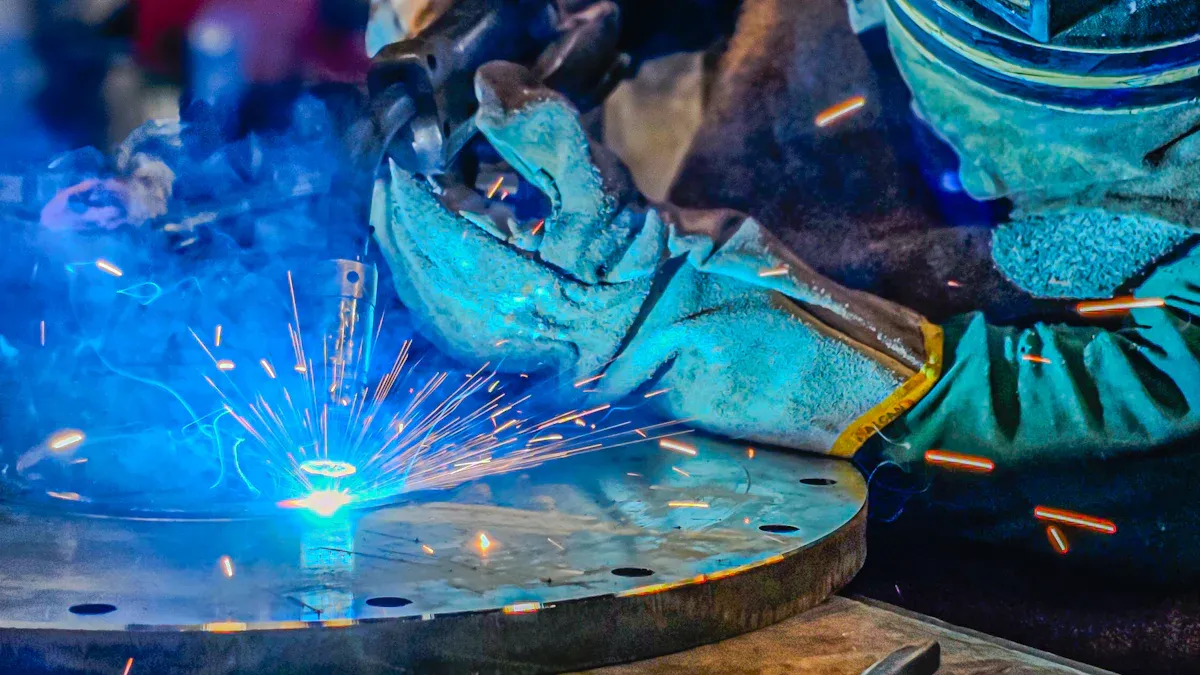
Welding aluminium bike frames is not just about joining metal; it is also about ensuring safety and functionality. Poor welding can lead to significant issues. A well-known bike manufacturer had to recall bikes after frames broke during test rides, citing “really bad welds” as the cause. You will face challenges such as maintaining a steady weld depth, as aluminium dissipates heat quickly. Additionally, the natural oxide layer on aluminium must be removed to achieve effective welding. These factors highlight the importance of precision when welding aluminium bike frames.
Key Takeaways
Pick the right welding machine. Look for features like good automated welding and a central control system to make strong welds.
Always wear safety gear. Use welding gloves and a helmet to protect yourself from sparks and harmful UV rays.
Get your aluminum frame ready. Clean the surfaces, remove oxidation, and use clamps to hold parts in place for good weld quality.
Manage your heat settings. Change the amperage based on how thick the aluminum is to avoid overheating and keep weld strength.
Check your welds after you finish. Look for even distribution, tight joints, and any signs of holes to make sure they are strong.
Materials for Welding Aluminum
When you are ready to weld your aluminum bike frame, you need the right materials. This will help make your project successful. Let’s look at the basics.
Welding Machines
Picking the right welding machine is very important. It helps you make strong and reliable welds. Here are some features to check for in a machine that works well with aluminum:
Feature | Description |
|---|---|
Makes aluminum frames quickly with a smooth finish. | |
Reliable Automated MIG/TIG Welding | Stops frame cracks caused by shaky hands. |
Full-Feature Automatic Welding System | Works well for small, mixed, and large jobs with great accuracy. |
Centralized Control System | Keeps track of welding settings in real-time for steady results. |
Quick Mold and Line Change | Lets you test and adjust welding settings without stopping work. |
For welding aluminum, MIG and TIG machines are both good options. MIG welding is faster and works on dirty surfaces, but it may not control thin materials well. TIG welding gives better precision and higher quality welds, but it needs clean surfaces and more attention.
Filler Materials
Choosing the right filler material is just as important as picking the welding machine. Here are some good filler rods for aluminum welding:
Best filler metal: 0.040” ER70s-2.
Smaller sizes can be hard to find, but 1/16” can work if you are careful.
The filler size should match or be smaller than the thickness of the material you are welding.
Different filler alloys have special traits that can change your weld’s strength and resistance to rust. Here’s a quick look:
Properties | |
|---|---|
4047 | Good for welding aluminum with a lot of silicon, flows well and shrinks less. |
5356 | Strong, resists rust well, good for building things. |
5180 | Made for welding 7xxx series, works well with heat treatments, great for bike frames. |
5554 | Resists rust well, used in boats, has moderate strength. |
Safety Gear Recommendations
Safety is very important when welding. Here are some safety gear items you should have:
Protective clothing
These will keep you safe from sparks, heat, and harmful UV rays while you weld. Always make sure your workspace has good airflow and is clear of anything that can catch fire.
By getting the right materials and focusing on safety, you will be ready to weld your aluminum bike frame successfully. Remember, practice is key, so don’t be afraid to try new things and improve your skills!
How to Weld Aluminum: Step-by-Step
Welding aluminum might look hard, but you can make strong welds with the right steps. Let’s break it down into easy parts.
Preparing the Frame
Before you start welding, get your aluminum bike frame ready. This step is very important for good results. Here’s what to do:
Wear protective gear: Always wear heat-resistant welding gloves and a welding helmet with the right shade. This gear keeps you safe from burns and harmful UV rays.
Clean the surfaces: Use cleaners to get rid of dirt, oil, or residue from the welding areas. A clean weld is key for good sticking.
Remove oxidation: Use a stainless steel wire brush made for aluminum to clean the surfaces. This step removes the oxide layer that can mess up the welding.
Check your materials: Make sure you’re using good quality aluminum tubing or pre-made frame parts. This choice affects how strong your bike will be.
Select the right filler rod: Use a filler rod that works well with aluminum to make strong welds. The filler size should match or be smaller than the thickness of the material you’re welding.
Set up your welding machine: Use a TIG (Tungsten Inert Gas) welding machine for its precision. Make sure it has AC capability and use argon gas to protect the weld pool from contamination.
Secure the frame: Use welding clamps or fixtures to hold the frame parts in place while welding. This keeps everything aligned and stops distortion.
Tip: Don’t use shop rags to clean welding joints. They can leave oil and dirt. Use special cleaning tools instead.
Initial Passes
Now that your frame is ready, it’s time to start welding. The first passes are very important for keeping the frame’s shape. Follow these steps:
Start with the bottom bracket and the seat tube: These are key points, so make sure they are lined up right.
Add the dropouts and the chainstays: Tack these parts together to keep the frame’s shape.
Use a fixture: Set the tubes in a fixture for exact geometry. This step is vital for keeping your bike strong.
Weld each set of tubes together: Keep your welds steady and controlled.
Tack up the rest of the frame: Go around and tack all joints to keep everything aligned before finishing the welds.
Note: Tack welding is key to stop distortion. It holds the pieces in place and lets you check alignment before finishing the welds.
Completing the Weld
After making your first passes, it’s time to finish the weld. Here’s how to do it well:
Check alignment: Use an alignment table to make sure the frame is straight before you continue.
Weld each set of tubes: Keep a steady hand and speed for good welds.
Finish welding freehand: This helps you reach tight spots that might be hard to get to with a fixture.
Inspect your work: After finishing the welds, look them over for any problems. Check for gaps or uneven spots that could hurt the weld quality.
By following these steps, you’ll be on your way to welding your aluminum bike frame successfully. Remember, practice makes perfect, so keep refining your skills as you go!
Post-Welding Techniques
After you finish welding your aluminum bike frame, it’s very important to do some follow-up steps. These steps help make sure your frame is strong and lasts a long time.
Heat Treatment Processes
Heat treating aluminum frames is a key step. It can really improve how strong they are. Here are some common heat treatment processes you might think about:
Solution Heat Treatment: This is often used for 6061 aluminum alloy. You soak the material at about 500°C and then cool it quickly in water. This helps dissolve the alloying parts and makes it stronger.
Artificial Aging: For 6061, you can heat it at certain temperatures for 8-10 hours. This helps bring back some strength lost during welding.
Natural Aging: If you’re using 7005 aluminum, it usually goes through natural aging after welding. You can also do this artificially at about 160°C for a set time.
Alloy Type | Heat Treatment Process | Description |
|---|---|---|
6061 | Solution Heat Treatment | Soak at about 500°C, then cool quickly |
6061 | Artificial Aging | Heat at certain temperatures for 8-10 hours |
7005 | Artificial Aging | Aged after welding, either naturally or artificially |
Heat treating aluminum frames not only brings back strength but also makes them last longer. If you skip this step, the strength in the heat-affected area can drop a lot, which might cause the frame to break.
Visual Inspection
After you finish heat treating, it’s time to check your welds. A good visual inspection helps make sure the welds are good and finds any problems. Here are some important things to look for:
Distribution: Make sure the weld material is spread evenly between the joined parts.
Waste: Look for any waste materials like slag that could hurt the weld.
Porosity: Check for bumps or holes on the weld surface.
Tightness: Make sure the joint is tight without any gaps.
Leak-Proof: If your frame will hold liquids or gases, use soap bubbles to check for leaks.
By following these post-welding techniques, you can make your aluminum bike frame stronger and more reliable. Remember, taking time to heat treat and check your welds can save you from problems later on!
Common Mistakes in Aluminum Welding
Welding aluminum can be hard. Many people make mistakes that hurt their work quality. Let’s look at two common errors: overheating and not preparing well.
Overheating Issues
Overheating is a big problem when welding aluminum. It can make the metal weak and cause cracks or bending. Here are some tips to avoid this mistake:
Control your heat settings: Use the right settings on your TIG welding machine. Adjust the amperage to fit the thickness of the aluminum.
Move steadily: Keep a steady speed while welding. If you stay too long in one spot, you might overheat the material.
Use argon gas: This gas protects the weld pool from dirt. It also helps keep a steady temperature while welding.
Remember, good welding techniques include using TIG welding with AC settings. This helps deal with aluminum’s special properties. It also helps remove the oxide layer for better welds.
Inadequate Preparation
Getting ready is very important for good aluminum welding. Skipping this step can lead to bad weld quality. Here’s how to make sure you’re ready:
Clean the surfaces: Dirt, oil, and oxidation can ruin your welds. Always clean the aluminum frame well before starting.
Inspect your materials: Look for any problems in the aluminum. Using good materials makes it stronger and lasts longer.
Use welding clamps: Hold your frame parts with clamps to keep everything straight. This stops bending during welding.
By avoiding these common mistakes, you can get better at welding and make stronger, more reliable aluminum bike frames. Remember, preparation and control are very important in this process!
Welding your aluminum bike frame can be rewarding, but safety is key. Remember to keep your hands steady for a good arc and use enough filler material to avoid weak welds. Managing heat is crucial; too much can damage your work, while too little can lead to poor fusion.
Tip: Practice on similar joints before tackling your frame. Doubling up welds can boost strength, but it takes skill.
With these tips in mind, you’ll be well on your way to creating a strong and reliable bike frame. Happy welding! 🚴♂️
FAQ
What type of welding is best for aluminum bike frames?
TIG welding is usually the best choice for aluminum bike frames. It gives you precision and control, which helps make strong and clean welds. MIG welding can also work, but it might not have the same level of detail.
How do I prevent warping during welding?
To stop warping, use tack welds to hold parts in place. Keep your heat settings low and move steadily. This method helps keep the frame’s shape and reduces distortion.
Can I weld aluminum without special equipment?
You can try to weld aluminum with basic tools, but it’s best to use a TIG or MIG welder made for aluminum. This equipment gives better results and makes it safer.
How do I know if my welds are strong enough?
Check your welds visually for even distribution and tight joints. You can also do a simple strength test by pushing on the welded area. If it stays firm, your welds are likely strong.
Is it safe to weld aluminum at home?
Yes, you can safely weld aluminum at home if you follow safety rules. Wear protective gear, make sure there is good airflow, and keep your workspace clear of anything that can catch fire. Always put safety first while welding!
See Also
Effective Methods to Safeguard Your Bicycle Frame
Key Insights for Builders on Gas Bike Frames
Necessary Tools and Supplies for Crafting Your Bike Frame