
You can weld a bike frame yourself if you use the right tools and prepare properly. TIG welding stands out as the main method for most modern bike frames. In fact, about 99% of steel frames made since 1992 use TIG welding instead of older techniques. You need to understand the welding process and always use proper equipment. Safety matters every step of the way. > Take your time and follow each step carefully. You can achieve strong results even as a beginner.
Key Takeaways
Use TIG welding with the right tools and a frame jig. This helps you make strong and neat bike frame welds. – Always put safety first by wearing safety gear. Make sure your workspace has good airflow. – Get all frame parts ready and clean them well. This helps the parts fit tightly and makes the welds strong. – Watch the heat while welding so you do not burn thin tubes. This also stops the frame from bending. – Check the welds and alignment very carefully before you ride. Ask a professional for help if you see any problems.
Can You Weld a Bike Frame?
DIY Possibility
You can weld a bike frame at home if you have the right tools and patience. Many people choose TIG welding because it gives you strong, clean joints. TIG welding works well for both steel and aluminum frames, but it takes practice to master. If you want to weld a bike frame, you need to think about a few important things:
The welding method you pick matters. TIG welding is the most common, but brazing is another option for steel frames.
Good equipment helps you control heat and avoid burning through thin tubes.
Practice is key. Thin-wall tubing, like chromoly or aluminum, can be tricky. You need to keep your hands steady and your settings just right.
Clean parts and a good fit make your welds stronger and safer.
Using a simple jig helps keep your frame straight and prevents twisting.
Steel frames are easier for beginners because steel is forgiving and simple to repair. Aluminum frames need more skill and careful heat control. If you want to try brazing, remember that it works only for steel, not aluminum.
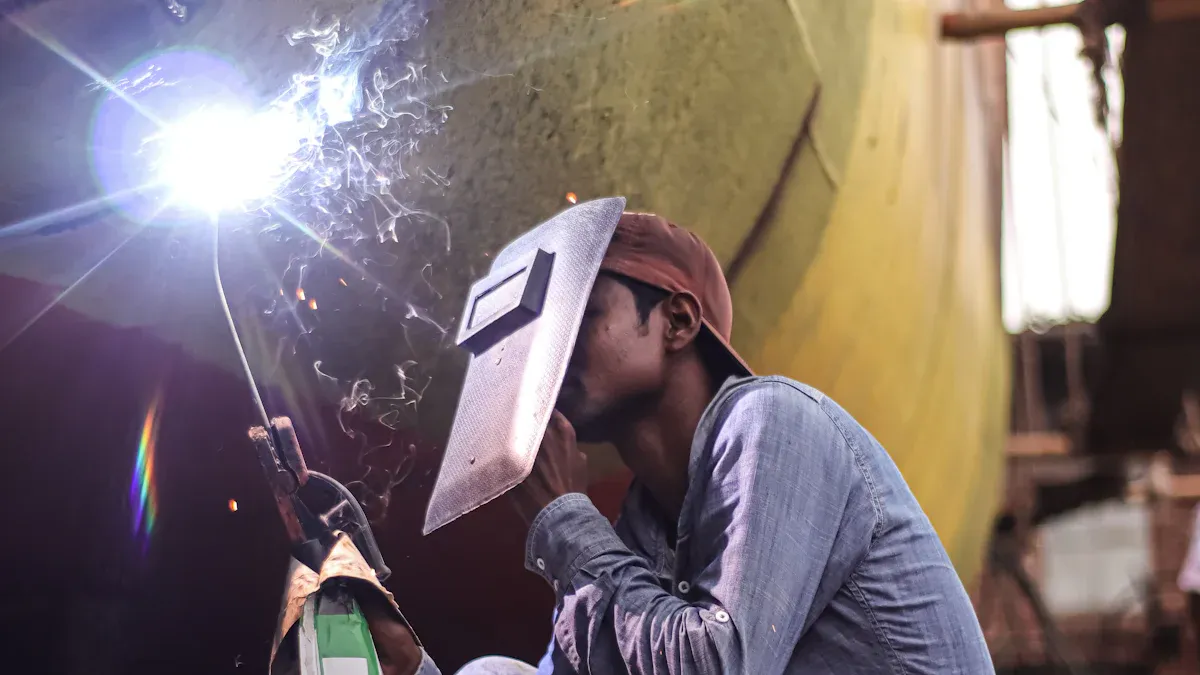
Safety First
Safety should always come first when you weld a bike frame. You must protect yourself from sparks, heat, and bright light. Always wear a welding helmet to shield your eyes and face. Gloves, long sleeves, and pants protect your skin from burns. Make sure your workspace has good ventilation to avoid breathing in fumes.
Tip: Never rush the process. Take your time to set up your equipment and double-check your safety gear before you start.
Every weld on a bike frame matters for your safety when you ride. Test your welds on scrap pieces before working on your actual frame. This helps you spot mistakes and improve your technique. If you see cracks or weak spots, fix them before you finish the project. With careful steps and the right mindset, you can weld a bike frame that is both strong and safe.
Tools and Gear for Welding a Bike Frame
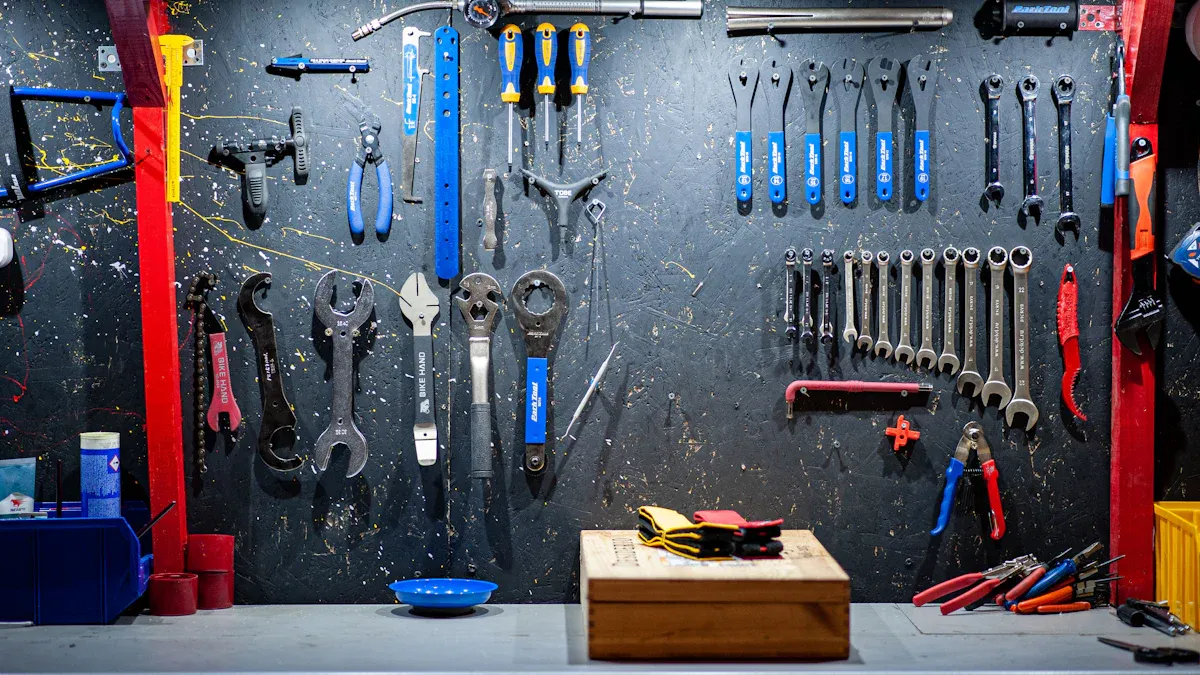
TIG Welder and Setup
You need the right tools to weld a bike frame at home. TIG welding is the best choice for most bike frames because it gives you strong and clean welds. To get started, gather these essential materials and equipment:
Tungsten electrodes
TIG welding pedal for heat control
Clamps to hold the frame parts in place
Cutting and grinding tools like angle grinders and saws
Abrasives and polishing tools such as flap discs and wire wheels
Hand tools like hammers, pliers, vises, magnets, and levels
Welding jig to keep the frame straight
These tools help you prepare, fit, and weld the steel or aluminum tubes accurately. A welding jig is important because it keeps your frame from twisting or moving while you work.
Materials and Filler Rods
Choosing the right filler rod is important for strong welds. The type of rod you use depends on the frame material. Here is a simple table to help you pick the right one:
Filler Rod Type | Composition / Alloying Element | Recommended Use for Bike Frames |
|---|---|---|
5% Magnesium alloy | Good for welding 7000 series aluminum frames like 7005 or 6061. | |
ER 70S-2 | Carbon steel | Common choice for steel bike frames. |
If you weld aluminum, ER 5356 works well and hardens naturally over time. For steel frames, ER 70S-2 is a popular option.
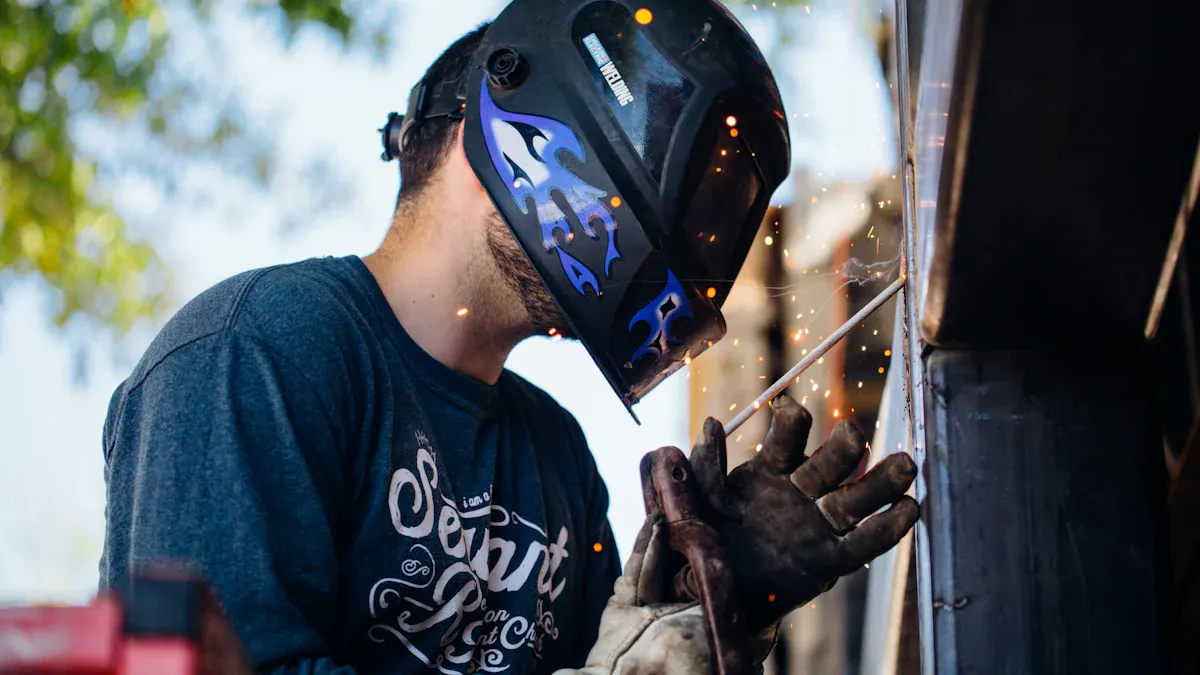
Safety Equipment
Safety matters every time you weld. Always wear a welding helmet to protect your eyes and face from bright light and sparks. Use welding gloves and protective clothing to shield your hands and skin from burns. Good ventilation is also part of your essential materials and equipment. Open windows and doors to create airflow, and use fans or fume extractors to remove fumes from your workspace. For small jobs, a box fan and a mask may be enough. For bigger projects, use a portable fume extractor to keep the air clean.
Tip: Always make sure fumes move away from your breathing zone, not across it.
How to Weld a Bike Frame
Frame Preparation
You start by preparing each part of your bike frame. Clean every tube to remove dirt, oil, and oxide layers. Use a wire brush or abrasive pad for this step. Make sure all tubes fit together tightly. Use a frame jig to hold the tubes in place. This tool keeps everything straight and helps you check alignment as you work.
Here is a step-by-step guide for frame preparation:
Tack the seat tube to the bottom bracket shell in the jig.
Check alignment and adjust if needed.
Weld the seat tube to the bottom bracket shell, following a set order.
Drill relief holes and slot the seat tube.
Cut the head tube to the right length and install spacers or heat sinks.
Set the jig to match your design.
Miter the downtube and toptube so they fit perfectly.
Test fit all tubes and components.
Clean tubes and drill vent holes.
Tack the downtube at the bottom bracket and head tube points.
Check alignment again.
Weld joints in accessible areas first.
Tack and weld the toptube, checking alignment often.
Remove the frame from the jig to weld remaining joints.
Reinstall the frame for chainstay fitting.
Miter and tack chainstays, checking length and alignment.
Weld chainstays, alternating sides.
Face the bottom bracket shell.
Check and correct alignment.
Bend and miter seatstays, then tack and weld them.
Add seatstay and chainstay bridges if needed.
Tip: Always clean your tubes before you start the welding process. Dirt and oil can cause weak welds.
Tack Welding and Fixturing
Tack welding holds your frame together before you make the final welds. Use small tack welds at key points to keep tubes from moving. The frame jig helps you position each tube and keeps everything aligned. Tack welds let you check and fix alignment before you finish the welding process.
A frame jig supports the seat tube, down tube, and top tube. You tack weld at specific clock positions to set the planes. You can flip and rotate the frame in the jig to reach different spots. After tacking, let the frame cool in the jig. Check alignment and make corrections if needed. Tack welds should be small and spaced out to avoid heat buildup.
Note: Tack welds make it easy to fix mistakes. If something is out of line, you can break the tack and adjust the tube.
TIG Welding Technique
TIG welding gives you control over heat and makes strong, clean welds. Set your TIG welder to the right current. The rule of thumb is 1 amp for every 0.001 inch of tube thickness. For thin bike frame tubing, start with 25-35 amps to practice. You can increase the current to around 100 amps for T-joints. Use a foot pedal to control heat and prevent burning through the tube.
Keep your tungsten electrode sharp for a stable arc. Use argon shielding gas to protect the weld pool. Choose the right filler rod size. A smaller rod, like 1.2mm, helps you avoid too much heat. Weld accessible joints first, then move to harder spots. Always check alignment after each weld.
Here are some tips for TIG welding:
Use short welds to control heat.
Alternate sides when welding chainstays and seatstays.
Let the frame cool between welds.
Keep seams tight to use less filler and heat.
Use heat sinks or paste to absorb extra heat.
Tip: Practice on scrap tubing before you weld a bike frame. This helps you learn puddle control and avoid mistakes.
Avoiding Distortion
Distortion happens when heat causes the frame to bend or twist. You can avoid distortion by controlling heat input and using the right welding process. TIG welding helps limit heat and makes smaller weld puddles. Always use clamps or fixtures to hold tubes tight. Clean surfaces before welding to reduce defects and heat.
Make relief cuts before welding to help shape the frame. Alternate your welding sequence to spread heat evenly. Use heat sinks to absorb extra heat. After welding, use grinding tools that make less heat. If you see shrinkage, use a hammer and dolly to fix the shape.
Plan for shrinkage and control heat to keep your frame straight. Check alignment after each weld. If you spot a problem, fix it before moving on.
Note: Careful heat control and alignment checks are key to a strong, straight bike frame.
How to Weld Aluminum Bike Frame
Aluminum Frame Prep
When you want to weld aluminum bike frame parts, you must start with careful cleaning. Aluminum forms an oxide layer that can weaken your welds. You should always:
Use a solvent or cleaner to remove dirt, oil, and residue from the tubes.
Scrub the aluminum surfaces with a wire brush to get rid of oxidation.
These steps help you create a clean surface. Clean tubes make it easier to achieve strong welds and keep the structural integrity of your frame. If you skip cleaning, your welds may crack or fail.
Welding Aluminum Tubes
Learning how to weld aluminum bike frame sections takes patience. Aluminum melts at a lower temperature than steel, so you must control the heat. Use a TIG welder with the right settings for thin tubing. Choose a compatible filler rod, such as ER 5356, for most aluminum frames. Keep your welds short and let the frame cool between passes. This helps prevent warping and keeps the frame straight.
You should always check your alignment as you weld aluminum bike frame joints. A frame jig helps hold everything in place. If you want to know how to weld aluminum bike frame parts without distortion, remember to alternate your welds on opposite sides. This spreads the heat and protects the structural integrity of your project.
Tip: Practice on scrap aluminum before you weld aluminum bike frame tubes. This helps you learn how fast aluminum heats up and cools down.
Post-Weld Heat Treatment
After you finish welding, you must heat treat the frame to restore its strength. Without this step, the heat-affected zone stays soft and brittle. For 6061 aluminum, you should:
Quench it right away in water or a water/glycol mix below 100°F (38°C).
Align the frame within 8 hours after quenching.
Wait at least 72 hours at room temperature before artificial aging.
Age the frame at 350°F (177°C) for 8 hours to reach T-6 temper.
If you skip post-weld heat treatment, the frame will have much lower yield strength and may crack under normal riding. The table below shows how heat treatment affects the frame:
Aspect | As-Welded (No Heat Treatment) | After T6 Heat Treatment |
|---|---|---|
Yield Strength (6061) | ~40 ksi | |
Hardness | Decreased | Restored |
Proper heat treatment is a key part of how to weld aluminum bike frame sections that last. This process keeps your frame safe and strong for every ride.
Inspecting Your Welded Bike Frame
Checking Weld Quality
You need to inspect your bike frame closely after welding. Good weld quality helps keep you safe and makes your frame last longer. Start by looking at the welds with your eyes. High-quality welds show even and consistent beads. You should not see small gaps that could trap moisture or extra bits of metal around the weld. The surface should have a regular pattern or be filed smooth. Pitting on the tube or lug means the weld may be weak.
Welds look even and smooth.
No gaps or splatter.
Beads are uniform in size.
No pitting or rough spots.
Visual inspection gives you a quick idea of weld quality, but it does not show hidden problems. You can use non-destructive testing methods to check deeper. The table below lists common ways to test welds without damaging your bike frame:
NDT Method | Description | Use for Bike Frames |
|---|---|---|
Visual Testing (VT) | Look for surface flaws and bead uniformity | Quick check for weld quality |
Ultrasonic Testing (UT) | Sound waves find internal defects | Detects hidden cracks or weak spots |
Radiographic Testing (RT) | X-rays show inside welds | Finds internal flaws in aluminum |
Liquid Penetrant Testing (LPT) | Dye reveals surface cracks | Shows tiny cracks or porosity |
Strength and Alignment
You must test the strength and alignment of your bike frame to protect its structural integrity. Use simple checks first. Try pressing or tapping the frame to listen for hollow sounds, which may mean weak welds. For more advanced checks, labs use fatigue and stress tests. These tests push the frame through thousands of cycles to see if it cracks or bends. Standards like ISO 4210-6 require frames to survive over 100,000 load cycles.
Alignment matters for safe riding. The most common problem is the rear triangle being off-center. This causes the wheel to sit crooked and affects handling. Use a frame alignment tool to check symmetry. If you find big problems, fixing them after welding is hard, especially with thin aluminum. You may need professional help if you see cracks or major misalignment. Studies show that nearly one-third of DIY welded aluminum frames need repair after cracking again within 500 km. Getting expert advice helps you keep the structural integrity of your bike frame.
Tip: Always inspect your welds and alignment before riding. If you see defects, ask a professional for help.
You can weld your own bike frame if you follow each step with care. Always use eye protection, gloves, and proper ventilation to stay safe. TIG welding works best when you control heat and use a jig for alignment. Practice on scrap metal and learn from mistakes to improve your skills. Many people feel proud and satisfied after building their own bike. Remember, steady hands and patience help you create a strong, lasting frame.
Tip: Keep first aid supplies nearby and post safety reminders in your workspace for extra protection.
FAQ
Can you weld a bike frame without a jig?
You can weld a frame without a jig, but it is much harder. A jig keeps your tubes straight and aligned. If you skip the jig, your frame may twist or bend. You get better results with a simple homemade jig.
What is the best welder for bike frames?
A TIG welder works best for most bike frames. TIG welding gives you strong, clean joints. You can use it for both steel and aluminum. MIG welders work for some projects, but TIG gives you more control.
How do you avoid burning through thin tubing?
Set your welder to a low current. Use a foot pedal for better heat control. Practice on scrap tubing first. Keep your welds short and let the metal cool between passes. This helps you avoid holes and weak spots.
Do you need to heat treat all welded frames?
You need to heat treat aluminum frames after welding. This step restores strength. Steel frames usually do not need heat treatment. Always check the type of metal before you decide.
How can you tell if your welds are strong enough?
Look for even, smooth weld beads. Test the frame by pressing or tapping near the welds. If you see cracks or hear odd sounds, your weld may be weak. When in doubt, ask a professional to inspect your work.
See Also
Step-By-Step Welding Guide For Constructing Drift Trike Frames
Must-Have Supplies And Tools To Create Your Bike Frame
Simple Methods To Perfectly Sketch Bike Frame Designs