
Choosing the right bike frame for your trainer is very important. It helps you have a comfortable and effective indoor training experience. A bike frame for trainer that fits well can make you more comfortable. It also lowers the chances of getting hurt. When your joints are in the right place, you have better control. You will feel more confident while riding. Additionally, a good fit helps your muscles work better. This can improve your performance and endurance. So, let’s look at what you should think about when picking the best bike frame for your trainer!
Key Takeaways
Make sure your bike frame works with your trainer. Look at things like axle type and wheel size for a good fit.
Choose the right frame size for comfort and efficiency. Measure your inseam and height to find the best size.
Think about what the bike frame is made of. Different materials like steel, aluminum, and carbon fiber have their own pros and cons.
Change your bike setup for the best comfort. The right seat height and handlebar position can help you feel good while riding.
Consider getting a special bike for indoor training. This can keep your main bike safe and improve your training.
Frame Compatibility
When you choose a bike frame for your trainer, knowing about frame compatibility is very important. Different types of indoor cycling trainers work best with certain bike frames. Let’s look at the main types of trainers and how they fit with different bike frames.
Types of Trainers
You can find many types of indoor cycling trainers today. Each type has its own special features. Here’s a quick summary:
Type | Description |
|---|---|
Direct Drive | This connects to your bike instead of the rear wheel. It gives a strong platform with different resistance methods. |
Tyre Drive | This clamps to the rear wheel and offers adjustable resistance. It usually costs less than direct drive options. |
Rollers | This has three round drums. It needs balance and skill, so it’s best for experienced cyclists. |
Complete Indoor Bicycle Systems | These are stationary bikes with built-in resistance. They are for users who want an all-in-one solution. |
Each trainer type has its own needs for compatibility. For example, direct drive trainers usually need a bike frame that fits a specific axle type. In contrast, tyre drive trainers can work with more frames but might not be as stable.
Matching Frame Size
Now that you know about the types of trainers, let’s discuss matching frame size and shape with your main bike. Getting the right size is key for comfort and efficiency during your indoor rides. Here are some important measurements to think about:
Seat Tube Length: Measure from the center of the bottom bracket to the top of the top tube. This helps you understand the frame size.
Reach: This is the horizontal distance from the bottom bracket to the headset. It affects how you sit while riding.
Stack: This is the vertical distance from the bottom bracket to the top of the head tube. A higher stack can give you a more relaxed riding position.
Inseam and Overall Height: These measurements help you find the right frame size for your body.
Standover Height: Make sure there’s about 2–3 inches between the bike’s top tube and your inseam for safe mounting and dismounting.
If you have a carbon fiber bike frame, you might worry about sweat causing damage. While carbon fiber is strong, sweat can still harm it over time. To protect your frame, think about using a sweat guard or towel during workouts. This easy step can help keep your bike frame safe while you enjoy indoor cycling.
Knowing these measurements and how they relate to your bike frame will help you find the best fit for your trainer. Remember, a well-fitted bike frame improves your performance and comfort, making your indoor cycling much more fun.
Choosing a Bike Frame for Trainer

When you pick a bike frame for your trainer, size and fit are very important. You want your bike to feel good and help you do your best. Here are some key things to think about:
Size and Fit
Frame Size: Make sure the frame size fits your body. A bike frame that fits well can stop discomfort and injuries.
Geometry: Different shapes change how you ride. For example, a racing shape may be good for speed, while a relaxed shape can make long rides more comfortable.
Adjustability: Look for frames that let you change the seat height and handlebar position. This helps you find the best fit.
Material Considerations
The material of your bike frame is important for how it performs and lasts. Here’s a list of common materials used in bike frames:
Material | Advantages | Disadvantages |
|---|---|---|
Steel | – Strong and durable | – Heavy |
Aluminum | – Light and stiff | – Not as durable |
Carbon Fiber | – Lightest and stiffest | – Can have durability problems |
Titanium | – Very strong and light | – Expensive |
Carbon fiber frames are popular because they are light and stiff. But they can have problems with durability if not taken care of. Here are some tips to keep your carbon fiber frame in good shape:
Use a sweat guard to keep your frame safe from sweat.
Check for any wear or damage, especially where aluminum parts connect.
Many cyclists say having a special bike for indoor training is important. A dedicated bike frame for trainer use makes it easier to train, especially when you don’t feel motivated. Comfort and easy setup are key for regular training, so think about these things when picking your bike frame.
Besides size and material, frame shape also affects your riding experience. Here’s a quick look at how different frame shapes can change your training:
Frame Geometry Element | Description | Impact on Cycling Discipline |
|---|---|---|
Head tube angle | Changes how the bike steers and stays stable | Important for racing bikes for quick turns |
Seat tube angle | Affects how you pedal and how much power you use | Key for performance in competitive cycling |
Chain stay length | Changes how the bike handles and moves | Affects comfort bikes for easier control |
Wheelbase | Decides how stable the bike is and how it turns | Important for stability in racing and fun rides |
Finally, think about warranty issues when choosing a bike frame for trainer use. The stress on a trainer is different from riding on the road, which can affect the frame. Some brands, like Specialized, might not cover frame damage under warranty if used on a trainer. Always check with the brand to make sure your bike is good for indoor training.
By keeping these points in mind, you can choose a bike frame for your trainer that makes your indoor cycling better.
Smart Trainer Compatibility
When you pick a bike frame for your trainer, knowing about smart trainer compatibility is very important. You will usually find two main types of smart trainers: direct drive and wheel-on. Each type has its own features and needs.
Direct Drive vs. Wheel-On
Here’s a quick look to help you see the differences:
Feature | Direct-Drive Trainers | Wheel-On Trainers |
|---|---|---|
Setup Complexity | More complex, needs rear wheel removal | Simpler, rear wheel stays in place |
Power Measurement Accuracy | Very precise | Not as precise |
Noise Level | Quiet | Makes more noise |
Direct drive trainers give a more real cycling feel. They let you do structured workouts in ERG mode, focusing on cadence. Many users say they pedal better at higher RPMs. Wheel-on trainers are usually easier to set up since you keep your rear wheel on.
Ensuring Compatibility
To make sure your bike frame works with smart trainers, remember these points:
Check for Compatibility Issues: Wheel-on trainers need a part to hold the bike, like a nut or end cap. Make sure nothing blocks the trainer’s clamp.
Thru-Axle Considerations: If your bike has a thru-axle, you might need a special axle for the trainer to hold the bike safely. For direct drive trainers, check that you have a cassette that matches your bike wheel closely.
Frame Dropout Standards: Older bikes can still work with new direct drive trainers by using the right adapters and spacers. For example, you can use a 7-speed cassette with an adapter on an 11-speed system without changing your bike.
By paying attention to these details, you can have a smooth indoor cycling experience with your smart trainer. Remember, compatibility is key to getting the most out of your training!
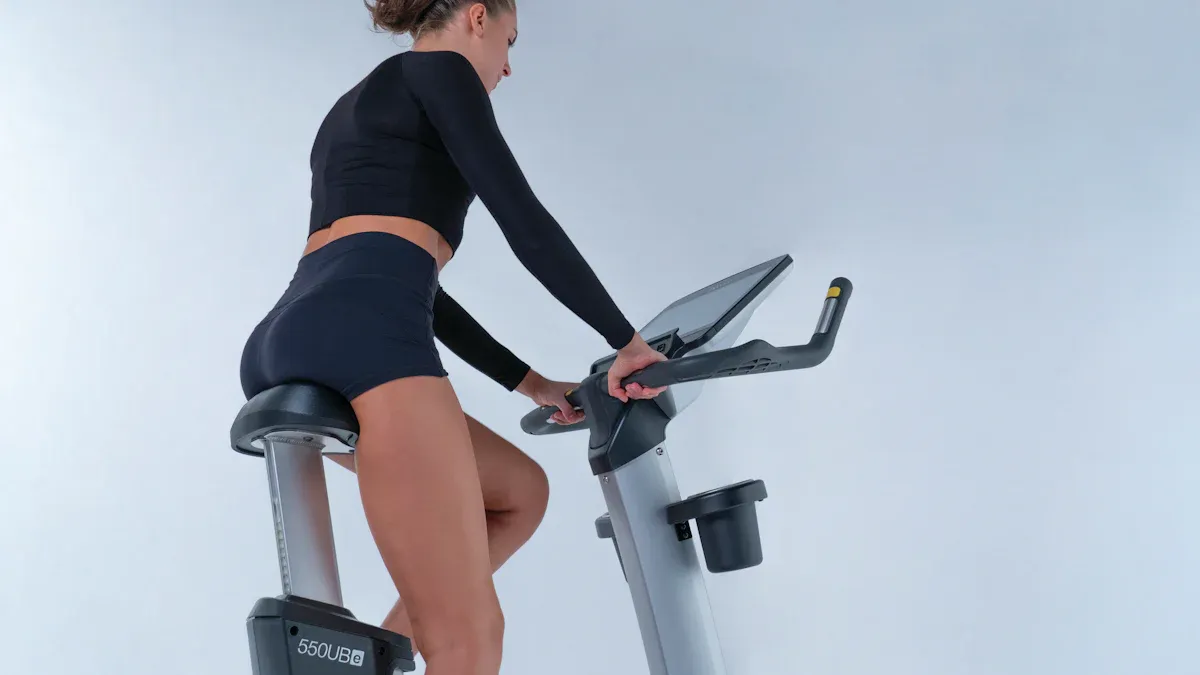
Tips for Proper Fit
Getting the right fit on your bike frame is crucial for a comfortable indoor training experience. Here are some tips to help you adjust your setup for maximum comfort.
Adjusting Your Setup
Ensure a Proper Bike Fit: Start by checking your bike fit. A well-fitted bike can prevent discomfort during your rides.
Adjust Seat Height: Set your seat height so that your legs extend comfortably without straining. A high seat can lead to discomfort and even injury.
Tilt Handlebars: Slightly tilting your handlebars downwards can improve your riding posture and make your ride more comfortable.
Position Your Seat Correctly: Even small adjustments to your seat position can significantly impact your comfort. Make sure it’s aligned with your hips.
Consider Professional Help: If you still feel discomfort after making adjustments, consider getting a professional bike fit. This can help you avoid injuries or saddle sores.
Use a Front Wheel Block: A dedicated block for your front wheel can help maintain a balanced setup, making your ride feel more stable.
Testing for Comfort
To ensure your bike fits well, you should test it out. Here are some effective methods:
Quick Fit: Start with visual estimates for adjustments. Ride for a bit and fine-tune based on how you feel.
Measured Fit: For a more precise fit, use tools to measure angles and distances. This method often requires assistance but can lead to a better overall fit.
When testing, pay attention to how your body feels during the ride. Adjustments to saddle height, handlebar width, and brake placement can make a big difference. Remember, comfort is key! If you notice any discomfort, don’t hesitate to tweak your setup until it feels just right.
By following these tips, you can create a more enjoyable and effective indoor cycling experience.
Choosing the right bike frame for your trainer is very important for a good indoor cycling experience. Here are some important points to remember:
Compatibility: Make sure your trainer fits your bike’s details, like wheel size and drivetrain.
Size: Check that the trainer fits your bike’s rear tire size, usually between 26 to 29 inches.
Material: Think about the frame material for the best performance and comfort.
Fit: Make sure the trainer’s cassette works with your bike’s drivetrain and number of gears.
Taking your time to pick the right bike frame can help you avoid damage to expensive parts. Remember, high-end frames can get damaged by sweat and rust over time. So, get a special bike for indoor training to keep your main bike in great shape. Happy cycling! 🚴♂️
FAQ
What should I consider for bike compatibility with my trainer?
You need to check if your bike frame fits the trainer type. Look for specifications like axle type and dropout standards to ensure a proper fit.
How do I know my bike frame size?
Measure your inseam and overall height. Use these measurements to find the right seat tube length, reach, and stack for your bike frame.
Can I use my road bike on a trainer?
Yes, you can use your road bike on a trainer. Just ensure it’s compatible with the trainer type you choose, especially regarding axle and wheel size.
Is a dedicated bike for trainers worth it?
Having a dedicated bike for trainers can enhance your indoor cycling experience. It saves wear on your main bike and allows for easier setup.
How can I maintain my carbon fiber bike frame?
To maintain your carbon fiber frame, clean it after each ride, use a sweat guard, and regularly check for any signs of wear or damage.
See Also
Selecting the Ideal Bike Frame to Suit Your Requirements
Determining the Best Bike Frame Fit for Your Body
Choosing the Best Bike Frame for Optimal Comfort and Speed